Categoria: PC Games e Consoles

  • Nintendo Switch 2 vs. Steam Deck OLED: Which Handheld Console Should You Buy in 2026?

    Nintendo Switch 2 vs. Steam Deck OLED: Which Handheld Console Should You Buy in 2026?

    The ultimate portable gaming showdown — and there’s a clear winner for most people


    Estimated reading time: 11 minutes


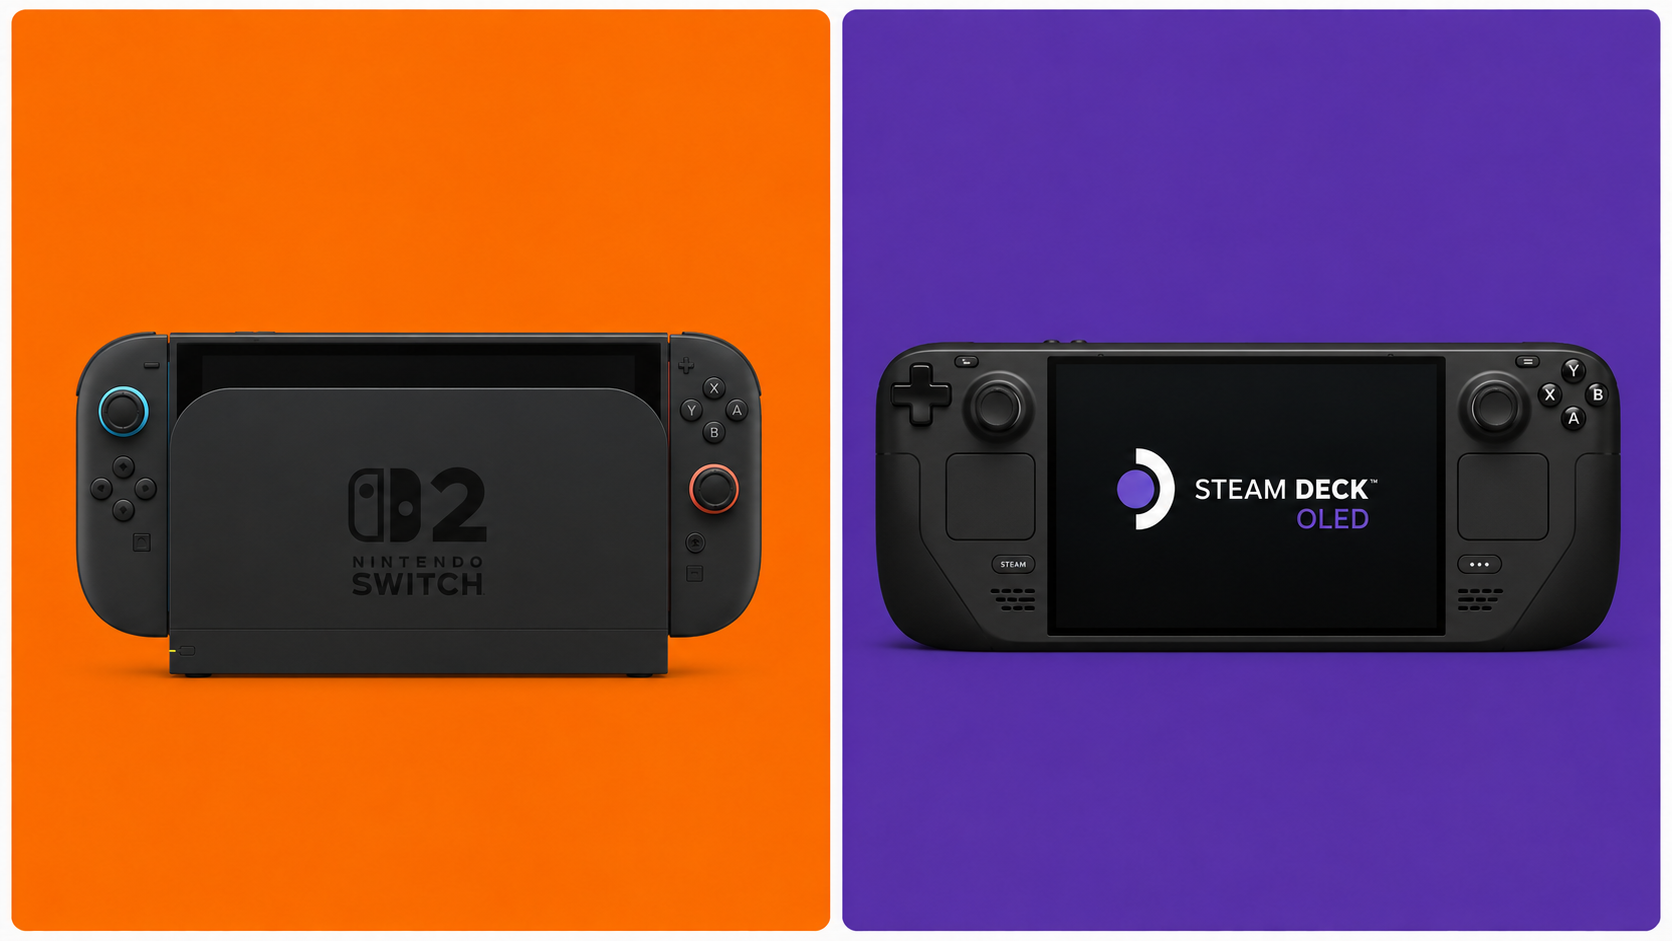
    Handheld gaming is having its best year ever. The Nintendo Switch 2 finally arrived after years of rumors, and Valve’s Steam Deck OLED is still going strong as the fan-favorite PC gaming powerhouse you can take anywhere. Both cost around the same. Both are incredible. Both will empty your wallet in different ways.

    So which one should you actually buy?

    That depends entirely on who you are as a gamer — and this guide breaks down every major factor so you can make the right call before spending $350 to $450 on a handheld console in 2026.


    📊 Quick Specs Comparison

    FeatureNintendo Switch 2Steam Deck OLED
    Price$449.99$349–$419
    Display7.9″ LCD, 1080p, 120Hz7.4″ OLED, 1280×800, 90Hz
    ProcessorCustom NVIDIA (Tensor + RT Cores)AMD Zen 2 + RDNA 2
    RAM12GB LPDDR5X16GB LPDDR5
    Storage256GB UFS512GB–1TB NVMe
    Battery2–6.5 hours3–8 hours
    Docked OutputUp to 4K (with DLSS)Up to 8K (limited by game)
    Game LibraryNintendo exclusives + portsVirtually all PC games
    OnlineNintendo Switch Online requiredSteam — free online
    Weight401g669g

    🖥️ The Display: Two Different Philosophies

    This is where the debate starts — and it’s more nuanced than most people think.

    The Nintendo Switch 2 uses a 7.9-inch LCD panel running at 1080p and up to 120Hz. It’s bright, responsive, and significantly larger than the original Switch’s screen. The 120Hz refresh rate is a genuine upgrade for gaming feel — menus, games, and animations all look smoother than what you’d see on most other handhelds.

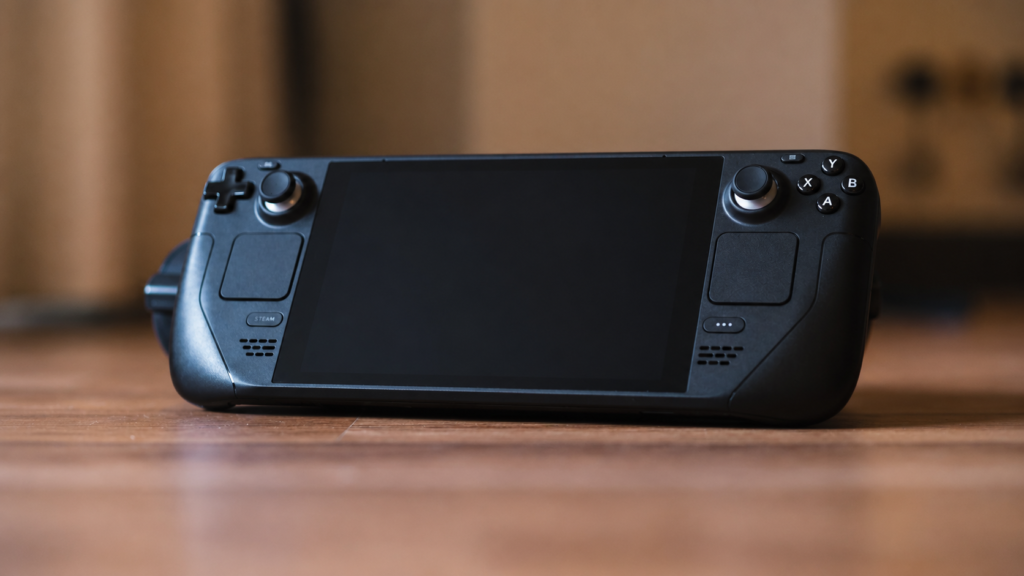
    The Steam Deck OLED, on the other hand, uses a 7.4-inch OLED display at 1280×800 resolution and up to 90Hz. OLED means true blacks, infinite contrast ratios, and colors that pop in a way LCD simply can’t match. Every game looks cinematically rich on the Steam Deck’s screen — even at a slightly lower resolution.

    Winner: Depends on what you value. 120Hz LCD vs. 90Hz OLED is a genuine tradeoff. For competitive games and fast action, Switch 2 feels snappier. For story-driven RPGs, visual media, and cinematic experiences, Steam Deck OLED’s display is flat-out gorgeous.


    🎮 1. Game Library: The Most Important Factor

    This is where the choice gets clearest for most people.

    Nintendo Switch 2

    nintendo switch 2 na estante fullhd
    Nintendo Swith 2

    The Switch 2 plays every Switch 2 exclusive and has backward compatibility with most Nintendo Switch 1 titles. That means access to:

    • The Legend of Zelda: Breath of the Wild / Tears of the Kingdom (upgraded versions)
    • Mario Kart World (Switch 2 launch title)
    • Donkey Kong Bananza
    • Metroid Prime 4: Beyond
    • Every major Nintendo franchise going forward

    If you grew up with Nintendo, there’s simply no substitute. These games don’t exist anywhere else. No PC port, no Xbox version — Nintendo’s exclusives are the entire reason the Switch 2 exists.

    👉 Nintendo Switch 2 on Amazon

    Steam Deck OLED

    steam deck oled no chão
    Steam Deck Oled

    The Steam Deck runs SteamOS and can access your entire Steam library — tens of thousands of games, including:

    • Everything from your existing Steam account
    • PC exclusives (Strategy games, MOBAs, indie gems)
    • Emulation (with some setup)
    • Non-Steam game launchers like Epic, GOG, and Xbox Game Pass PC

    The Steam Deck is essentially a gaming PC in handheld form. If you have a large PC library, every game you own is suddenly portable.

    👉 Steam Deck OLED on Amazon

    Pro Tip: Check the Steam Deck Verified database before buying if you want to confirm specific games run well. Most major titles are fully verified, but edge cases exist.

    Winner: Nintendo Switch 2 for Nintendo fans. Steam Deck for PC gamers. If you play both worlds, see the next section.


    ⚡ 2. Performance: DLSS Changes Everything for Switch 2

    The Nintendo Switch 2 is built around a custom NVIDIA chip with dedicated RT Cores (ray tracing) and Tensor Cores (DLSS neural upscaling). This is the same technology that powers NVIDIA’s RTX GPU lineup — the difference is that it’s in a handheld.

    In practice, this means:

    • Games can run at a lower internal resolution and be upscaled by AI to 1080p in handheld mode and 4K in docked mode
    • Ray tracing effects (reflections, shadows, global illumination) are available in supported titles
    • Performance is significantly higher than what the raw specs would suggest

    The Steam Deck OLED uses an AMD Zen 2 / RDNA 2 chip — solid and proven, but based on architecture from 2020. In 2026, the Steam Deck starts to show its age against newer, graphically demanding titles. Valve is expected to release a Steam Deck 2 eventually, but no official announcement has been made.

    Winner: Nintendo Switch 2 in raw performance and future-proofing.


    🔋 3. Battery Life: Real-World Numbers

    Both manufacturers publish optimistic battery estimates. Here’s what real-world testing shows:

    Game TypeSwitch 2Steam Deck OLED
    Light indie games6–7 hours7–8 hours
    Mid-weight RPGs4–5 hours4–5 hours
    Demanding AAA titles2–3 hours2–3.5 hours

    Roughly equivalent for most use cases. The Steam Deck OLED made major improvements over the original model with a larger 50Whr battery, and it shows.

    One advantage the Switch 2 has: it charges via USB-C at up to 45W, and Nintendo’s official dock charges it quickly even during play. The Steam Deck also charges via USB-C but draws more power under load, meaning charging while gaming requires a higher-wattage adapter.

    👉 NOCO U65 65W USB-C Charger on Amazon — works perfectly with both handhelds.

    Winner: Tie in normal use. Steam Deck OLED very slightly edges out for light gaming.


    💰 4. Cost: The Real Total Price

    The sticker price is only the beginning.

    Nintendo Switch 2 True Cost

    ItemPrice
    Console$449.99
    Nintendo Switch Online + Expansion Pack (annual)$49.99/year
    Games (Nintendo exclusives, $60–$80 each)$60–$80 per game
    MicroSD card (storage expansion)$30–$60
    Extra Joy-Con pair$79.99
    Typical first-year cost~$700–$800

    👉 SanDisk 512GB MicroSD for Switch 2 on Amazon 👉 Nintendo Switch 2 Joy-Con on Amazon

    Steam Deck OLED True Cost

    ItemPrice
    Console (512GB model)$349
    Steam games (sales, bundles, backlog)Varies widely
    Carrying case$20–$50
    Dock (optional, for TV gaming)$89 (official) or $30 third-party
    Typical first-year cost~$450–$550

    If you already have a Steam library with dozens of games, the Steam Deck pays for itself quickly. The Switch 2’s premium game prices and mandatory online subscription add up fast.

    👉 Valve Steam Deck Carrying Case on Amazon 👉 Steam Deck Official Dock on Amazon

    Winner: Steam Deck OLED in pure value. Nintendo Switch 2 if Nintendo games are what you want — you’ll pay a premium, but there’s no substitute.


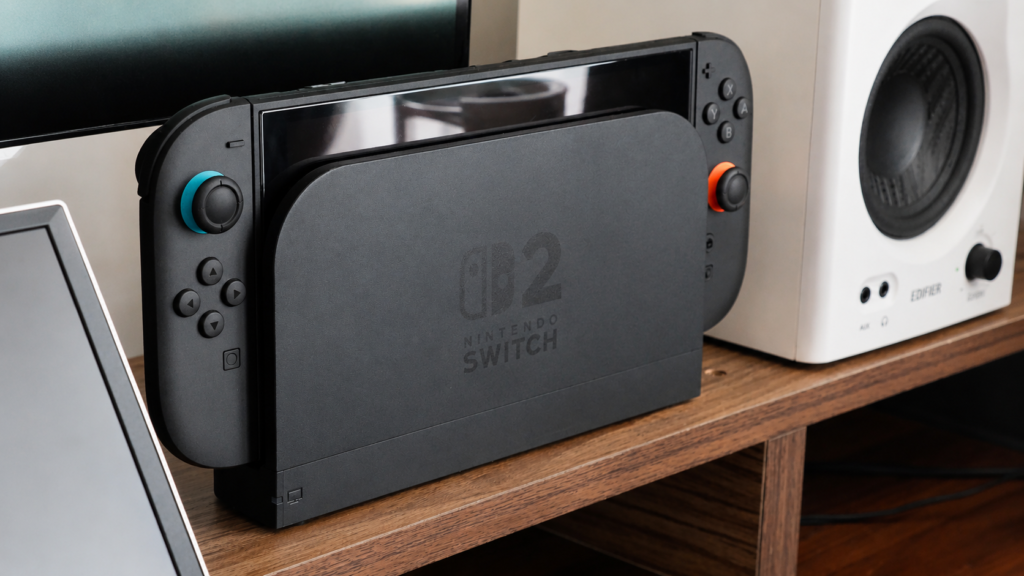
    🏠 5. TV/Docked Mode: Switch 2 Wins Easily

    If you plan to use your handheld as a home console too — plug it into your TV, sit on the couch, play with a controller — the Switch 2 is purpose-built for this.

    The Nintendo Switch 2 dock outputs HDMI 2.0 with DLSS upscaling to 4K. The experience is seamless: remove from dock, play in handheld mode, put it back, continue on TV. It’s the same game, same save file, no friction.

    The Steam Deck can also connect to a TV via USB-C dock or DisplayPort, but it requires a bit more setup and doesn’t have the same plug-and-play elegance. Desktop mode on the Steam Deck is genuinely useful but adds a learning curve compared to Nintendo’s simplicity.

    👉 Nintendo Switch 2 Dock on Amazon

    Winner: Nintendo Switch 2 for TV gaming experience.


    🧒 6. Who Is Each Console For?

    Buy the Nintendo Switch 2 if you:

    • Love Nintendo franchises (Zelda, Mario, Metroid, Pokémon)
    • Want the most social handheld experience (local multiplayer, Joy-Con sharing)
    • Plan to use it on a TV as well as in handheld mode
    • Are buying for a child or family gaming sessions
    • Want a polished, out-of-the-box experience with no setup required

    Buy the Steam Deck OLED if you:

    • Already have a large Steam library
    • Love PC gaming and want it portable
    • Play indie games, strategy titles, RPGs
    • Are comfortable with some light tinkering (installing non-Steam launchers, etc.)
    • Want the best value for money on a handheld
    • Are interested in emulation

    🎮 The Best Accessories for Each Console

    Nintendo Switch 2 Accessories

    👉 Nintendo Switch 2 Pro Controller on Amazon — essential for extended play 👉 Nintendo Switch 2 Carrying Case on Amazon — protect your $450 investment 👉 SanDisk 1TB MicroSD UHS-I Card on Amazon — Switch 2 games take up serious space 👉 HORI Split Pad Compact for Switch 2 on Amazon — better grip for handheld mode

    Steam Deck OLED Accessories

    👉 dbrand Steam Deck OLED Skin on Amazon — the most popular customization 👉 Deckmate Accessory Hub on Amazon — attaches stands, mounts, more 👉 Satisfye ZenGrip Pro for Steam Deck on Amazon — essential for long sessions


    🏆 Final Verdict

    CategoryWinner
    Game library (Nintendo fans)✅ Nintendo Switch 2
    Game library (PC gamers)✅ Steam Deck OLED
    Display quality✅ Steam Deck OLED (OLED)
    Display size / refresh rate✅ Nintendo Switch 2
    Performance & future-proofing✅ Nintendo Switch 2
    Battery life🤝 Tie
    TV/docked mode✅ Nintendo Switch 2
    Value for money✅ Steam Deck OLED
    Ease of use✅ Nintendo Switch 2
    Customization / flexibility✅ Steam Deck OLED

    The honest answer: If you have to pick one, the Nintendo Switch 2 is the better handheld console for most people in 2026. It’s more powerful, better designed for TV gaming, has the best exclusives in the industry, and the DLSS technology means it will age much better than the Steam Deck’s aging AMD chip.

    But if you’re a PC gamer who wants to take your library on the road and don’t care about Nintendo games — the Steam Deck OLED is still one of the best gaming devices ever made. Especially at $349.

    Can’t decide? Buy both. We’re not judging.


    This post contains affiliate links. If you purchase through our links, we may earn a small commission at no extra cost to you. We only recommend products we genuinely stand behind.


    Tags: Nintendo Switch 2 vs Steam Deck, best handheld console 2026, Switch 2 review, Steam Deck OLED review, portable gaming 2026, handheld gaming comparison, Nintendo Switch 2 accessories, Steam Deck accessories

  • PC Gaming Setup: Everything You Need to Get Started

    PC Gaming Setup: Everything You Need to Get Started

    So you’ve decided to jump into the world of PC gaming. Great choice. The PC is the platform with the largest game library in the world, full compatibility with controllers, keyboard and mouse, and total freedom to customize everything your way.

    However, the first question that comes up for beginners is always the same: where do I start, and how much should I spend?

    That’s why, in this guide, we split the setup into two parts: the PC itself (the “heart” of the setup) and the peripherals (everything you plug into it). In addition, everything is organized by budget, with realistic recommendations for 2026.


    First Things First: Pre-Built or Build Your Own?

    This is the first decision you’ll need to make. Both options have their advantages and disadvantages, so it’s worth understanding each one before choosing.

    Pre-built gaming PC: more convenient and generally comes with a warranty for the whole unit, so you don’t need to understand component compatibility. On the other hand, it tends to be more expensive for the same performance — or deliver lower performance than what you want or can afford.

    Building from scratch: more cost-effective in the long run and gives you total control over your components, making future upgrades much easier. The downside, however, is that it requires research, patience, and some experience with PC assembly — or you’ll need to pay a professional to put it together.

    In short, for beginners with no hardware experience, a pre-built from a reputable retailer is a safe choice. But if you have time to do your research, building your own is absolutely worth it.


    💻 The PC: Configurations by Budget

    🟢 Entry Level — Up to US$ 500

    Yes, you can build a gaming PC in the US$ 400–500 range that runs the most popular games out there. The key, in this case, is choosing the right parts.

    Suggested build:

    • CPU: AMD Ryzen 5 5600 (~US$ 100) — 6 cores, excellent for gaming and multitasking
    • GPU: AMD RX 6600 (~US$ 120) — handles all popular games at high 1080p settings
    • RAM: 16 GB DDR4 (~US$ 40)
    • Storage: 480 GB NVMe SSD (~US$ 35) — essential; never use an HDD as your main drive
    • Motherboard: B450 or B550 compatible with Ryzen 5000 (~US$ 80)
    • Power Supply: 550W 80 Plus Bronze (~US$ 50)
    • Case: basic with good airflow (~US$ 40)

    As a result, this build runs Fortnite, Valorant, CS2, FIFA, GTA V and most popular titles at 1080p on medium to high settings.

    💡 Affiliate tip: You can often find pre-built PCs in this price range on sale. Check out the options available:


    🟡 Mid-Range — US$ 800 to US$ 1,200

    At this level, the performance jump is significant. Therefore, you can start playing demanding titles at max 1080p or at 1440p with quality settings.

    Suggested build:

    • CPU: AMD Ryzen 5 7600 (~US$ 170) — modern AM5 platform, ready for future upgrades
    • GPU: NVIDIA RTX 4060 (~US$ 300) — maxes out 1080p, with DLSS 3 and Ray Tracing support
    • RAM: 16 GB DDR5 (~US$ 70) — required, since the AM5 platform uses DDR5
    • Storage: Kingston NV2 1 TB NVMe SSD (~US$ 60)
    • Motherboard: MSI B650M Gaming Plus WIFI (~US$ 150) — comes with Wi-Fi 6E built in
    • Power Supply: Corsair CX650 650W 80 Plus Bronze (~US$ 80)
    • Cooler: Cooler Master Hyper 212 (~US$ 35)
    • Case: with good airflow (~US$ 60)

    In practical terms, this build runs every current game at max 1080p with high frame rates. Furthermore, it will handle GTA VI very comfortably (check out our full GTA VI article — everything you need to know).

    💡 Affiliate tip:


    🖥️ Peripherals: What You’ll Need

    Having a good PC is only half the setup. That’s why peripherals make all the difference in your gaming experience — and the value for money can be excellent even on a tight budget.

    Monitor

    The monitor is just as important as the graphics card. After all, there’s no point having a powerful GPU and pairing it with a 60Hz monitor with slow response times.

    For 1080p / entry level:

    • Look for at least 144Hz and an IPS or VA panel (better image quality than TN)
    • Ideal size: 24 to 27 inches
    • Price range: US$ 150 to US$ 250

    👉 144Hz gaming monitors on Amazon

    For 1440p / mid-range:

    • 165Hz or higher, IPS panel
    • Ideal size: 27 inches
    • Price range: US$ 300 to US$ 500

    Gaming Mouse

    Don’t fall into the high-DPI trap. What actually matters is the sensor quality at low DPI settings (400–1600) and ergonomics. For example, a no-name 30,000 DPI mouse will easily lose to a quality 6,400 DPI sensor in real gameplay.

    Entry level (up to US$ 30):

    • Redragon M711 Cobra — precise sensor, ergonomic design, excellent value for money
    • Redragon keyboard + mouse combo — practical for those who want everything at once

    👉 Redragon gaming mouse on Amazon

    Mid-range (US$ 30 to US$ 70):

    • Logitech G502 HERO — high-precision sensor, comfortable for long sessions
    • It’s also worth noting that the trend in 2026 is ultralight mice under 60g, which significantly reduce fatigue during long gaming sessions

    👉 Logitech G502 on Amazon


    Gaming Keyboard

    The main choice here is between a membrane keyboard (cheaper and quieter) and a mechanical keyboard (more precise, durable, and with better feel). For gaming, mechanical is always the better option — and you can get into that world for under US$ 50.

    Important tip: avoid Blue switches for gaming. The click sound is great for typing; however, the high reset point gets in the way during competitive play. For that reason, go for Red (linear, quiet) or Brown (tactile, balanced) switches instead.

    Entry level (up to US$ 50):

    • Redragon K552 Kumara — mechanical with Red switches, solid build quality, great for first-time mechanical users

    👉 Mechanical gaming keyboard on Amazon

    Mid-range (US$ 50 to US$ 120):

    • Mechanical keyboards with Red or Brown switches from brands like HyperX, Logitech, or Corsair

    Gaming Headset

    In gaming, sound is information. In other words, knowing where an enemy is coming from before you see them is a real competitive advantage. Similarly, in story-driven games, a good headset completely transforms your immersion.

    Entry level (up to US$ 50):

    • HyperX Cloud Stinger 2 — solid sound quality for the price, with a functional microphone

    👉 Gaming headset under $50 on Amazon

    Mid-range (US$ 50 to US$ 120):

    • HyperX Cloud III Wireless — excellent audio quality, wireless, with long battery life
    • In addition, look for models with 50mm drivers and 7.1 virtual surround sound support

    👉 HyperX Cloud III on Amazon


    Mousepad

    Simple, cheap, and frequently overlooked. Even so, a large extended mousepad that covers your whole desk significantly improves precision and protects your surface.

    • Speed models: more glide; therefore, better for games requiring fast aim movements
    • Control models: more friction and, for that reason, better for slow, precise movements

    👉 Extended gaming mousepad on Amazon


    🎮 What About a Controller? Do You Need One?

    It depends on your play style. For fighting, platformer, racing, and adventure games, a controller is superior to keyboard and mouse. On the other hand, for FPS and competitive games, keyboard and mouse wins by a wide margin.

    The good news is that, on PC, you can use both without any issue. The most compatible options are:

    • Xbox Series X/S controller — plug and play on Windows, no additional drivers needed
    • DualSense (PS5) — works via USB or Bluetooth, though it requires minimal setup
    • Generic USB controller — works well for platformers and fighting games

    📋 Summary: Full Setup by Budget

    ItemEntry Level (~US$ 500 total)Mid-Range (~US$ 1,200 total)
    PCRyzen 5 5600 + RX 6600Ryzen 5 7600 + RTX 4060
    Monitor24″ IPS 144Hz27″ IPS 165Hz 1440p
    MouseRedragon M711 CobraLogitech G502 HERO
    KeyboardRedragon K552 MechanicalHyperX Red/Brown Mechanical
    HeadsetHyperX Cloud Stinger 2HyperX Cloud III Wireless
    MousepadBasic extendedPremium extended

    Conclusion: Start With What You Have, Upgrade Over Time

    The most common mistake among first-time builders is wanting everything at maximum level all at once. However, it doesn’t have to be that way. You can start with a simple PC and basic peripherals and then upgrade piece by piece over time.

    In any case, there are three things you should never compromise on from day one: an SSD as your main drive (never an HDD), at least 16 GB of RAM, and a 144Hz monitor. These three factors make more of a difference in your day-to-day experience than any other upgrade.

    Everything else can be adjusted according to your preferences and your budget. Got a question about a specific part or peripheral? Drop it in the comments and we’ll help — or follow TechPlayGrid on Instagram! 👇


    (The links above are affiliate links. Buying through them supports TechPlayGrid at no extra cost to you — thank you!)

  • Setup Gamer no PC: Tudo Que Você Precisa Para Começar em 2026 (Por Faixa de Preço)

    Setup Gamer no PC: Tudo Que Você Precisa Para Começar em 2026 (Por Faixa de Preço)

    Então você decidiu entrar de vez no mundo dos games no PC. Boa escolha. O PC é a plataforma com o maior catálogo de jogos do mundo, compatibilidade com controles, teclado e mouse, e total liberdade para personalizar tudo do seu jeito.

    No entanto, a primeira dúvida que aparece para quem está começando é sempre a mesma: por onde começar e quanto gastar?

    Por isso, neste guia, a gente divide o setup em duas partes: o PC em si (o “coração” do setup) e os periféricos (tudo que você conecta nele). Além disso, tudo organizado por faixa de preço, com indicações realistas para o mercado brasileiro em 2026.


    Antes de Tudo: PC Pronto ou Montar Peça a Peça?

    Essa é a primeira decisão. Ambas as opções têm vantagens e desvantagens, portanto vale entender cada uma antes de escolher.

    PC pré-montado (gamer pronto): mais prático, geralmente vem com garantia do conjunto e você não precisa entender de compatibilidade. Por outro lado, costuma ser mais caro para a mesma performance ou entregar performance inferior ao que se deseja ter ou pode pagar.

    Montar peça a peça: é mais barato a longo prazo e oferece total controle sobre as peças, além de facilitar upgrades no futuro. A desvantagem, no entanto, é que exige pesquisa, paciência e um pouco de experiência em montagens — ou você vai ter que pagar um profissional para montar, se não tiver aquele amigo para quebrar o seu galho.

    Em resumo, para quem está começando sem experiência com hardware, um PC pré-montado de boa loja (como Pichau, KaBuM, Terabyteshop) é uma opção segura. Mas se você tem tempo para pesquisar, montar peça a peça vale muito mais a pena.


    💻 O PC: Configurações por Faixa de Preço

    🟢 Faixa Iniciante — até R$ 2.500

    Sim, dá para montar um PC gamer por volta de R$ 2.000–2.500 que roda os jogos mais populares do Brasil. A chave, nesse caso, é escolher as peças certas.

    Configuração sugerida:

    • Processador: AMD Ryzen 5 5600 (~R$ 500) — 6 núcleos, excelente para jogos e multitarefa
    • Placa de vídeo: AMD RX 6600 (~R$ 600) — roda todos os jogos populares em 1080p alto
    • Memória RAM: 16 GB DDR4 (~R$ 200)
    • Armazenamento: SSD NVMe 480 GB (~R$ 150) — essencial, não use HD como drive principal
    • Placa-mãe: B450 ou B550 compatível com Ryzen 5000 (~R$ 400)
    • Fonte: 550W 80 Plus Bronze (~R$ 250)
    • Gabinete: básico com boa ventilação (~R$ 150)

    O que roda: Como resultado, essa configuração roda Free Fire, Valorant, CS2, FIFA, GTA V e a maioria dos jogos populares em 1080p com configurações médias/altas.

    💡 Dica de afiliado: Você pode encontrar PCs pré-montados nessa faixa em promoções frequentes. Confira as opções disponíveis:

    👉 PCs gamer no Amazon.com.br


    🟡 Faixa Intermediária — R$ 3.500 a R$ 5.000

    Aqui o salto de qualidade é significativo. Sendo assim, você começa a jogar títulos mais pesados em 1080p no máximo ou em 1440p com qualidade.

    Configuração sugerida:

    • Processador: AMD Ryzen 5 7600 (~R$ 800) — plataforma AM5 moderna, compatível com futuros upgrades
    • Placa de vídeo: NVIDIA RTX 4060 (~R$ 2.200) — 1080p no máximo, com suporte a DLSS 3 e Ray Tracing
    • Memória RAM: 16 GB DDR5 (~R$ 350) — necessária, pois a plataforma AM5 usa DDR5
    • Armazenamento: SSD NVMe 1 TB Kingston NV2 (~R$ 300)
    • Placa-mãe: MSI B650M Gaming Plus WIFI (~R$ 700) — já vem com Wi-Fi 6E incluso
    • Fonte: Corsair CX650 650W 80 Plus Bronze (~R$ 550)
    • Cooler: Cooler Master Hyper 212 (~R$ 200)
    • Gabinete: com bom fluxo de ar (~R$ 250)

    O que roda: Em termos práticos, essa configuração roda todos os jogos atuais em 1080p máximo com frames altos. Além disso, o GTA VI vai rodar muito bem nessa configuração (leia o nosso artigo sobre GTA VI – Saiba tudo sobre).

    💡 Dica de afiliado:


    🖥️ Periféricos: O Que Você Vai Precisar

    Ter um bom PC é só metade do setup. Por isso, os periféricos fazem toda a diferença na experiência de jogo — e o custo-benefício pode ser excelente mesmo com orçamento limitado.

    Monitor

    O monitor é tão importante quanto a placa de vídeo. Afinal, não adianta ter uma GPU potente e usar um monitor de 60Hz com tempo de resposta lento.

    Para 1080p / iniciante:

    • Busque ao menos 144Hz e painel IPS ou VA (imagem melhor que TN)
    • Tamanho ideal: 24 a 27 polegadas
    • Faixa de preço: R$ 700 a R$ 1.200

    👉 Monitores gamer 144Hz no Amazon

    Para 1440p / intermediário:

    • 165Hz ou mais, painel IPS
    • Tamanho ideal: 27 polegadas
    • Faixa de preço: R$ 1.500 a R$ 2.500

    Mouse Gamer

    Não caia na armadilha do DPI alto. O que realmente importa é a qualidade do sensor em DPIs baixos (400–1600) e a ergonomia. Por exemplo, um mouse de 30.000 DPI de marca desconhecida perde feio para um de 6.400 DPI de qualidade.

    Iniciante (até R$ 150):

    • Redragon Cobra M711 — sensor preciso, design ergonômico, ótimo custo-benefício
    • Kit Redragon teclado + mouse — prático para quem quer tudo de uma vez

    👉 Mouse Redragon no Amazon

    Intermediário (R$ 150 a R$ 350):

    • Logitech G502 HERO — sensor de alta precisão, confortável para longas sessões
    • Vale destacar que a tendência de 2026 são os mouses ultraleves abaixo de 60g, que reduzem a fadiga em longas sessões

    👉 Mouse Logitech G502 no Amazon


    Teclado Gamer

    A grande divisão aqui é entre teclado de membrana (mais barato e silencioso) e teclado mecânico (mais preciso, durável e com sensação melhor). Para gaming, o mecânico é sempre superior — e você consegue entrar nesse mundo por menos de R$ 200.

    Dica importante: evite switches Blue para jogos. O barulho do clique é ótimo para digitação; no entanto, o ponto de reset alto atrapalha em jogos competitivos. Por isso, prefira switches Red (linear, silencioso) ou Brown (tátil, equilibrado).

    Iniciante (até R$ 200):

    • Redragon Dark Avenger — semi-mecânico, boa durabilidade, bom para quem está migrando de membrana

    👉 Teclado mecânico gamer no Amazon

    Intermediário (R$ 200 a R$ 500):

    • Teclados com switches Red ou Brown de marcas como Redragon, HyperX, Logitech ou Corsair

    Headset Gamer

    No mundo dos games, som é informação. Ou seja, saber de onde vem um inimigo antes de vê-lo é uma vantagem real em qualquer jogo competitivo. Da mesma forma, nos jogos de história, um bom headset transforma completamente a imersão.

    Iniciante (até R$ 200):

    • Havit HV-H2232d — boa qualidade sonora para o preço, com microfone funcional

    👉 Headset gamer até R$ 200 no Amazon

    Intermediário (R$ 200 a R$ 500):

    • HyperX Cloud III Wireless — excelente qualidade de áudio, sem fio, bateria de longa duração
    • Além disso, busque modelos com drivers de 50mm e suporte a som surround 7.1 virtual

    👉 HyperX Cloud III no Amazon


    Mousepad

    Simples, barato e frequentemente esquecido. Mesmo assim, um mousepad de tamanho grande (extended) que cubra toda a mesa melhora muito a precisão e protege a superfície.

    • Modelos Speed: deslizam mais, são bons para jogos de mira rápida
    • Modelos Control: têm mais atrito e, por isso, são melhores para movimentos lentos e precisos

    👉 Mousepad gamer extended no Amazon


    🎮 E o Controle? Precisa?

    Depende do seu estilo de jogo. Para jogos de luta, plataforma, corrida e aventura, o controle é superior ao teclado/mouse. Por outro lado, para FPS e jogos competitivos, o teclado/mouse vence com folga.

    A boa notícia é que, no PC, você pode usar os dois sem problema. Os controles mais compatíveis são:

    • Xbox Series X/S — plug and play no Windows, sem necessidade de driver adicional
    • DualSense (PS5) — funciona via USB ou Bluetooth, porém exige configuração mínima
    • Controle genérico USB — funciona para jogos de plataforma e luta

    📋 Resumo: Setup Completo por Faixa de Preço

    ItemIniciante (até R$ 2.500 total)Intermediário (R$ 5.000+ total)
    PCRyzen 5 5600 + RX 6600Ryzen 5 7600 + RTX 4060
    Monitor24″ IPS 144Hz27″ IPS 165Hz 1440p
    MouseRedragon Cobra M711Logitech G502 HERO
    TecladoRedragon semi-mecânicoMecânico Red/Brown HyperX
    HeadsetHavit HV-H2232dHyperX Cloud III Wireless
    MousepadExtended básicoExtended premium

    Conclusão: Comece Com o Que Tem, Evolua Com o Tempo

    O erro mais comum de quem está montando o primeiro setup é querer tudo de uma vez no nível máximo. No entanto, não precisa ser assim. Você pode começar com um PC simples e periféricos básicos e, em seguida, ir evoluindo peça por peça ao longo do tempo.

    Em todo caso, o que não dá para abrir mão desde o começo são três itens: um SSD como drive principal (nunca HD), pelo menos 16 GB de RAM e um monitor de 144Hz. Esses três fatores fazem mais diferença na experiência do dia a dia do que qualquer outro upgrade.

    O resto é ajustar conforme o seu gosto e o seu bolso.

    Tem dúvida sobre alguma peça ou periférico específico? Deixa nos comentários que a gente responde ou siga o Tech Play Grid no Instagram! 👇


    (Os links acima são de afiliado. Ao comprar através deles, você ajuda a manter o TechPlayGrid sem custo extra para você — obrigado!)