Author: belisio21

  • How to Fix Discord Lag While Playing Valorant (Without Buying New Hardware)

    How to Fix Discord Lag While Playing Valorant (Without Buying New Hardware)


    You’re mid-match in Valorant, peeking a corner — and suddenly your Discord call cuts out, your frames tank, or your voice starts robot-chopping through the mic. Your teammates can’t hear callouts. You die. You tilt.

    Sound familiar?

    This is one of the most common complaints from PC gamers, and the good news is: most of the fixes are completely free and take under 10 minutes. We’ll walk you through every solution, from the easiest to the most advanced. Only at the very end will we suggest any hardware upgrades — and only if you truly need them.

    ⚠️ Affiliate Disclosure: TechPlayGrid is reader-supported. When you buy through links on our site, we may earn an affiliate commission at no extra cost to you.


    🔍 Why Does Discord Lag While Playing Valorant?

    Before fixing anything, let’s understand why this happens. There are three main culprits:

    CauseWhat It Does
    CPU/RAM bottleneckYour PC struggles to run both Valorant and Discord simultaneously
    Network congestionYour router can’t prioritize voice traffic over game data
    Discord settingsDefault settings aren’t optimized for gaming

    Valorant is a competitive shooter — it’s demanding on CPU and network. Discord’s voice processing also uses CPU cycles. When they fight for resources, one (or both) suffers.


    ✅ Step-by-Step Fixes (Free, Software Only)

    🛠️ Fix 1 — Lower Discord’s Hardware Acceleration

    Time: 1 minute | Difficulty: Easy

    Discord uses your GPU to render its interface by default. This sounds helpful, but in practice it competes with Valorant for GPU resources.

    1. Open Discord → Settings (gear icon)
    2. Go to Advanced
    3. Toggle Hardware Acceleration → OFF
    4. Restart Discord

    💡 Pro Tip: This single fix resolves the lag for most users. Do this first before anything else.


    🛠️ Fix 2 — Change Discord’s Audio Subsystem

    Time: 2 minutes | Difficulty: Easy

    Discord’s default audio subsystem (“Standard”) can cause conflicts with games. Switching to Legacy often fixes voice cutting out.

    1. Discord → Settings → Voice & Video
    2. Scroll down to Audio Subsystem
    3. Change from Standard to Legacy
    4. Restart Discord

    🛠️ Fix 3 — Set Discord and Valorant Process Priorities in Windows

    Time: 3 minutes | Difficulty: Medium

    Windows doesn’t automatically know which apps matter most. You can manually tell it to prioritize Valorant (game performance) and give Discord just enough CPU to function smoothly.

    1. Launch both Valorant and Discord
    2. Press Ctrl + Shift + Esc to open Task Manager
    3. Go to the Details tab
    4. Right-click VALORANT-Win64-Shipping.exe → Set Priority → High
    5. Right-click Discord.exe → Set Priority → Below Normal

    ⚠️ Warning: Setting Valorant to “Real Time” priority can cause system instability. “High” is the sweet spot.


    🛠️ Fix 4 — Disable Windows Game Mode (Counterintuitive But Effective)

    Time: 1 minute | Difficulty: Easy

    Windows Game Mode sounds great in theory, but it can actually cause stutters by aggressively reallocating resources mid-game.

    1. Press Windows + I → Gaming → Game Mode
    2. Toggle Game Mode → OFF
    3. Reboot your PC

    🛠️ Fix 5 — Flush Your DNS and Renew IP

    Time: 2 minutes | Difficulty: Easy

    Stale DNS cache can cause both Valorant and Discord to have unstable connections. This clears it out.

    1. Press Windows + R → type cmd → Run as Administrator
    2. Paste these commands one by one:
    ipconfig /flushdns
    ipconfig /release
    ipconfig /renew
    netsh winsock reset
    
    1. Restart your PC

    🛠️ Fix 6 — Enable Quality of Service (QoS) on Your Router

    Time: 5–10 minutes | Difficulty: Medium

    QoS tells your router to prioritize certain types of traffic — in this case, your game and voice data — over other household bandwidth hogs (Netflix, cloud backups, etc.).

    1. Open your browser and go to your router’s admin panel (usually 192.168.0.1 or 192.168.1.1)
    2. Log in (check the sticker on your router for default credentials)
    3. Find QoS or Traffic Priority settings
    4. Set Gaming or Voice/VoIP to highest priority

    💡 Pro Tip: Not all routers have QoS. If yours doesn’t, it might be time for a router upgrade — more on that below.


    🛠️ Fix 7 — Disable Discord’s Noise Suppression (Krisp)

    Time: 1 minute | Difficulty: Easy

    Discord’s built-in Krisp noise suppression is AI-powered and surprisingly CPU-hungry. If your PC is older, this alone can cause stutters.

    1. Discord → Settings → Voice & Video
    2. Under Noise Suppression, select None or Krisp (light)
    3. Alternatively, disable Echo Cancellation if not needed

    🛠️ Fix 8 — Optimize Valorant’s In-Game Settings for Better CPU Headroom

    Time: 5 minutes | Difficulty: Easy

    Freeing up CPU cycles inside Valorant gives Discord more room to breathe.

    Recommended settings in Valorant:

    SettingRecommended Value
    Limit FPS on BatteryOn
    Limit FPS in MenusOn (set to 60)
    Limit FPS in BackgroundOn (set to 30)
    Multithreaded RenderingOn
    Material QualityLow
    Texture QualityLow
    Detail QualityLow
    UI QualityLow
    Bloom / DistortionOff

    💡 Pro Tip: Valorant pros play on these exact low settings — not because their PCs can’t handle more, but because it maximizes frame rate consistency and reduces input lag.


    📊 Fix Priority Cheat Sheet

    FixImpactTimeDifficulty
    Disable Hardware Acceleration⭐⭐⭐⭐⭐1 minEasy
    Change Audio Subsystem to Legacy⭐⭐⭐⭐1 minEasy
    Set Process Priority⭐⭐⭐⭐3 minMedium
    Disable Game Mode⭐⭐⭐1 minEasy
    Flush DNS⭐⭐⭐2 minEasy
    Enable Router QoS⭐⭐⭐⭐⭐10 minMedium
    Disable Krisp⭐⭐⭐1 minEasy
    Optimize Valorant Settings⭐⭐⭐⭐5 minEasy

    💻 Still Lagging? Maybe It’s Time for a Hardware Upgrade

    If you’ve done everything above and still experience lag, your hardware is likely the bottleneck. Here’s what to look at:

    Option A — Upgrade Your Router

    If multiple people share your internet and QoS isn’t available on your current router, a Wi-Fi 6 router with proper QoS is a game-changer.

    👉 Best Gaming Routers Under $150 — Amazon 👉 TP-Link Archer AX5400 — Best Budget Wi-Fi 6 Router

    Option B — Switch to Wired (Ethernet)

    Wi-Fi adds latency and instability. A single Ethernet cable to your PC can cut your ping by 10–30ms and eliminate most voice call drops.

    👉 Cat 8 Ethernet Cable 25ft — Amazon

    Option C — Add More RAM

    Valorant + Discord + Windows background processes need at least 16GB RAM. If you have 8GB, upgrading is the single most impactful hardware change you can make under $50.

    👉 Corsair Vengeance 32GB DDR4 — Amazon

    Option D — Upgrade Your Headset/Microphone

    Sometimes Discord voice issues come from a low-quality microphone creating feedback loops. A headset with a cardioid mic and built-in noise cancellation eliminates that entirely.

    👉 Best Gaming Headsets Under $100 — TechPlayGrid Guide 👉 SteelSeries Arctis Nova 3 — Editor’s Pick


    ❓ FAQ

    Why does my Discord cut out only during Valorant matches? Valorant is CPU-intensive during active matches. The spike in CPU usage leaves less headroom for Discord’s voice processing. Fixes 1, 2, and 3 above address this directly.

    Is it safe to set Valorant to High priority in Task Manager? Yes, “High” is safe. Avoid “Real Time” — that can destabilize Windows.

    Does running Discord as Administrator help? Sometimes. Right-click the Discord shortcut → Run as Administrator and test it.

    Will a VPN help with Valorant lag? Generally no — VPNs add a routing hop that increases latency. Only use a gaming VPN if your ISP is specifically throttling gaming traffic.

    Can I use Discord on my phone instead to save PC resources? Yes! Joining Discord voice chat on your phone via Wi-Fi is a great workaround while you troubleshoot. It offloads all audio processing from your PC entirely.


    Last updated: June 2026

    ⚠️ Affiliate Disclosure: TechPlayGrid participates in the Amazon Associates Program and other affiliate programs. We earn a small commission on qualifying purchases at no extra cost to you. Our recommendations are always based on honest research and testing.
  • Best 144Hz Monitor Under $300 for PS5 and Xbox Series X (2026 Review)

    Best 144Hz Monitor Under $300 for PS5 and Xbox Series X (2026 Review)


    Post updated September/2026.

    So you grabbed a PS5 or an Xbox Series X, and now your old 60Hz TV is making you feel like you’re playing underwater. We get it. The difference between 60Hz and 144Hz is night and day — faster response, buttery-smooth motion, and a genuine competitive edge in shooters and racing games.

    The good news? You don’t need to spend a fortune. There are excellent 144Hz monitors under $300 that pair perfectly with current-gen consoles. We tested and researched the top options on the market so you don’t have to.

    Let’s break it down.

    ⚠️ Affiliate Disclosure: TechPlayGrid is reader-supported. When you buy through links on our site, we may earn an affiliate commission at no extra cost to you.


    🎮 What to Look For in a Console Gaming Monitor

    Before jumping into the list, here’s a quick cheat sheet of specs that actually matter for PS5 and Xbox Series X:

    SpecWhy It MattersRecommended
    Refresh RateSmoother motion, less blur144Hz minimum
    ResolutionImage sharpness1080p (budget) or 1440p (sweet spot)
    Panel TypeColor & response timeIPS (best balance) or VA (better contrast)
    Response TimeGhosting reduction1ms–5ms
    HDR SupportBetter highlights/shadowsHDR400 or better
    HDMI VersionConsole compatibilityHDMI 2.1 for full bandwidth
    VRR / FreeSyncTear-free gamingEssential for consoles

    💡 Pro Tip: PS5 supports up to 120Hz via HDMI 2.1. A 144Hz monitor will cap at 120Hz on PS5, which is still a massive upgrade over 60Hz — and future-proofs you for PC gaming too.


    🏆 Best 144Hz Monitors Under $300 for Consoles (2026)

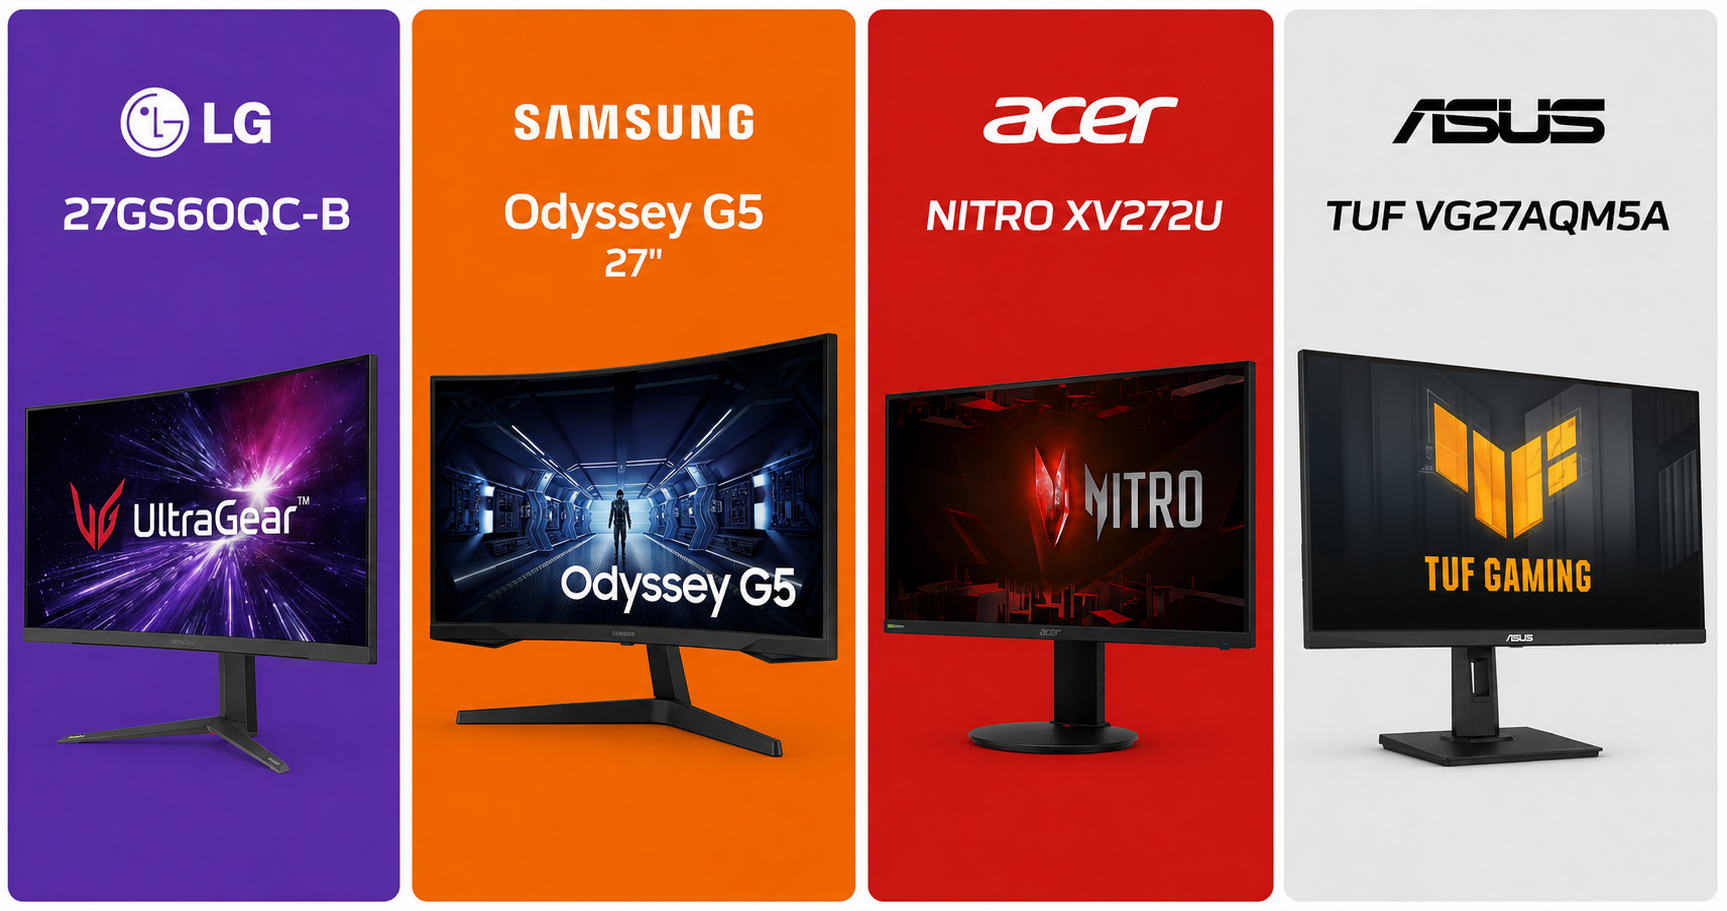
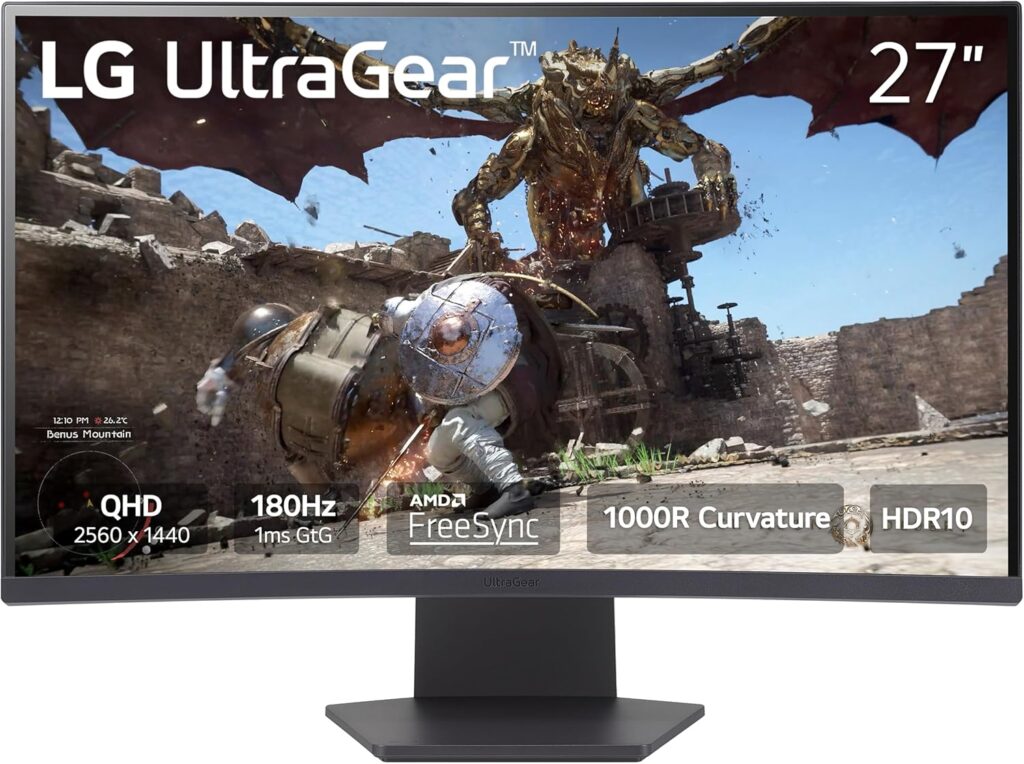
    🥇 Best Overall — LG 27GS60QC-B Ultragear (27″ QHD 180Hz IPS)

    LG57GS60QC-B fundo branco fonte Amazon US
    Official design of the LG27GS60QC-B. (Image: Amazon US)

    👉 Check price on Amazon

    Why we love it: This is the gold standard in the under-$300 range. LG’s Nano IPS panel delivers stunning color accuracy, ultra-fast 1ms response time, and support for NVIDIA G-Sync and AMD FreeSync Premium. At 1440p and 180Hz, it makes Xbox Series X content look absolutely gorgeous.

    Specs at a glance:

    • Panel: Nano IPS
    • Resolution: 2560×1440 (1440p)
    • Refresh Rate: 180Hz (120Hz on PS5/Xbox via HDMI 2.1)
    • Response Time: 1ms GtG
    • HDR: HDR400
    • Ports: 2x HDMI 2.0, 1x DisplayPort 1.4, 2x USB-A

    Pros:

    • Exceptional color accuracy out of the box
    • 180Hz feels silky even on consoles at 120Hz
    • Slim bezels, premium build quality
    • Great for both gaming and content creation

    Cons:

    • HDMI 2.0 means PS5 won’t hit full 4K@120Hz (HDMI 2.1 is needed for that)
    • HDR400 is entry-level HDR

    Best for: Xbox Series X owners and PC+console hybrid setups.


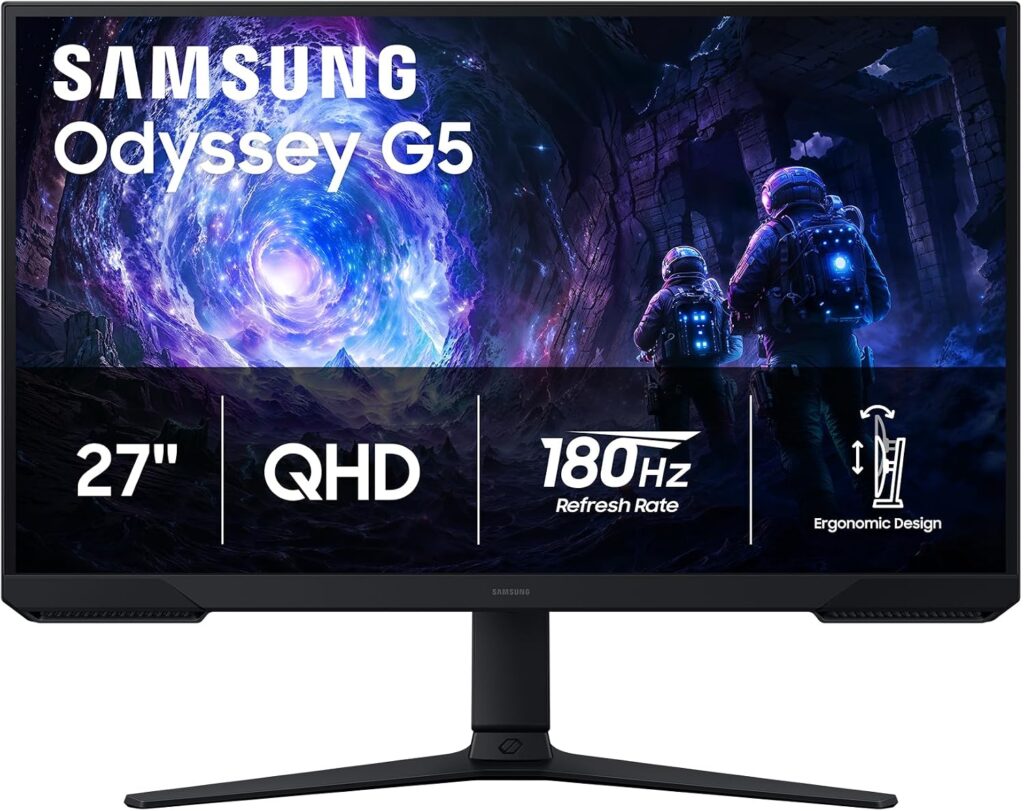
    🥈 Best Value Pick — Samsung Odyssey G5 (27″ 1440p 180Hz IPS)

    Samsung Odyssey G5 com fundo branco, fonte Amazon US
    Official design of the Odyssey G5. (Image: Amazon US)

    👉 Check price on Amazon

    Why we love it: If you play fast-paced competitive games like Valorant, Fortnite, or Call of Duty on console, the Odyssey G5 is a beast. 180Hz is overkill for consoles right now, but you get a monitor that will never feel sluggish, with Samsung’s IPS Black technology for deeper blacks than typical IPS panels.

    Specs at a glance:

    • Panel: IPS Black
    • Resolution: 2560 x 1440 (1440p)
    • Refresh Rate: 180Hz
    • Response Time: 1ms GtG
    • HDR: HDR10
    • Ports: 2x HDMI 1.4, 3x USB 3.0

    Pros:

    • Insanely fast refresh rate
    • Better contrast than standard IPS
    • Excellent motion clarity

    Cons:

    • 1440p shows pixel grid on 27″ up close
    • No HDMI 2.1

    Best for: Competitive console players who prioritize speed over resolution.


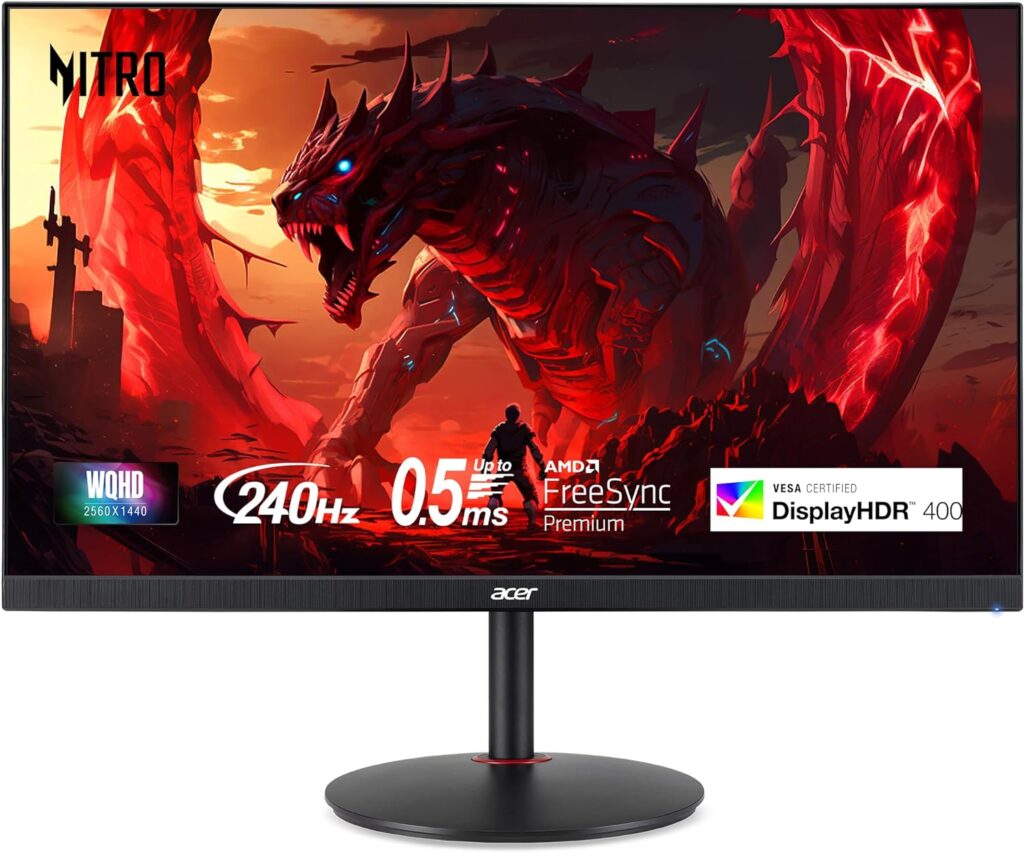
    🥉 Best Budget Option — Acer Nitro XV272U (27″ 1440p 144Hz IPS)

    Monitor Acer Nitro XV272U no fundo branco, fonte Amazon US
    Official design of the Acer XV272U. (Image: Amazon US)

    👉 Check price on Amazon

    Why we love it: The Nitro XV272U punches well above its price tag. It’s one of the cheapest ways to get into 1440p at 144Hz, with solid IPS colors and AMD FreeSync Premium support. Not the flashiest monitor on this list, but it gets the job done reliably.

    Specs at a glance:

    • Panel: IPS
    • Resolution: 2560×1440 (1440p)
    • Refresh Rate: 144Hz
    • Response Time: 1ms VRB
    • HDR: HDR400
    • Ports: 2x HDMI 2.0, 1x DisplayPort 1.4

    Pros:

    • Affordable entry into 1440p gaming
    • Good factory color calibration
    • Sturdy stand with height adjustment

    Cons:

    • Backlight bleed can be present on some units
    • No HDMI 2.1

    Best for: Budget-conscious buyers who want 1440p without breaking the bank.


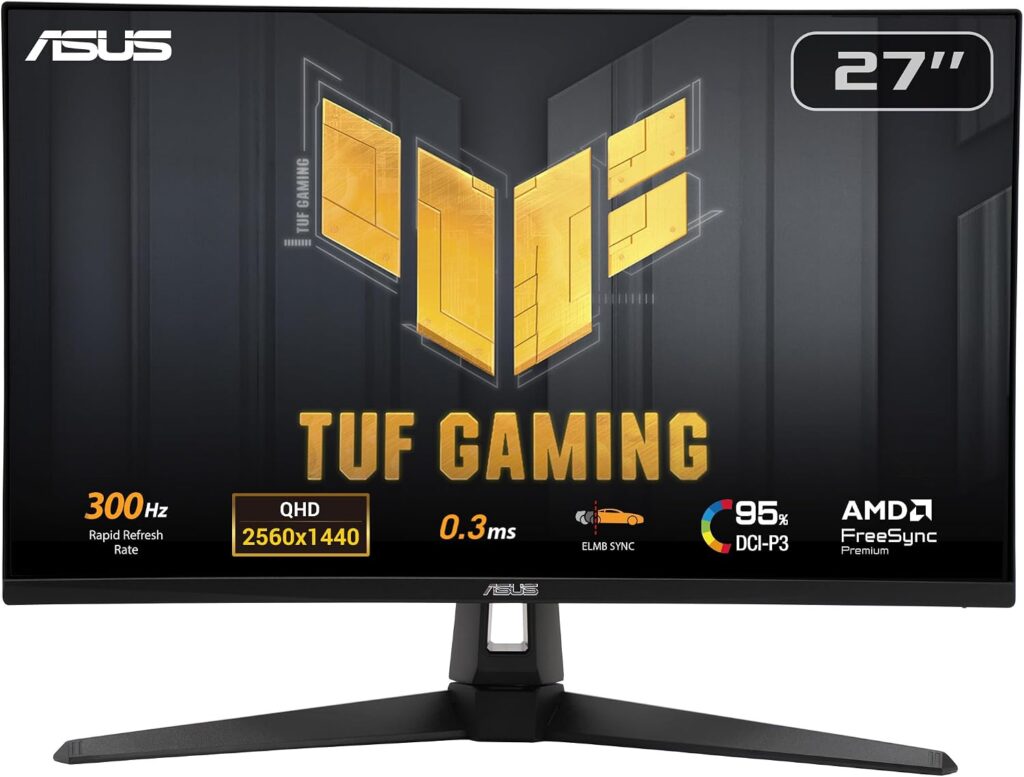
    🎯 Best for PS5 Specifically — ASUS TUF Gaming VG27AQM5A (27″ QHD 300Hz)

    Monitor Asus VG27AQM5A no fundo branco, fonte Amazon US
    Official design of the Asus VG27AQM5A. (Image: Amazon US)

    👉 Check price on Amazon

    Why we love it: This is the wild card. At the $300 budget (prices fluctuate — grab it on sale), the VG27AQM5A is one of the few monitors with HDMI 2.1, unlocking true 2K@300Hz on PS5 and Xbox Series X. If you want the full next-gen experience, this is your monitor.

    Specs at a glance:

    • Panel: IPS
    • Resolution: 2560×1440 (2K)
    • Refresh Rate: 300Hz (PC) / 120Hz @ 4K (console via HDMI 2.1)
    • Response Time: 1ms GtG
    • HDR: HDR400
    • Ports: 2x HDMI 2.1, 1x DisplayPort 1.4

    Pros:

    • True HDMI 2.1 for 2K@120Hz on PS5
    • Future-proof resolution
    • VRR and FreeSync Premium support

    Cons:

    • HDR performance is still entry-level

    Best for: PS5 owners who want the definitive console gaming display.


    📊 Full Comparison Table

    MonitorSizeResolutionHzPanelHDMI 2.1Price Range
    LG 27GS60QC-B27″1440p180HzVA❌~$250–$280
    Samsung Odyssey G527″1440p180HzVA❌~$200–$230
    Acer Nitro XV272U27″1440p144HzIPS❌~$180–$220
    ASUS TUF VG27AQM5A27″1440p300HzIPS✅~$280–$320

    🤔 Which Monitor Should You Buy?

    • Best all-around pick: → LG 27GS60QC-B. Stunning image, fast panel, great for any console.
    • Tight budget: → Acer Nitro XV272U. Reliable 1440p without the premium price.
    • Competitive multiplayer focus: → Samsung Odyssey G5. Speed above all else.
    • PS5 true 2K@300Hz: → ASUS TUF VG27AQM5A. The only one with HDMI 2.1 on this list.

    ❓ FAQ

    Does PS5 support 144Hz? No — PS5 maxes out at 120Hz over HDMI 2.1. A 144Hz monitor will cap at 120Hz, which is still a massive upgrade over 60Hz.

    Do I need HDMI 2.1 for PS5? Only if you want 4K@120Hz simultaneously. At 1080p or 1440p@120Hz, HDMI 2.0 is sufficient.

    Is 1440p worth it over 1080p for consoles? Yes, especially on screens 27″ and above. The image quality difference is clearly visible in open-world and cinematic games.

    Will these monitors work with PC too? Absolutely — all picks on this list are excellent for PC gaming as well.

    Did you see our post about Build the Ultimate Gaming Setup in 2026? Check it now!


    Last updated: June 2026 | Prices may vary by retailer and region.

    ⚠️ Affiliate Disclosure: TechPlayGrid participates in the Amazon Associates Program and other affiliate programs. We earn a small commission on qualifying purchases at no extra cost to you. Our recommendations are always based on honest research and testing.
  • Nintendo Switch 2 vs. Steam Deck OLED: Which Handheld Console Should You Buy in 2026?

    Nintendo Switch 2 vs. Steam Deck OLED: Which Handheld Console Should You Buy in 2026?

    The ultimate portable gaming showdown — and there’s a clear winner for most people


    Estimated reading time: 11 minutes


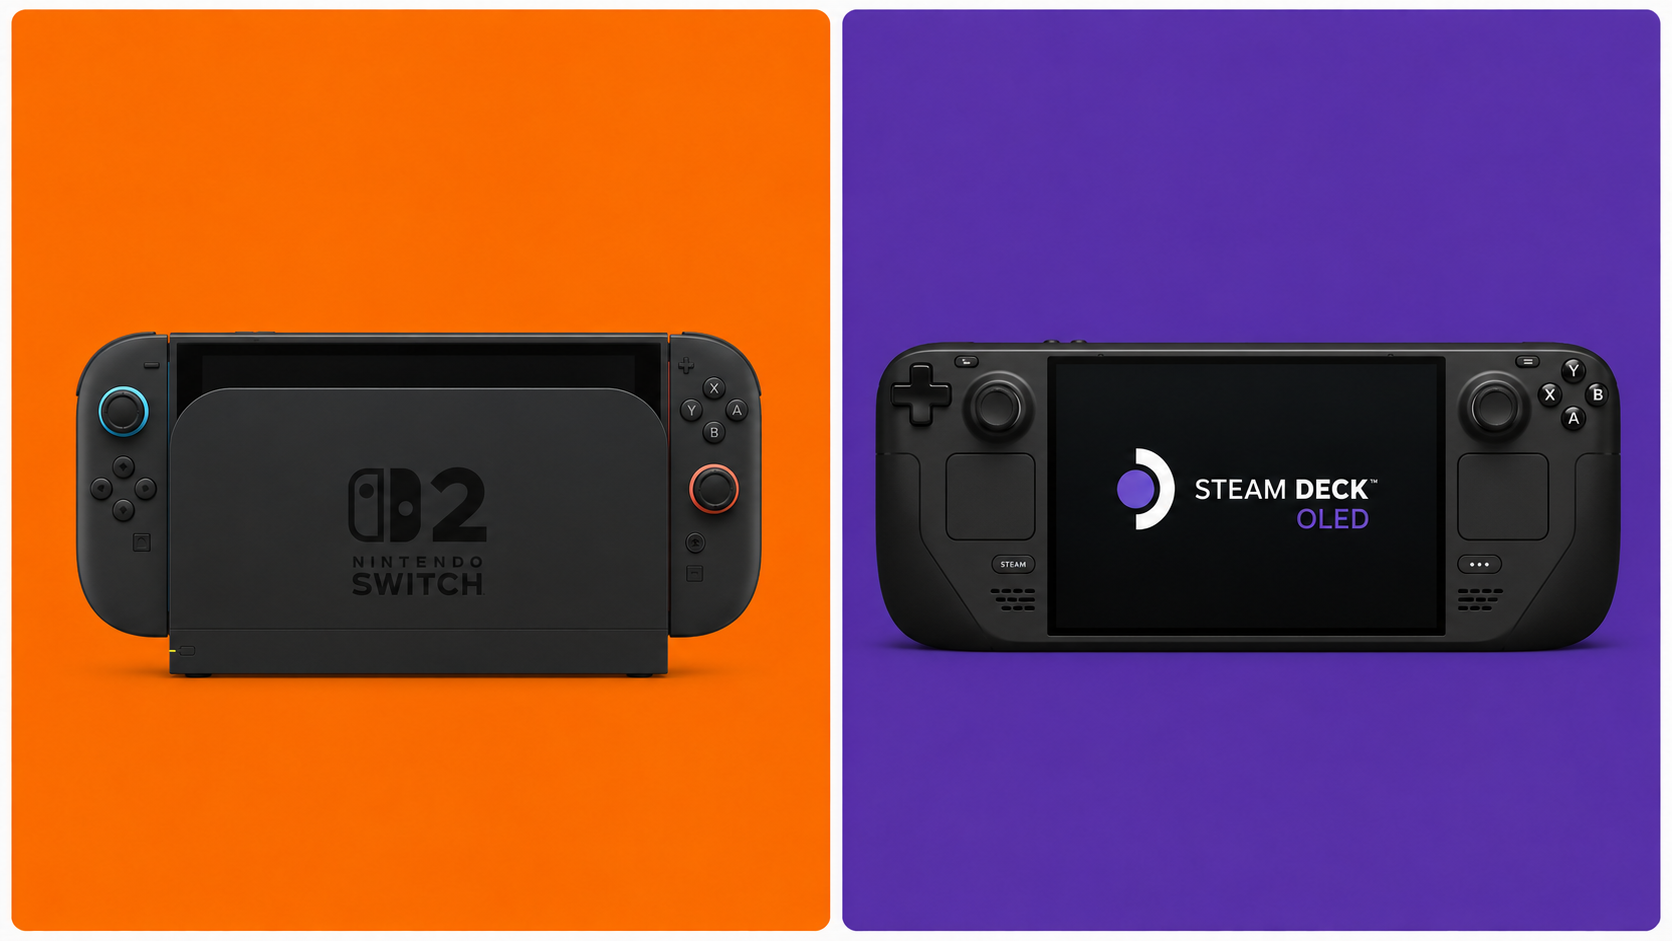
    Handheld gaming is having its best year ever. The Nintendo Switch 2 finally arrived after years of rumors, and Valve’s Steam Deck OLED is still going strong as the fan-favorite PC gaming powerhouse you can take anywhere. Both cost around the same. Both are incredible. Both will empty your wallet in different ways.

    So which one should you actually buy?

    That depends entirely on who you are as a gamer — and this guide breaks down every major factor so you can make the right call before spending $350 to $450 on a handheld console in 2026.


    📊 Quick Specs Comparison

    FeatureNintendo Switch 2Steam Deck OLED
    Price$449.99$349–$419
    Display7.9″ LCD, 1080p, 120Hz7.4″ OLED, 1280×800, 90Hz
    ProcessorCustom NVIDIA (Tensor + RT Cores)AMD Zen 2 + RDNA 2
    RAM12GB LPDDR5X16GB LPDDR5
    Storage256GB UFS512GB–1TB NVMe
    Battery2–6.5 hours3–8 hours
    Docked OutputUp to 4K (with DLSS)Up to 8K (limited by game)
    Game LibraryNintendo exclusives + portsVirtually all PC games
    OnlineNintendo Switch Online requiredSteam — free online
    Weight401g669g

    🖥️ The Display: Two Different Philosophies

    This is where the debate starts — and it’s more nuanced than most people think.

    The Nintendo Switch 2 uses a 7.9-inch LCD panel running at 1080p and up to 120Hz. It’s bright, responsive, and significantly larger than the original Switch’s screen. The 120Hz refresh rate is a genuine upgrade for gaming feel — menus, games, and animations all look smoother than what you’d see on most other handhelds.

    The Steam Deck OLED, on the other hand, uses a 7.4-inch OLED display at 1280×800 resolution and up to 90Hz. OLED means true blacks, infinite contrast ratios, and colors that pop in a way LCD simply can’t match. Every game looks cinematically rich on the Steam Deck’s screen — even at a slightly lower resolution.

    Winner: Depends on what you value. 120Hz LCD vs. 90Hz OLED is a genuine tradeoff. For competitive games and fast action, Switch 2 feels snappier. For story-driven RPGs, visual media, and cinematic experiences, Steam Deck OLED’s display is flat-out gorgeous.


    🎮 1. Game Library: The Most Important Factor

    This is where the choice gets clearest for most people.

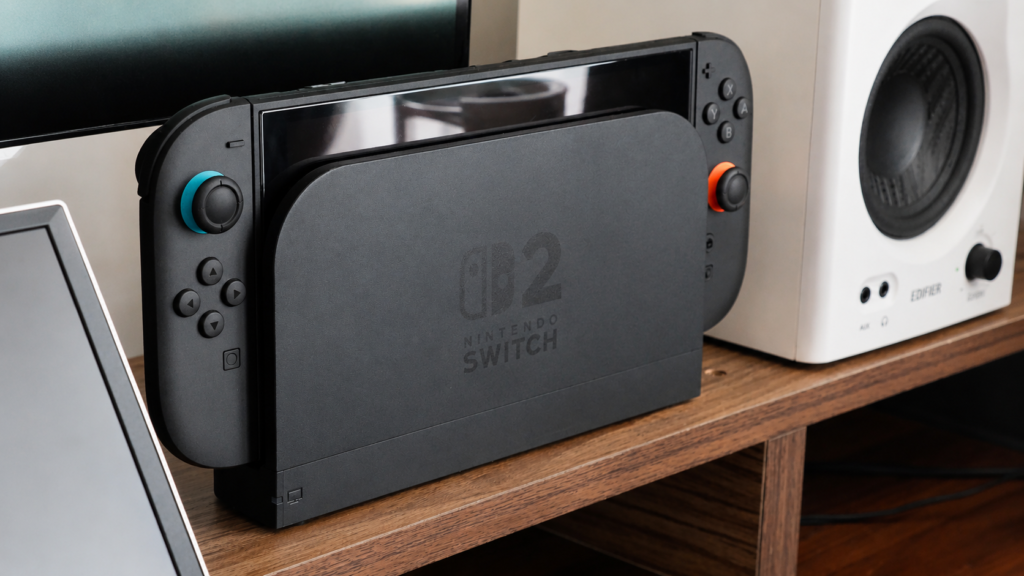
    Nintendo Switch 2

    nintendo switch 2 na estante fullhd
    Nintendo Swith 2

    The Switch 2 plays every Switch 2 exclusive and has backward compatibility with most Nintendo Switch 1 titles. That means access to:

    • The Legend of Zelda: Breath of the Wild / Tears of the Kingdom (upgraded versions)
    • Mario Kart World (Switch 2 launch title)
    • Donkey Kong Bananza
    • Metroid Prime 4: Beyond
    • Every major Nintendo franchise going forward

    If you grew up with Nintendo, there’s simply no substitute. These games don’t exist anywhere else. No PC port, no Xbox version — Nintendo’s exclusives are the entire reason the Switch 2 exists.

    👉 Nintendo Switch 2 on Amazon

    Steam Deck OLED

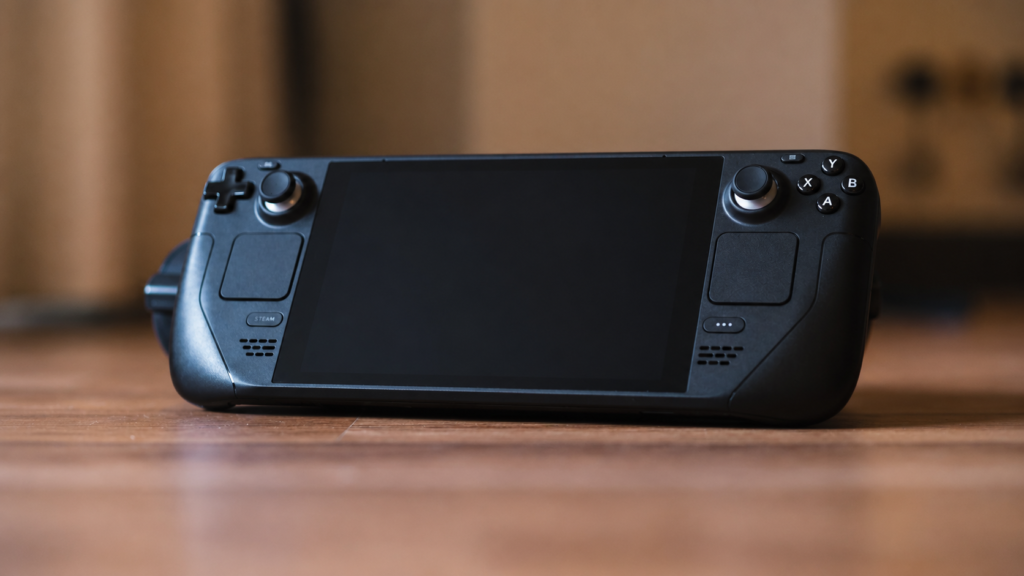
    steam deck oled no chão
    Steam Deck Oled

    The Steam Deck runs SteamOS and can access your entire Steam library — tens of thousands of games, including:

    • Everything from your existing Steam account
    • PC exclusives (Strategy games, MOBAs, indie gems)
    • Emulation (with some setup)
    • Non-Steam game launchers like Epic, GOG, and Xbox Game Pass PC

    The Steam Deck is essentially a gaming PC in handheld form. If you have a large PC library, every game you own is suddenly portable.

    👉 Steam Deck OLED on Amazon

    Pro Tip: Check the Steam Deck Verified database before buying if you want to confirm specific games run well. Most major titles are fully verified, but edge cases exist.

    Winner: Nintendo Switch 2 for Nintendo fans. Steam Deck for PC gamers. If you play both worlds, see the next section.


    ⚡ 2. Performance: DLSS Changes Everything for Switch 2

    The Nintendo Switch 2 is built around a custom NVIDIA chip with dedicated RT Cores (ray tracing) and Tensor Cores (DLSS neural upscaling). This is the same technology that powers NVIDIA’s RTX GPU lineup — the difference is that it’s in a handheld.

    In practice, this means:

    • Games can run at a lower internal resolution and be upscaled by AI to 1080p in handheld mode and 4K in docked mode
    • Ray tracing effects (reflections, shadows, global illumination) are available in supported titles
    • Performance is significantly higher than what the raw specs would suggest

    The Steam Deck OLED uses an AMD Zen 2 / RDNA 2 chip — solid and proven, but based on architecture from 2020. In 2026, the Steam Deck starts to show its age against newer, graphically demanding titles. Valve is expected to release a Steam Deck 2 eventually, but no official announcement has been made.

    Winner: Nintendo Switch 2 in raw performance and future-proofing.


    🔋 3. Battery Life: Real-World Numbers

    Both manufacturers publish optimistic battery estimates. Here’s what real-world testing shows:

    Game TypeSwitch 2Steam Deck OLED
    Light indie games6–7 hours7–8 hours
    Mid-weight RPGs4–5 hours4–5 hours
    Demanding AAA titles2–3 hours2–3.5 hours

    Roughly equivalent for most use cases. The Steam Deck OLED made major improvements over the original model with a larger 50Whr battery, and it shows.

    One advantage the Switch 2 has: it charges via USB-C at up to 45W, and Nintendo’s official dock charges it quickly even during play. The Steam Deck also charges via USB-C but draws more power under load, meaning charging while gaming requires a higher-wattage adapter.

    👉 NOCO U65 65W USB-C Charger on Amazon — works perfectly with both handhelds.

    Winner: Tie in normal use. Steam Deck OLED very slightly edges out for light gaming.


    💰 4. Cost: The Real Total Price

    The sticker price is only the beginning.

    Nintendo Switch 2 True Cost

    ItemPrice
    Console$449.99
    Nintendo Switch Online + Expansion Pack (annual)$49.99/year
    Games (Nintendo exclusives, $60–$80 each)$60–$80 per game
    MicroSD card (storage expansion)$30–$60
    Extra Joy-Con pair$79.99
    Typical first-year cost~$700–$800

    👉 SanDisk 512GB MicroSD for Switch 2 on Amazon 👉 Nintendo Switch 2 Joy-Con on Amazon

    Steam Deck OLED True Cost

    ItemPrice
    Console (512GB model)$349
    Steam games (sales, bundles, backlog)Varies widely
    Carrying case$20–$50
    Dock (optional, for TV gaming)$89 (official) or $30 third-party
    Typical first-year cost~$450–$550

    If you already have a Steam library with dozens of games, the Steam Deck pays for itself quickly. The Switch 2’s premium game prices and mandatory online subscription add up fast.

    👉 Valve Steam Deck Carrying Case on Amazon 👉 Steam Deck Official Dock on Amazon

    Winner: Steam Deck OLED in pure value. Nintendo Switch 2 if Nintendo games are what you want — you’ll pay a premium, but there’s no substitute.


    🏠 5. TV/Docked Mode: Switch 2 Wins Easily

    If you plan to use your handheld as a home console too — plug it into your TV, sit on the couch, play with a controller — the Switch 2 is purpose-built for this.

    The Nintendo Switch 2 dock outputs HDMI 2.0 with DLSS upscaling to 4K. The experience is seamless: remove from dock, play in handheld mode, put it back, continue on TV. It’s the same game, same save file, no friction.

    The Steam Deck can also connect to a TV via USB-C dock or DisplayPort, but it requires a bit more setup and doesn’t have the same plug-and-play elegance. Desktop mode on the Steam Deck is genuinely useful but adds a learning curve compared to Nintendo’s simplicity.

    👉 Nintendo Switch 2 Dock on Amazon

    Winner: Nintendo Switch 2 for TV gaming experience.


    🧒 6. Who Is Each Console For?

    Buy the Nintendo Switch 2 if you:

    • Love Nintendo franchises (Zelda, Mario, Metroid, Pokémon)
    • Want the most social handheld experience (local multiplayer, Joy-Con sharing)
    • Plan to use it on a TV as well as in handheld mode
    • Are buying for a child or family gaming sessions
    • Want a polished, out-of-the-box experience with no setup required

    Buy the Steam Deck OLED if you:

    • Already have a large Steam library
    • Love PC gaming and want it portable
    • Play indie games, strategy titles, RPGs
    • Are comfortable with some light tinkering (installing non-Steam launchers, etc.)
    • Want the best value for money on a handheld
    • Are interested in emulation

    🎮 The Best Accessories for Each Console

    Nintendo Switch 2 Accessories

    👉 Nintendo Switch 2 Pro Controller on Amazon — essential for extended play 👉 Nintendo Switch 2 Carrying Case on Amazon — protect your $450 investment 👉 SanDisk 1TB MicroSD UHS-I Card on Amazon — Switch 2 games take up serious space 👉 HORI Split Pad Compact for Switch 2 on Amazon — better grip for handheld mode

    Steam Deck OLED Accessories

    👉 dbrand Steam Deck OLED Skin on Amazon — the most popular customization 👉 Deckmate Accessory Hub on Amazon — attaches stands, mounts, more 👉 Satisfye ZenGrip Pro for Steam Deck on Amazon — essential for long sessions


    🏆 Final Verdict

    CategoryWinner
    Game library (Nintendo fans)✅ Nintendo Switch 2
    Game library (PC gamers)✅ Steam Deck OLED
    Display quality✅ Steam Deck OLED (OLED)
    Display size / refresh rate✅ Nintendo Switch 2
    Performance & future-proofing✅ Nintendo Switch 2
    Battery life🤝 Tie
    TV/docked mode✅ Nintendo Switch 2
    Value for money✅ Steam Deck OLED
    Ease of use✅ Nintendo Switch 2
    Customization / flexibility✅ Steam Deck OLED

    The honest answer: If you have to pick one, the Nintendo Switch 2 is the better handheld console for most people in 2026. It’s more powerful, better designed for TV gaming, has the best exclusives in the industry, and the DLSS technology means it will age much better than the Steam Deck’s aging AMD chip.

    But if you’re a PC gamer who wants to take your library on the road and don’t care about Nintendo games — the Steam Deck OLED is still one of the best gaming devices ever made. Especially at $349.

    Can’t decide? Buy both. We’re not judging.


    This post contains affiliate links. If you purchase through our links, we may earn a small commission at no extra cost to you. We only recommend products we genuinely stand behind.


    Tags: Nintendo Switch 2 vs Steam Deck, best handheld console 2026, Switch 2 review, Steam Deck OLED review, portable gaming 2026, handheld gaming comparison, Nintendo Switch 2 accessories, Steam Deck accessories

  • How to Build the Ultimate Gaming Setup in 2026: Desk, Monitor, Chair & Lighting Guide

    How to Build the Ultimate Gaming Setup in 2026: Desk, Monitor, Chair & Lighting Guide

    From $500 to $2,000+: Build your dream gaming setup at any budget


    Estimated reading time: 12 minutes


    Whether you’re a casual gamer who just wants a comfortable space to play after work or a competitive streamer looking to build a professional-grade battle station, one thing is clear: your gaming setup matters. The right gear doesn’t just look good — it reduces fatigue, improves reaction times, and makes every session more enjoyable.

    In this guide, we break down everything you need to build the ultimate gaming setup in 2026, from the desk and chair to the monitor, lighting, and audio. We’ll cover three budget tiers so you can build smart at any price point.


    Why Your Gaming Setup Matters More Than Ever

    Gaming in 2026 isn’t a hobby you do at a cramped desk on a wobbly chair anymore. With the global gaming audience surpassing 3.6 billion players and the U.S. market leading in both revenue and innovation, the standards for what a proper gaming space should look like have risen dramatically.

    More people are spending 3 to 6+ hours a day in front of their setups — and that kind of screen time demands real ergonomic investment. A bad chair can cause chronic back pain. A low-refresh monitor can literally make you lose competitive matches. Harsh lighting strains your eyes after an hour.

    The good news? You don’t need to spend a fortune. Let’s break it down by tier.


    🎮 Budget Tiers at a Glance

    TierBudgetWho It’s For
    🥉 Starter~$500First-time setup, casual gamers
    🥈 Mid-Range~$1,000–$1,200Everyday competitive players
    🥇 Premium$1,800–$2,500+Streamers, esports enthusiasts, WFH gamers

    🖥️ 1. Gaming Monitor: The Most Important Purchase You’ll Make

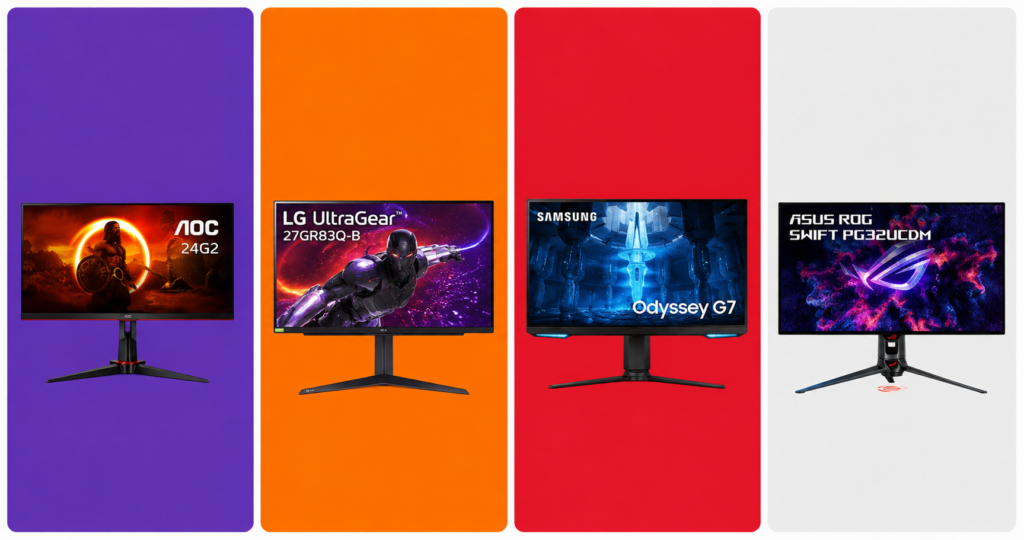
    monitores AOC24G2, LG 27GR83Q-B, Samsung Odyssey G7 e ASUS ROG Swift PG32UCDM no fundo padrão do blog
    Monitors models AOC24G2, LG 27GR83Q-B, Samsung Odyssey G7 e ASUS PG32UCDM. (AI Image)

    Your monitor is the window to every game you play. No other upgrade delivers as immediate and noticeable an improvement as going from a 60Hz standard screen to a high-refresh gaming display.

    What to Look For in 2026

    • Refresh rate: 144Hz minimum for casual play; 240Hz or higher for competitive FPS titles like Valorant and CS2
    • Resolution: 1080p for budget builds, 1440p (QHD) for the sweet spot between performance and image quality, 4K for cinematic single-player experiences
    • Panel type: IPS for color accuracy and wide viewing angles; VA for deep blacks; TN for the fastest response times
    • Response time: 1ms is ideal for competitive gaming
    • HDR: HDR400 is the entry point; HDR600 and above actually makes a visible difference

    Our Picks by Budget

    🥉 Starter (~$150–$180) The AOC 24G2 remains one of the best value 1080p 144Hz IPS monitors on the market. Fast, accurate colors, and widely available. 👉 AOC 24G2 on Amazon

    🥈 Mid-Range (~$300–$380) The LG 27GR83Q-B at 27-inch 1440p 240Hz IPS hits the perfect balance for competitive and story-driven gaming alike. Stunning colors out of the box. 👉 LG 27GR83Q-B on Amzon

    🥇 Premium (~$600–$900) The Samsung Odyssey G7 32″ OLED or ASUS ROG Swift PG32UCDM deliver a jaw-dropping 4K experience with ultra-fast refresh rates for serious enthusiasts. 👉 Samsung Odyssey G7 / ASUS ROG Swift on Amazon

    Pro Tip: Always prioritize refresh rate over resolution if you play competitive multiplayer games. A 1080p 240Hz monitor will beat a 4K 60Hz screen for your kill-death ratio every single time.


    🪑 2. Gaming Chair: Your Back Will Thank You

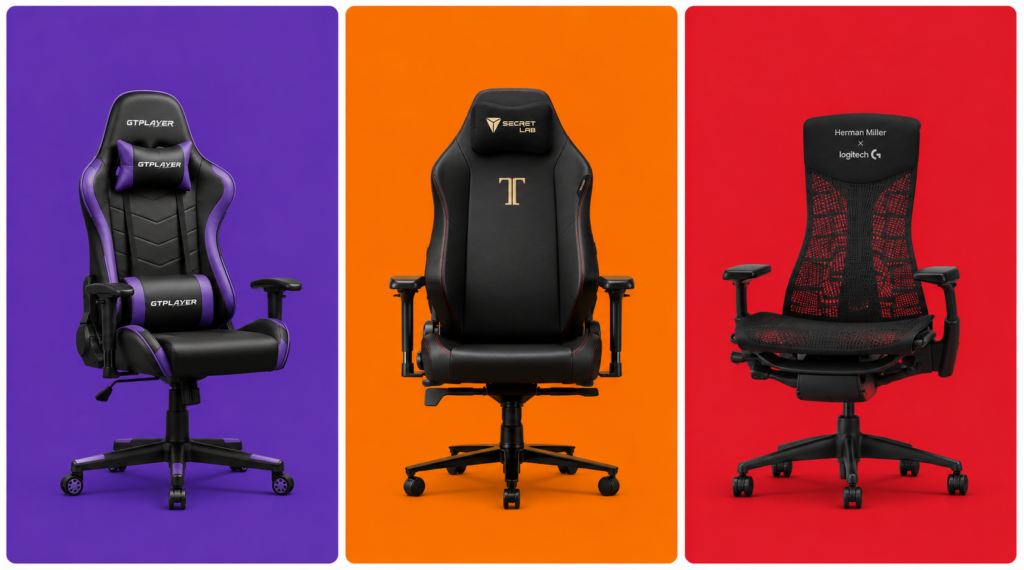
    cadeiras GTPLAYER Gaming Chair, Secretlab Titan Evo e Herman Miller x Logitech Embody no fundo padrão do blog
    Designs of the GTPLAYER, Secretlab Titan Evo and Herman Miller Embody (AI Image)

    After spending thousands on a PC and monitor, most gamers cheap out on their chair — and then spend years dealing with lower back pain. Don’t be that person.

    What to Look For

    • Lumbar support: Adjustable, ideally with a separate pillow or built-in curve
    • Armrest adjustability: 4D armrests (up/down, side/side, forward/back, pivot) are the gold standard
    • Seat depth and width: Make sure it fits your body type
    • Material: Fabric breathes better than PU leather; PU leather is easier to clean
    • Tilt and recline: Look for at least 120–160° recline for gaming sessions that run long

    Our Picks by Budget

    🥉 Starter (~$150–$200) The GTPLAYER Gaming Chair offers surprisingly solid lumbar support and build quality at a very accessible price for a first gaming chair. 👉 GTPLAYER Gaming Chair on Amazon

    🥈 Mid-Range (~$350–$500) The Secretlab Titan Evo is the most recommended chair in the gaming community for a reason — impeccable build quality, cold-cure foam that doesn’t flatten after a year, and genuinely good ergonomics. Available in multiple sizes (Small, Regular, XL). 👉 Secretlab Titan Evo on Amazon

    🥇 Premium (~$700–$1,400) If you want to go full professional, the Herman Miller x Logitech Embody blends Herman Miller’s legendary ergonomics with gaming-specific design. Built to last 12+ years. 👉 Herman Miller Embody Gaming — Herman Miller or Amazon

    Pro Tip: Measure your desk height before buying a chair. Ideally your elbows should rest at a 90° angle while your feet are flat on the floor. Add a footrest (~$30 on Amazon) if your desk isn’t height-adjustable.


    🗂️ 3. Gaming Desk: Your Command Center

    mesas Bestier L-Shaped Desk, Flexispot E7 e Uplift V2 Commercial no fundo padrão do blog
    Designs of the desks models Bestier L-Shaped, Flexispot E7 and Uplift V2 (AI Image)

    Your desk anchors the entire setup. In 2026, the biggest trend is the rise of sit-stand desks (also called standing desks), which have moved from office furniture into gaming setups thanks to their flexibility and health benefits.

    What to Look For

    • Size: At minimum 55 inches wide for a dual-monitor or ultrawide setup; 63+ inches if you want room to spare
    • Depth: 27–30 inches gives you proper monitor distance without feeling cramped
    • Cable management: Built-in grommets, under-desk trays, or cable channels are hugely valuable for keeping things clean
    • Weight capacity: If you’re mounting multiple monitors or a heavy setup, check the load rating
    • Motorized vs. fixed: A height-adjustable electric desk changes your life if you also work from home

    Our Picks by Budget

    🥉 Starter (~$80–$130) The Bestier L-Shaped Desk gives you maximum surface space at a budget price. Solid for most setups. Cable grommets included. 👉 Bestier L-Shaped Desk on Amazon

    🥈 Mid-Range (~$300–$450) The Flexispot E7 is the go-to recommendation for gamers who want a motorized sit-stand desk without breaking the bank. Dual-motor system, quiet, and rock solid at full height. 👉 Flexispot E7 on Amazon or Flexispot.com

    🥇 Premium (~$800–$1,200) The Uplift V2 Commercial or Autonomous SmartDesk Pro represent the premium tier — deeper customization, better build materials, and longer warranties. Worth it if you’ll be at your desk 8+ hours a day. 👉 Uplift V2 on Amazon


    🖱️ 4. Peripherals: Mouse, Keyboard & Headset

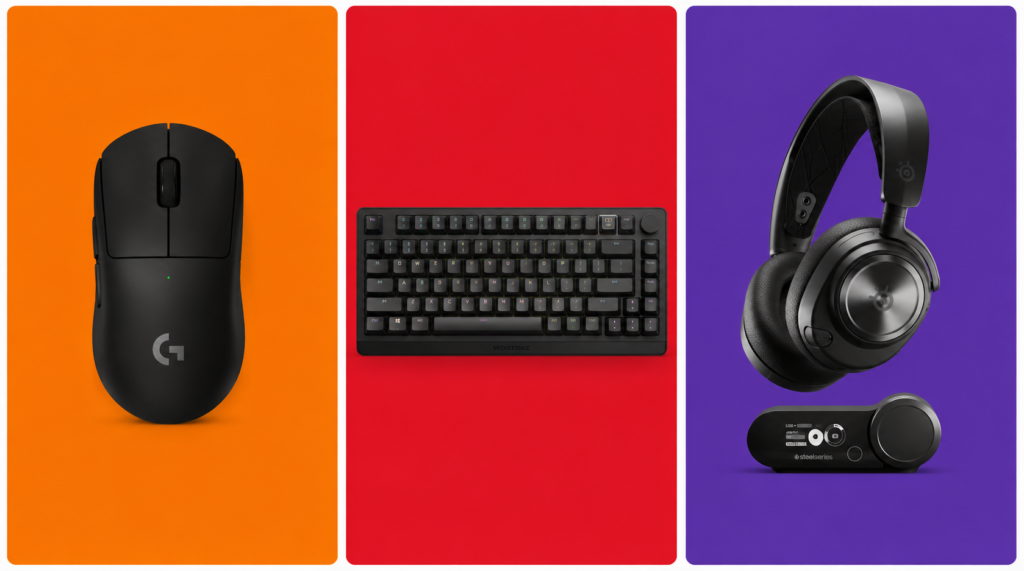
    mouse Logitech G Pro X Superlight 2, teclado Wooting 80HE e headset SteelSeries Arctis Nova Pro no fundo padrão blog
    Official designs of the Mouse Logitech G Pro X, Keyboard Wooting 80HE and SteelSeries Arctis Nova Pro headset (AI Image)

    No gaming setup is complete without a great set of peripherals. These directly impact your performance and comfort every single session.

    Gaming Mouse

    Look for a mouse with a high-quality optical sensor, a weight that fits your grip style, and wireless if your budget allows (wireless gaming mice in 2026 have zero perceptible lag).

    Starter (~$30–$50): Logitech G305 — Wireless, lightweight, 12,000 DPI sensor. Unbeatable value. 👉 Logitech G305 on Amazon

    Mid-Range (~$80–$110): Razer DeathAdder V3 HyperSpeed — Ergonomic masterclass, ultra-accurate sensor, up to 300 hours battery life. 👉 Razer DeathAdder V3 on Amazon or Razer.com

    Premium (~$150–$160): Logitech G Pro X Superlight 2 — The choice of top esports professionals. 60g, HERO 2 sensor, virtually flawless tracking. 👉 Logitech G Pro X Superlight 2 on Amazon

    Gaming Keyboard

    Starter (~$40–$60): Redragon K552 Kumara — Compact TKL layout, clicky blue switches, solid build for the price. 👉 Redragon K552 on Amazon

    Mid-Range (~$130–$170): Razer Huntsman V3 Pro — Analog optical switches with rapid trigger support. A must-have for competitive FPS players. 👉 Razer Huntsman V3 Pro on Amazon

    Premium (~$200–$250): Wooting 80HE — Hall effect rapid trigger, USB polling at 8000Hz, and a devoted esports following. The technical ceiling of mechanical keyboards in 2026. 👉 Wooting 80HE on Amazon

    Gaming Headset

    Starter (~$50–$70): HyperX Cloud Stinger 2 — Comfortable, decent sound stage, plug-and-play. Great for beginners. 👉 HyperX Cloud Stinger 2 on Amazon

    Mid-Range (~$130–$180): SteelSeries Arctis Nova 7 — Wireless, 38-hour battery, solid surround sound. Works on PC, PS5, Switch 2, and mobile. 👉 SteelSeries Arctis Nova 7 on Amazon

    Premium (~$280–$350): SteelSeries Arctis Nova Pro Wireless — Dual wireless (2.4GHz + Bluetooth), swappable battery system, and active noise cancellation. The flagship for serious gamers. 👉 SteelSeries Arctis Nova Pro Wireless on Amazon


    💡 5. RGB Lighting: Set the Mood, Reduce Eye Strain

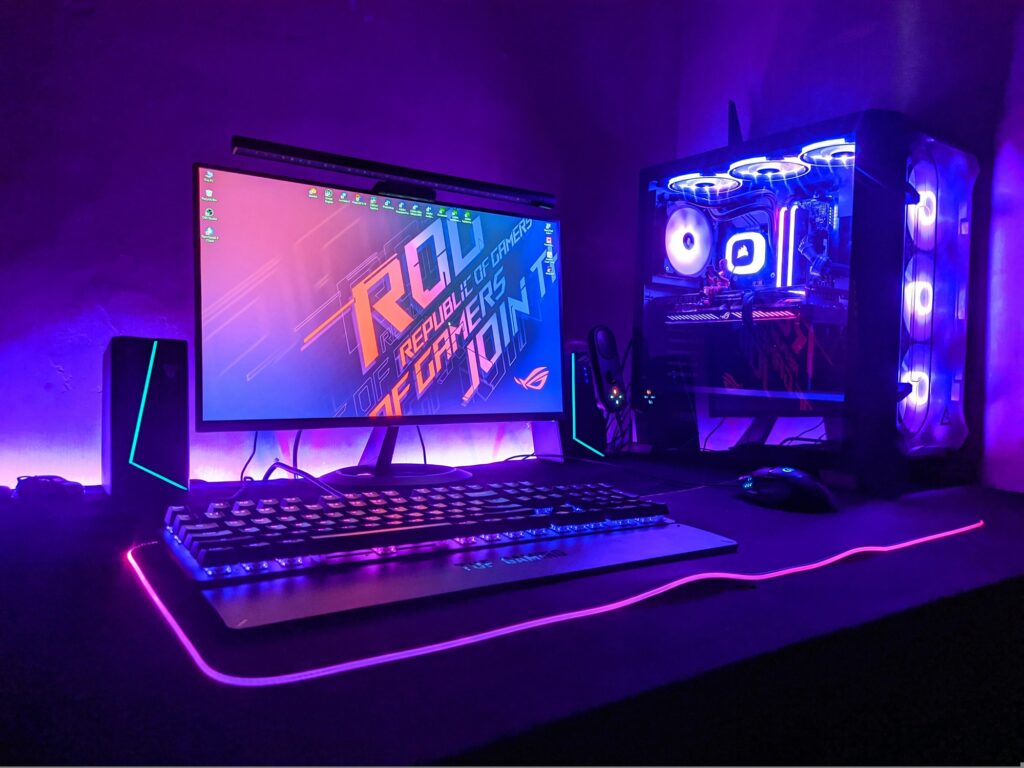
    Foto gaming setup

    RGB gets a bad reputation for being purely cosmetic, but proper ambient lighting in a gaming room actually reduces eye strain significantly by balancing the brightness difference between your monitor and the surrounding environment.

    Must-Have Lighting Pieces

    Bias Lighting (behind your monitor): The Govee TV Backlight strips are affordable, sync with your on-screen content via camera or HDMI passthrough, and create a stunning halo effect that makes colors pop. 👉 Govee TV Backlight T2 on Amazon

    Desk LED Strip: Govee M1 RGBIC Strips or Philips Hue Play Gradient offer millions of color combinations and app control for full customization. 👉 Govee M1 / Philips Hue Play on Amazon

    Smart Key Light / Ring Light (for streamers): The Elgato Key Light Air is the industry standard for clean, even lighting that makes your face look professional on stream or video calls. 👉 Elgato Key Light Air on Amazon

    Pro Tip: Set your bias lighting to a warm white or soft blue (~5500–6500K) during long sessions. It’s much easier on the eyes than pure RGB cycling effects, which look great in photos but cause fatigue over time.


    🔌 6. Don’t Forget These Essentials

    These are the often-overlooked items that complete a serious gaming setup:

    Monitor Arm (~$30–$120): Frees up desk space and puts your screen at the perfect ergonomic height. The Ergotron LX is the community favorite. 👉 Ergotron LX on Amazon

    Gaming Router (~$100–$300): For competitive online gaming, a Wi-Fi 6E or Wi-Fi 7 router makes a real difference. The ASUS ROG Rapture GT-BE98 is the top-tier pick for dedicated gamers. 👉 ASUS ROG Rapture on Amazon

    UPS / Surge Protector: Protect your entire setup from power surges and unexpected outages. The APC Back-UPS Pro 1500VA is a reliable, trusted option. 👉 APC Back-UPS Pro on Amazon

    XL Mousepad (~$20–$40): A large desk mat unifies your setup aesthetically and gives your mouse consistent tracking across the entire desk. The SteelSeries QcK XXL is the most popular choice among competitive players. 👉 SteelSeries QcK XXL on Amazon


    🏆 Full Setup Recommendations by Budget

    🥉 Starter Setup — ~$500

    ItemPickPrice
    MonitorAOC 24G2 (1080p 144Hz)~$160
    ChairHomall Gaming Chair~$180
    DeskBestier L-Shaped~$110
    MouseLogitech G305~$35
    KeyboardRedragon K552~$45
    HeadsetHyperX Cloud Stinger 2~$50
    MousepadAmazon Basics XL~$15
    Total~$595

    🥈 Mid-Range Setup — ~$1,100

    ItemPickPrice
    MonitorLG 27GP850-B (1440p 165Hz)~$330
    ChairSecretlab Titan Evo~$450
    DeskFlexispot E7 (standing desk)~$370
    MouseRazer DeathAdder V3 HyperSpeed~$90
    KeyboardRazer Huntsman V3 Pro~$150
    HeadsetSteelSeries Arctis Nova 7~$150
    LightingGovee TV Backlight + Strips~$60
    MousepadSteelSeries QcK XXL~$30
    Total~$1,630

    🥇 Premium Setup — ~$2,500+

    ItemPickPrice
    MonitorSamsung Odyssey G7 32″ OLED~$800
    ChairHerman Miller x Logitech Embody~$995
    DeskUplift V2 Commercial~$950
    MouseLogitech G Pro X Superlight 2~$155
    KeyboardWooting 80HE~$220
    HeadsetSteelSeries Arctis Nova Pro Wireless~$320
    LightingPhilips Hue Play Gradient + Key Light Air~$250
    Monitor ArmErgotron LX~$120
    RouterASUS ROG Rapture GT-BE98~$280
    Total~$4,090

    Final Thoughts

    Building a great gaming setup in 2026 doesn’t require spending $4,000 all at once. Start with the fundamentals — a decent monitor, a chair that won’t destroy your back, and a desk that fits your space. Then upgrade piece by piece as your budget allows.

    The single best bang-for-your-buck upgrade for most gamers is the chair. It’s the one thing you’ll feel immediately, every single session. Once you sit in a proper gaming chair with lumbar support and 4D armrests, going back is painful — literally.

    Happy gaming. Build smart.


    This post contains affiliate links. If you purchase through our links, we may earn a small commission at no extra cost to you. We only recommend products we genuinely stand behind.


    Tags: gaming setup 2026, best gaming chair, gaming desk guide, gaming monitor buying guide, RGB lighting setup, gaming peripherals, budget gaming setup, ultimate battle station

  • 5 Real Ways to Make Money Online in 2026 (No Hype, No Shortcuts)

    5 Real Ways to Make Money Online in 2026 (No Hype, No Shortcuts)

    The internet is full of get-rich-quick promises. However, the reality is very different from that — and honestly, a lot more interesting. Making money online in 2026 is completely achievable, but it requires consistency, choosing the right path, and above all, realistic expectations.

    That’s why, in this article, we cut straight to the point. No magic formulas, no “make $5,000 in your first month.” Just the 5 methods that actually work, with estimated timelines, average earnings, and free tools to get you started right now.


    1. 📝 Start a Monetized Blog

    foto pessoa digitando texto

    Starting a blog is, without a doubt, one of the most solid and scalable ways to build passive income online over the long term. The idea is straightforward: you write about a subject you know well or are passionate about, attract visitors through Google, and monetize through ads and affiliate links.

    How it works in practice

    You pick a niche — gaming, technology, personal finance, cooking, health, travel — and publish articles regularly, optimized to rank on Google (this is called SEO). As your traffic grows, you activate Google AdSense to display ads and insert affiliate links from programs like Amazon Associates to earn commissions on product recommendations.

    Free or low-cost tools to get started

    • Hosting: Hostinger starting at around $3/month — best value for beginners
    • CMS: WordPress (free, one-click install on Hostinger)
    • SEO: Ubersuggest (free tier) and Google Search Console (completely free)
    • Affiliate program: Amazon Associates (free to join)
    • Images: Unsplash and Canva (both free)

    What equipment you’ll need

    For writing articles, a basic laptop is all you need to start. However, if you want to scale with video content and richer media, a decent setup makes a big difference:

    💻 Laptops for content creation on Amazon

    Return timeline

    ⏱️ Time to first earnings3 to 6 months
    💰 Average monthly (beginner)$50 to $300
    💰 Average monthly (intermediate, 6–12 months)$300 to $1,500
    💰 Potential (long term, 1–2 years)$1,500 to $8,000+
    💸 Minimum starting investment~$36/year (hosting)
    📈 DifficultyMedium — requires consistency and basic SEO knowledge

    🎯 Practical tip: aim to publish at least 3 articles per week to accelerate growth. The more quality content you have indexed on Google, the more visitors you attract — and the more you earn. That’s exactly the strategy we follow here at TechPlayGrid!


    2. 🎥 Faceless YouTube Channel

    foto edição de vídeo

    A faceless YouTube channel — also known as a “dark channel” — is a YouTube channel where you never have to show your face. Instead, videos are built using voiceover narration (your own voice or AI-generated), stock footage, animations, and on-screen text. In 2026, this is one of the most scalable ways to generate passive income, especially with the rapid advancement of AI content tools.

    How it works in practice

    You choose a niche — trivia, history, personal finance, technology, true crime, motivation — and publish videos consistently. Once you reach 1,000 subscribers and 4,000 watch hours, your channel can apply for the YouTube Partner Program and start earning from ads. YouTube also offers an entry-level tier at just 500 subscribers and 3,000 watch hours that unlocks fan funding features.

    In addition to YouTube ad revenue, you can place affiliate links in your video descriptions — a passive income stream that keeps working as long as the video gets views, even months after it was published.

    Free or low-cost tools to get started

    • Scriptwriting: ChatGPT or Claude (free tiers available, paid for more volume)
    • AI voiceover: ElevenLabs (free plan available) or use your own voice
    • Video editing: CapCut (free) or DaVinci Resolve (free)
    • Stock footage and images: Pexels, Pixabay, and Unsplash (all free)
    • Thumbnails: Canva (free)

    What equipment you’ll need

    To start with your own voiceover narration, a decent USB microphone is the only essential hardware investment. Furthermore, if you plan to record screen content or gaming footage, a capable PC or laptop helps significantly:

    🎙️ USB microphones for recording on Amazon 💻 PCs for content creation on Amazon

    Return timeline

    ⏱️ Time to monetize3 to 6 months (to reach YouTube’s requirements)
    💰 Average monthly (10k–50k views/month)$100 to $500
    💰 Average monthly (100k–500k views/month)$800 to $4,000
    💰 Potential (1M+ views/month)$5,000 to $15,000+
    💸 Minimum starting investment$0 (using free AI tools and your own voice)
    📈 DifficultyMedium — requires consistency and attention to audience retention metrics

    ⚠️ Watch out for: reusing copyrighted content, prioritizing quantity over quality, ignoring audience retention data, and quitting too early. The key is to test different formats, watch your analytics closely, and adjust based on what your audience actually watches.


    3. 📱 Monetizing Social Media (Instagram, TikTok, and Pinterest)

    gravacao de conteúdo redes sociais

    Social media has long evolved beyond entertainment. In 2026, it’s one of the most accessible entry points for online income — especially when combined with affiliate marketing.

    How it works in practice

    You build profiles on one or more social media platforms around a specific niche — beauty, fitness, tech, gaming, cooking, personal finance — and post content consistently. As your audience grows, you insert affiliate links in your bio, stories, and post descriptions to earn commissions on purchases. In addition, brands start paying for sponsored posts once your profile reaches meaningful engagement.

    Pinterest deserves special attention here. Unlike Instagram and TikTok, where the algorithm quickly buries older posts, Pinterest is a search platform — therefore, a pin you create today can continue generating clicks and sales for years.

    Free tools to get started

    • Post creation: Canva (free)
    • Scheduling: Meta Business Suite (free for Instagram and Facebook)
    • Affiliate links: Amazon Associates, ClickBank, ShareASale (all free to join)
    • Link in bio: Linktree or Beacons (both free)

    What equipment you’ll need

    For creating high-quality content on Instagram and TikTok, where visual quality directly impacts reach, a decent camera makes a real difference:

    📷 Cameras for content creators on Amazon 🎙️ Microphones for smartphone and camera on Amazon

    Return timeline

    ⏱️ Time to first affiliate earnings1 to 3 months (with an active audience)
    💰 Average monthly (1k–10k engaged followers)$50 to $400
    💰 Average monthly (10k–100k followers)$500 to $2,500
    💰 Potential (100k+ followers)$2,500 to $15,000+
    💸 Minimum starting investment$0 (a smartphone is enough to start)
    📈 DifficultyMedium/High — the algorithm demands daily consistency and creativity

    💡 Tip: don’t try to be everywhere at once. Start with one platform, master its format, and then expand. TikTok offers the fastest organic growth potential in 2026; Pinterest has the best long-term passive income potential.


    4. 🔗 Affiliate Marketing (Without a Blog or Channel)

    smartphone com ícones e foco nas redes sociais

    Affiliate marketing doesn’t require a blog or a YouTube channel to work. That’s one of its biggest advantages in 2026: you can share affiliate links in WhatsApp groups, Telegram channels, Reddit communities, niche forums, and even in YouTube video comments — as long as it’s relevant and not spammy.

    The Amazon Associates program, for example, is free to join, accepts promotion through social media, and doesn’t require a website. Commissions range from 1% to 10% depending on the product category — and the 24-hour cookie means you earn commission on everything the customer buys during that window, not just the product you recommended.

    Affiliate platforms to get started

    • Amazon Associates — physical products, high conversion rate, commissions of 1%–10%
    • ClickBank — digital products (courses, e-books), commissions of 20%–75%
    • ShareASale — wide range of physical and digital products
    • Impact — brands and SaaS tools, often higher commissions

    How to promote without spending money

    • WhatsApp groups and Telegram channels focused on deals
    • Relevant comments on YouTube videos in your niche
    • Instagram bio and stories with a Linktree
    • Reddit communities and specialized forums

    Return timeline

    ⏱️ Time to first earnings2 weeks to 2 months
    💰 Average monthly (beginner, organic promotion)$100 to $600
    💰 Average monthly (intermediate, multiple channels)$600 to $3,000
    💰 Potential (advanced, at scale)$5,000+
    💸 Minimum starting investment$0
    📈 DifficultyLow to start — medium to scale consistently

    💡 Important: to keep your Amazon Associates account active, you need to make at least 3 sales within your first 180 days. For that reason, start by promoting affordable, popular products to secure those first sales quickly.


    5. 🎓 Create and Sell an Online Course

    vídeo call no notebook / curso online

    Creating an online course is the option with the highest revenue-per-effort potential — but it’s also the one that demands the most upfront work. The concept is simple: you have knowledge that other people want to learn, you package it into video lessons, and sell it repeatedly on autopilot.

    The best part is that, unlike a regular job, your course keeps selling while you sleep. Therefore, it’s one of the purest forms of passive income available today.

    What you can teach

    Anything you know better than the average person. Practical examples: video editing, English, Excel, cooking, digital illustration, photography, digital marketing, coding, personal finance, crafts. Don’t underestimate what you know — there’s an audience for virtually every niche.

    Platforms to host your course

    • Teachable — free plan available, beginner-friendly
    • Udemy — free to publish, but the platform takes a percentage
    • Gumroad — simple setup, low fees, great for solopreneurs
    • Thinkific — free plan with solid features

    What equipment you’ll need

    Here, equipment investment matters more than in any other option on this list. A course with good audio and video quality sells significantly better than one that looks and sounds amateur. For that reason, investing in a decent microphone and camera from the start pays for itself quickly:

    🎙️ USB condenser microphones for course recording on Amazon 📷 Cameras for recording online courses on Amazon 💻 Laptops for video editing on Amazon

    Return timeline

    ⏱️ Time to build and launch your first course1 to 3 months
    ⏱️ Time to first earningsRight after launch, if you already have an audience
    💰 Average monthly (niche course, beginner)$200 to $1,500
    💰 Average monthly (established course with audience)$2,500 to $10,000+
    💸 Minimum starting investment$0 (using Teachable or Udemy free tiers)
    📈 DifficultyHigh — requires solid content creation and a sales strategy

    💡 Tip: before recording the entire course, validate the idea by selling early access. If people pay before the course exists, you’ve proven there’s a market for it. Only then record everything properly — it saves you weeks of work on content nobody wanted.


    🖥️ The Right Equipment Makes a Difference

    Regardless of which path you choose, a good setup accelerates your results. Whether you’re writing articles faster, recording better-quality videos, or editing content, the right equipment saves time and improves your output.

    💡 Speaking of setup — if you don’t have a capable PC yet, check out our full guide: PC Gaming Setup: Everything You Need to Get Started in 2026 — we break down configurations by budget that work just as well for content creation as they do for gaming.

    Here are also the most searched products by content creators and digital entrepreneurs:

    💻 Laptops and desktop PCs on Amazon 🎙️ USB microphones on Amazon 📷 Cameras for YouTube and online courses on Amazon


    📊 Full Comparison: Which Path Should You Choose?

    OptionTime to First EarningsMonthly PotentialStarting CostDifficulty
    Monetized Blog3 to 6 monthsUp to $8,000+~$36/yearMedium
    Faceless YouTube3 to 6 monthsUp to $15,000+$0Medium
    Social Media1 to 3 monthsUp to $15,000+$0Medium/High
    Affiliate Marketing2 weeks to 2 monthsUp to $5,000+$0Low/Medium
    Online Course1 to 3 months to launchUp to $10,000+$0High

    Conclusion: What’s the Best Path?

    There’s no single best path — there’s the best path for your profile. That’s why, before choosing, ask yourself three simple questions: What do you know how to do? How many hours per week can you dedicate? And do you prefer being in front of the camera or working behind the scenes?

    If you enjoy writing and have patience for the long game, a blog is unbeatable. If you’d rather create videos without showing your face, a faceless YouTube channel is the way to go. If you already have a social media audience, start with affiliate marketing right now — it’s the fastest way to generate your first revenue.

    What doesn’t work, in any of these options, is quitting in the first few months. Whoever starts with clear, realistic expectations doesn’t abandon the project when results are slow at the beginning. Consistency is, without exception, the one thing that separates those who succeed from those who don’t.

    Are you already using any of these strategies? Let us know in the comments which path you chose! 👇


    (The links above are affiliate links. Buying through them supports TechPlayGrid at no extra cost to you — thank you!)


    Sources: Cielo Blog, Hostinger, Ecommerce na Prática, Canal Engajado, Agência Roque, FGV/Hotmart, FluxoPromo, Authority Hacker

  • PC Gaming Setup: Everything You Need to Get Started

    PC Gaming Setup: Everything You Need to Get Started

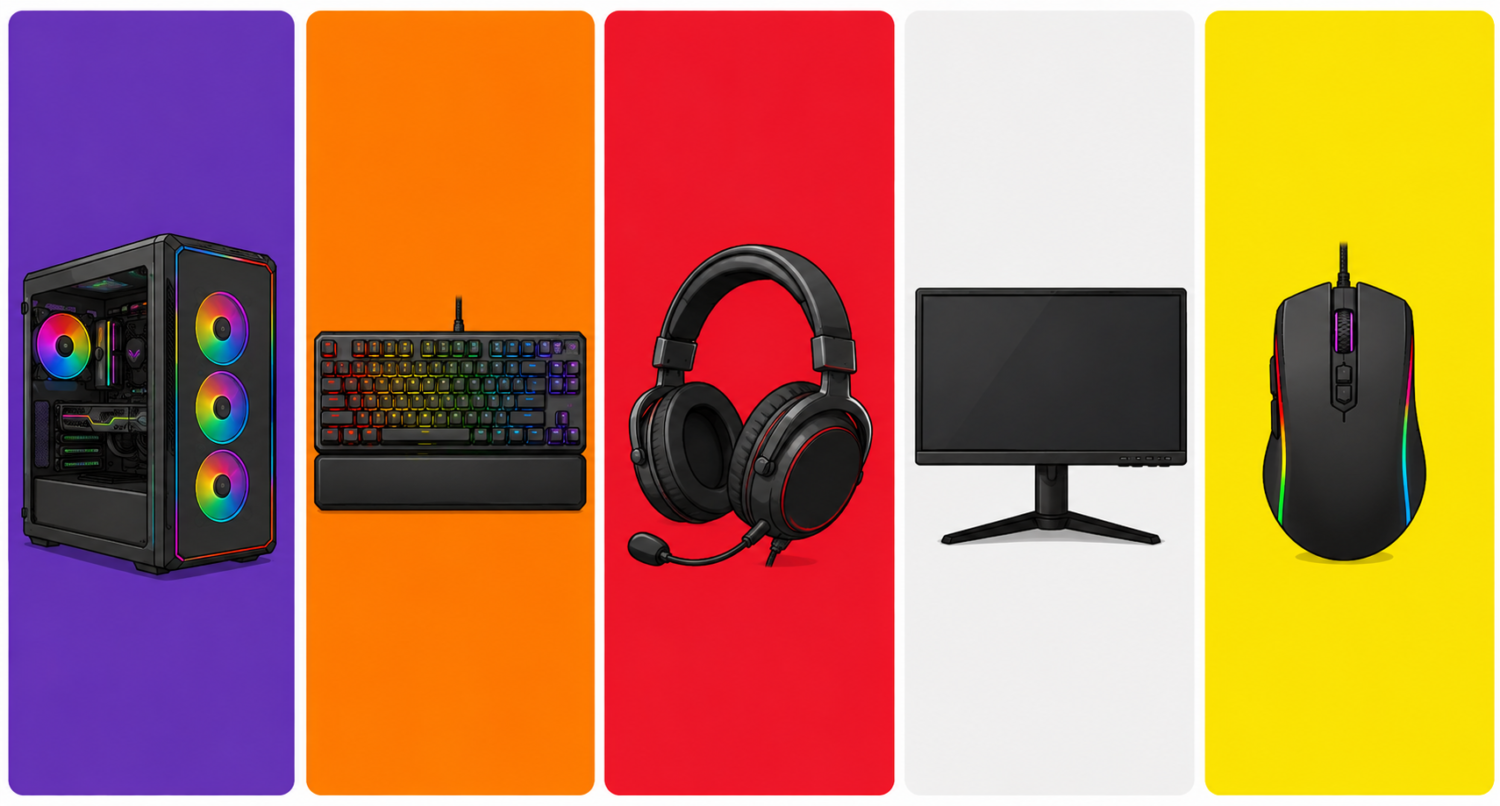
    So you’ve decided to jump into the world of PC gaming. Great choice. The PC is the platform with the largest game library in the world, full compatibility with controllers, keyboard and mouse, and total freedom to customize everything your way.

    However, the first question that comes up for beginners is always the same: where do I start, and how much should I spend?

    That’s why, in this guide, we split the setup into two parts: the PC itself (the “heart” of the setup) and the peripherals (everything you plug into it). In addition, everything is organized by budget, with realistic recommendations for 2026.


    First Things First: Pre-Built or Build Your Own?

    This is the first decision you’ll need to make. Both options have their advantages and disadvantages, so it’s worth understanding each one before choosing.

    Pre-built gaming PC: more convenient and generally comes with a warranty for the whole unit, so you don’t need to understand component compatibility. On the other hand, it tends to be more expensive for the same performance — or deliver lower performance than what you want or can afford.

    Building from scratch: more cost-effective in the long run and gives you total control over your components, making future upgrades much easier. The downside, however, is that it requires research, patience, and some experience with PC assembly — or you’ll need to pay a professional to put it together.

    In short, for beginners with no hardware experience, a pre-built from a reputable retailer is a safe choice. But if you have time to do your research, building your own is absolutely worth it.


    💻 The PC: Configurations by Budget

    🟢 Entry Level — Up to US$ 500

    Yes, you can build a gaming PC in the US$ 400–500 range that runs the most popular games out there. The key, in this case, is choosing the right parts.

    Suggested build:

    • CPU: AMD Ryzen 5 5600 (~US$ 100) — 6 cores, excellent for gaming and multitasking
    • GPU: AMD RX 6600 (~US$ 120) — handles all popular games at high 1080p settings
    • RAM: 16 GB DDR4 (~US$ 40)
    • Storage: 480 GB NVMe SSD (~US$ 35) — essential; never use an HDD as your main drive
    • Motherboard: B450 or B550 compatible with Ryzen 5000 (~US$ 80)
    • Power Supply: 550W 80 Plus Bronze (~US$ 50)
    • Case: basic with good airflow (~US$ 40)

    As a result, this build runs Fortnite, Valorant, CS2, FIFA, GTA V and most popular titles at 1080p on medium to high settings.

    💡 Affiliate tip: You can often find pre-built PCs in this price range on sale. Check out the options available:


    🟡 Mid-Range — US$ 800 to US$ 1,200

    At this level, the performance jump is significant. Therefore, you can start playing demanding titles at max 1080p or at 1440p with quality settings.

    Suggested build:

    • CPU: AMD Ryzen 5 7600 (~US$ 170) — modern AM5 platform, ready for future upgrades
    • GPU: NVIDIA RTX 4060 (~US$ 300) — maxes out 1080p, with DLSS 3 and Ray Tracing support
    • RAM: 16 GB DDR5 (~US$ 70) — required, since the AM5 platform uses DDR5
    • Storage: Kingston NV2 1 TB NVMe SSD (~US$ 60)
    • Motherboard: MSI B650M Gaming Plus WIFI (~US$ 150) — comes with Wi-Fi 6E built in
    • Power Supply: Corsair CX650 650W 80 Plus Bronze (~US$ 80)
    • Cooler: Cooler Master Hyper 212 (~US$ 35)
    • Case: with good airflow (~US$ 60)

    In practical terms, this build runs every current game at max 1080p with high frame rates. Furthermore, it will handle GTA VI very comfortably (check out our full GTA VI article — everything you need to know).

    💡 Affiliate tip:


    🖥️ Peripherals: What You’ll Need

    Having a good PC is only half the setup. That’s why peripherals make all the difference in your gaming experience — and the value for money can be excellent even on a tight budget.

    Monitor

    The monitor is just as important as the graphics card. After all, there’s no point having a powerful GPU and pairing it with a 60Hz monitor with slow response times.

    For 1080p / entry level:

    • Look for at least 144Hz and an IPS or VA panel (better image quality than TN)
    • Ideal size: 24 to 27 inches
    • Price range: US$ 150 to US$ 250

    👉 144Hz gaming monitors on Amazon

    For 1440p / mid-range:

    • 165Hz or higher, IPS panel
    • Ideal size: 27 inches
    • Price range: US$ 300 to US$ 500

    Gaming Mouse

    Don’t fall into the high-DPI trap. What actually matters is the sensor quality at low DPI settings (400–1600) and ergonomics. For example, a no-name 30,000 DPI mouse will easily lose to a quality 6,400 DPI sensor in real gameplay.

    Entry level (up to US$ 30):

    • Redragon M711 Cobra — precise sensor, ergonomic design, excellent value for money
    • Redragon keyboard + mouse combo — practical for those who want everything at once

    👉 Redragon gaming mouse on Amazon

    Mid-range (US$ 30 to US$ 70):

    • Logitech G502 HERO — high-precision sensor, comfortable for long sessions
    • It’s also worth noting that the trend in 2026 is ultralight mice under 60g, which significantly reduce fatigue during long gaming sessions

    👉 Logitech G502 on Amazon


    Gaming Keyboard

    The main choice here is between a membrane keyboard (cheaper and quieter) and a mechanical keyboard (more precise, durable, and with better feel). For gaming, mechanical is always the better option — and you can get into that world for under US$ 50.

    Important tip: avoid Blue switches for gaming. The click sound is great for typing; however, the high reset point gets in the way during competitive play. For that reason, go for Red (linear, quiet) or Brown (tactile, balanced) switches instead.

    Entry level (up to US$ 50):

    • Redragon K552 Kumara — mechanical with Red switches, solid build quality, great for first-time mechanical users

    👉 Mechanical gaming keyboard on Amazon

    Mid-range (US$ 50 to US$ 120):

    • Mechanical keyboards with Red or Brown switches from brands like HyperX, Logitech, or Corsair

    Gaming Headset

    In gaming, sound is information. In other words, knowing where an enemy is coming from before you see them is a real competitive advantage. Similarly, in story-driven games, a good headset completely transforms your immersion.

    Entry level (up to US$ 50):

    • HyperX Cloud Stinger 2 — solid sound quality for the price, with a functional microphone

    👉 Gaming headset under $50 on Amazon

    Mid-range (US$ 50 to US$ 120):

    • HyperX Cloud III Wireless — excellent audio quality, wireless, with long battery life
    • In addition, look for models with 50mm drivers and 7.1 virtual surround sound support

    👉 HyperX Cloud III on Amazon


    Mousepad

    Simple, cheap, and frequently overlooked. Even so, a large extended mousepad that covers your whole desk significantly improves precision and protects your surface.

    • Speed models: more glide; therefore, better for games requiring fast aim movements
    • Control models: more friction and, for that reason, better for slow, precise movements

    👉 Extended gaming mousepad on Amazon


    🎮 What About a Controller? Do You Need One?

    It depends on your play style. For fighting, platformer, racing, and adventure games, a controller is superior to keyboard and mouse. On the other hand, for FPS and competitive games, keyboard and mouse wins by a wide margin.

    The good news is that, on PC, you can use both without any issue. The most compatible options are:

    • Xbox Series X/S controller — plug and play on Windows, no additional drivers needed
    • DualSense (PS5) — works via USB or Bluetooth, though it requires minimal setup
    • Generic USB controller — works well for platformers and fighting games

    📋 Summary: Full Setup by Budget

    ItemEntry Level (~US$ 500 total)Mid-Range (~US$ 1,200 total)
    PCRyzen 5 5600 + RX 6600Ryzen 5 7600 + RTX 4060
    Monitor24″ IPS 144Hz27″ IPS 165Hz 1440p
    MouseRedragon M711 CobraLogitech G502 HERO
    KeyboardRedragon K552 MechanicalHyperX Red/Brown Mechanical
    HeadsetHyperX Cloud Stinger 2HyperX Cloud III Wireless
    MousepadBasic extendedPremium extended

    Conclusion: Start With What You Have, Upgrade Over Time

    The most common mistake among first-time builders is wanting everything at maximum level all at once. However, it doesn’t have to be that way. You can start with a simple PC and basic peripherals and then upgrade piece by piece over time.

    In any case, there are three things you should never compromise on from day one: an SSD as your main drive (never an HDD), at least 16 GB of RAM, and a 144Hz monitor. These three factors make more of a difference in your day-to-day experience than any other upgrade.

    Everything else can be adjusted according to your preferences and your budget. Got a question about a specific part or peripheral? Drop it in the comments and we’ll help — or follow TechPlayGrid on Instagram! 👇


    (The links above are affiliate links. Buying through them supports TechPlayGrid at no extra cost to you — thank you!)