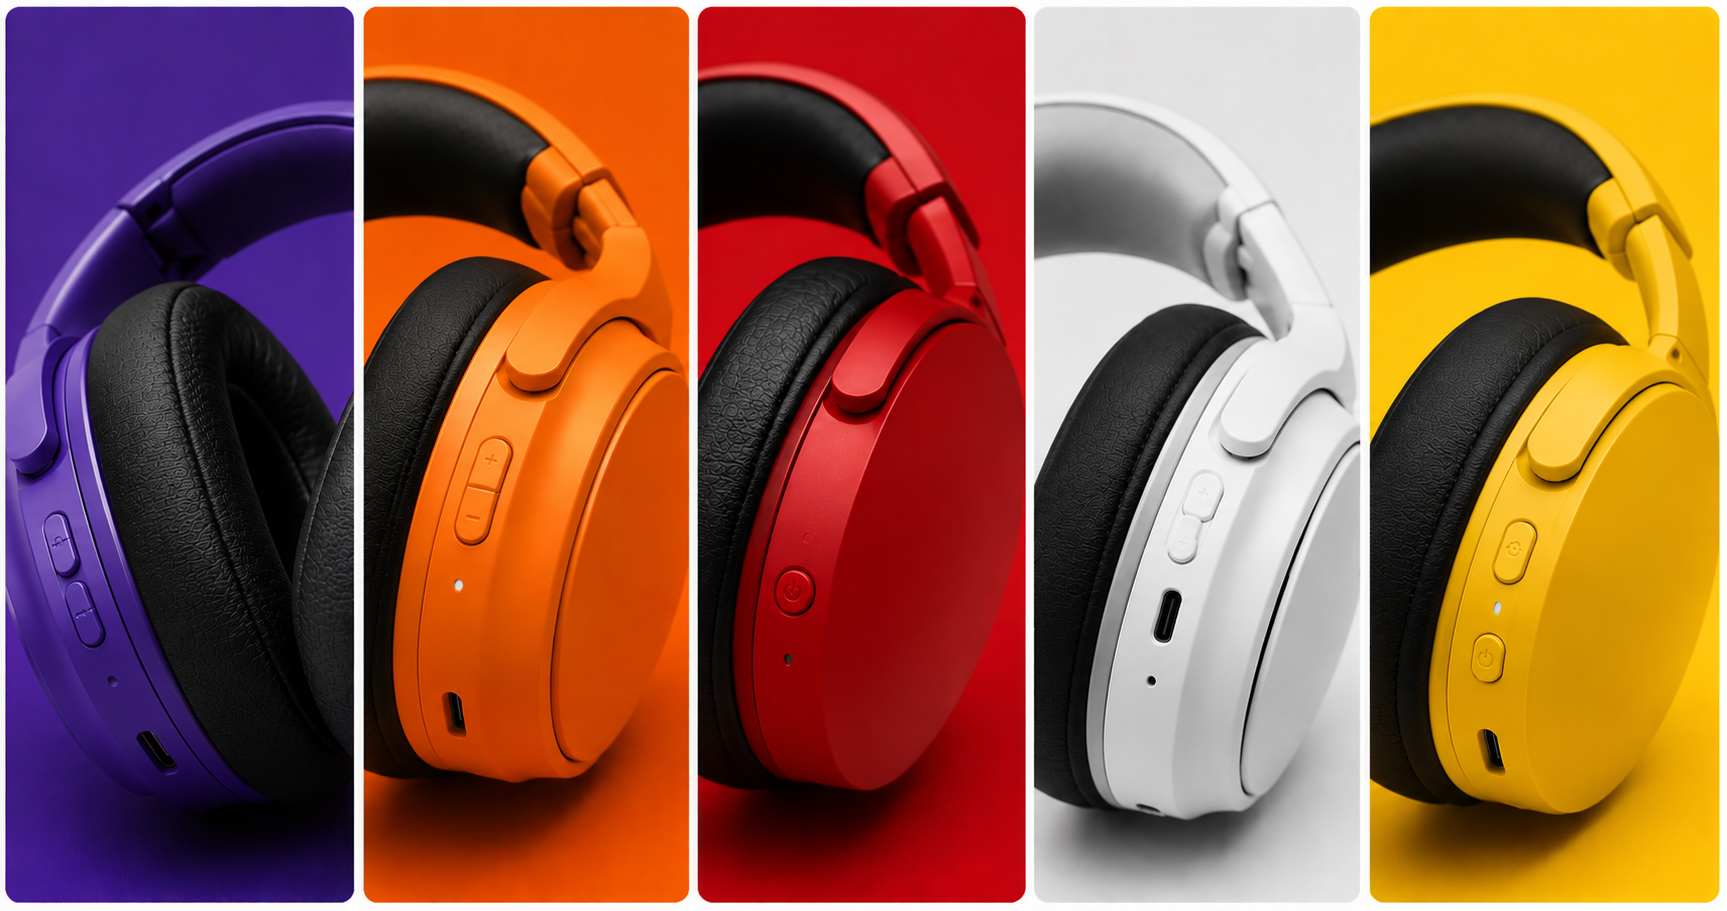
Categoria: Blog

  • Monitores no BR: Best Opções Under R$1200

    Monitores no BR: Best Opções Under R$1200

    Introdução: O Salto para os 144Hz

    Se você ainda joga em um monitor convencional de 60Hz, você está fisicamente em desvantagem. Em jogos competitivos como Valorant, CS2 e Call of Duty, a fluidez da imagem dita o tempo da sua reação. Jogar a 60 quadros por segundo já não é aceitável para quem busca subir de rank.

    A boa notícia é que o mercado brasileiro amadureceu muito e recebeu novas opções incríveis e acessíveis. Se você quer o melhor custo-benefício para o seu setup gamer, focar na faixa de 144Hz a 180Hz é o caminho ideal. Neste guia, vamos analisar os melhores monitores disponíveis no Brasil por abaixo de R$ 1.200 (abaixo de mil e duzentos reais), focando em opções confiáveis na Amazon e KaBuM!.

    ⚠️ Aviso de Afiliados: O TechPlayGrid é financiado pelos leitores. Quando você compra através dos nossos links, podemos ganhar uma comissão de afiliado sem custo extra para você.

    Lembre-se, os produtos sugeridos aqui estão sujeitos aos estoques das lojas e os preços podem sofrer variações após a publicação dessa postagem.

    Tipos de Painel: IPS vs VA vs TN

    Créditos da Imagem: Tecnoblog

    Antes de comprar, você precisa entender a sopa de letrinhas das telas. O tipo de painel define a qualidade da imagem:

    • Painel TN: Eram os reis da velocidade (baixo tempo de resposta), mas possuem cores lavadas e ângulos de visão horríveis. Hoje em dia, estão obsoletos.
    • Painel VA: Excelentes para contraste. O preto é realmente escuro, ótimo para jogos de terror e filmes. O problema é que painéis VA baratos sofrem de Black Smearing (um rastro escuro em cenas rápidas).
    • Painel IPS: O queridinho atual. Oferece cores vibrantes, ângulos de visão perfeitos e, nas gerações atuais, tempos de resposta ultrarrápidos (1ms). É a recomendação principal para 90% dos usuários.

    O Campeão Consolidado: LG UltraGear 24″

    Imagem meramente ilustrativa. Modelo: LG UltraGear 24GN60R-B

    A linha UltraGear da LG dominou o mercado brasileiro nos últimos anos, e por um bom motivo.

    Desempenho e Qualidade

    O modelo de 24 polegadas (24GN60R) traz um painel IPS de excelente qualidade, 144Hz nativos e 1ms de tempo de resposta. A calibração de cores de fábrica da LG é fantástica, o que significa que o jogo já fica lindo logo que sai da caixa. Ele suporta AMD FreeSync Premium, eliminando quebras de imagem na tela. O único ponto negativo é o suporte de mesa, que não possui ajuste de altura (apenas inclinação).

    O Desafiante de Alto Custo-Benefício: AOC Hero 24″

    Imagem meramente ilustrativa. Modelo: AOC Hero 24G2

    A AOC é a maior rival da LG nessa categoria de entrada.

    Desempenho e Qualidade

    O AOC Hero de 24 polegadas (24G2) também usa um painel IPS de 144Hz. A grande vantagem do AOC sobre o LG é a sua base. O suporte que vem na caixa é incrivelmente ergonômico, permitindo ajuste de altura, rotação e inclinação—algo raro nessa faixa de preço. As cores tendem a ser um pouco mais saturadas por padrão, o que agrada muitos gamers.

    O Gigante de Alto Desempenho: KBM! Gaming 27″

    Imagem meramente ilustrativa. Modelo: Monitor Gamer KBM! Gaming 27″

    Se você busca uma tela maior com taxa de atualização ainda mais alta sem estourar o orçamento, a marca própria da KaBuM! surge como uma forte candidata.

    Desempenho e Qualidade

    O monitor KBM! Gaming de 27 polegadas se destaca por entregar impressionantes 180Hz de taxa de atualização, oferecendo uma vantagem de fluidez superior para quem foca em eSports competitivos. Ele utiliza um painel VA focado em alto nível de contraste, entregando pretos mais profundos e marcantes, sendo perfeito para quem ama jogar em ambientes escuros ou curtir campanhas com visuais sombrios.

    • Onde Comprar: Encontrado com exclusividade e ótimas condições de frete na [KaBuM!].

    Comparativo Direto

    Modelo do MonitorTaxa de AtualizaçãoTipo de PainelAjuste de AlturaVantagem Principal
    AOC Hero 24″144HzIPSSimBase ergonômica excelente
    LG UltraGear 24″144HzIPSNãoQualidade de imagem e cores
    KBM! Gaming 27″180HzVASimTela maior, preço agressivo

    Dicas para Configurar seu Novo Monitor

    Muitos gamers compram um monitor de 144Hz, ligam no PC e passam anos jogando a 60Hz sem saber. Para evitar isso:

    1. Use o cabo DisplayPort incluído na caixa (o HDMI antigo pode limitar a taxa).
    2. No Windows, vá em Configurações de Exibição > Configurações Avançadas.
    3. Certifique-se de alterar a taxa de atualização no menu suspenso para 144Hz.

    Perguntas Frequentes (FAQ)

    Devo escolher 24 ou 27 polegadas para Full HD (1080p)?

    Para a resolução 1080p, 24 polegadas é o tamanho perfeito. Se você pular para 27 polegadas em 1080p, a densidade de pixels cai, e você começará a notar a imagem levemente serrilhada ou “pixelada” ao ler textos.

    🔗 Relacionados no TechPlayGrid

    Veredito

    Ambos os monitores são escolhas fenomenais. Se a ergonomia for uma prioridade para você e você não quiser comprar um braço articulado à parte, o AOC Hero 24″ é a melhor compra. Contudo, se você prioriza a fidelidade de cores e um input lag levemente mais otimizado, o LG UltraGear reina absoluto na categoria “Under R$1200”.

    Tags: Monitor Gamer, 144Hz, Custo-Benefício, AOC Hero, LG UltraGear, Setup Gamer, Hardware BR

    Meta Description: Descubra os melhores monitores gamer no BR por under R$ 1200. Compare os campeões de vendas LG UltraGear vs AOC Hero e melhore seu desempenho.

    Summary: Um guia detalhado e focado no mercado brasileiro para ajudar gamers a escolherem o melhor monitor IPS de 144Hz até R$ 1.200. Comparamos especificações, tipos de painel e onde encontrar os melhores preços na Amazon e KaBuM!.

  • Best Ergonomic Chairs for New Back Relief

    Best Ergonomic Chairs for New Back Relief

    Introduction: Stop Destroying Your Back

    You just spent thousands of dollars upgrading your PC, buying a high-refresh OLED monitor, and securing the fastest mouse on the market. But what are you sitting on? Spending six to eight hours a day at your desk in a cheap, bucket-style racing chair is a recipe for disaster. No matter how good your game looks, chronic back pain will ruin the experience.

    The best upgrade for any work-from-home or gaming setup isn’t electronic—it is structural. A proper ergonomic chair designed for actual human anatomy, rather than the aesthetic of a race car, is essential. In this guide, we explore the new standards in seating and review the best ergonomic chairs available for maximum back pain relief.

    ⚠️ Affiliate Disclosure: TechPlayGrid is reader-supported. When you buy through links on our site, we may earn an affiliate commission at no extra cost to you.

    The Myth of the “Gaming Chair”

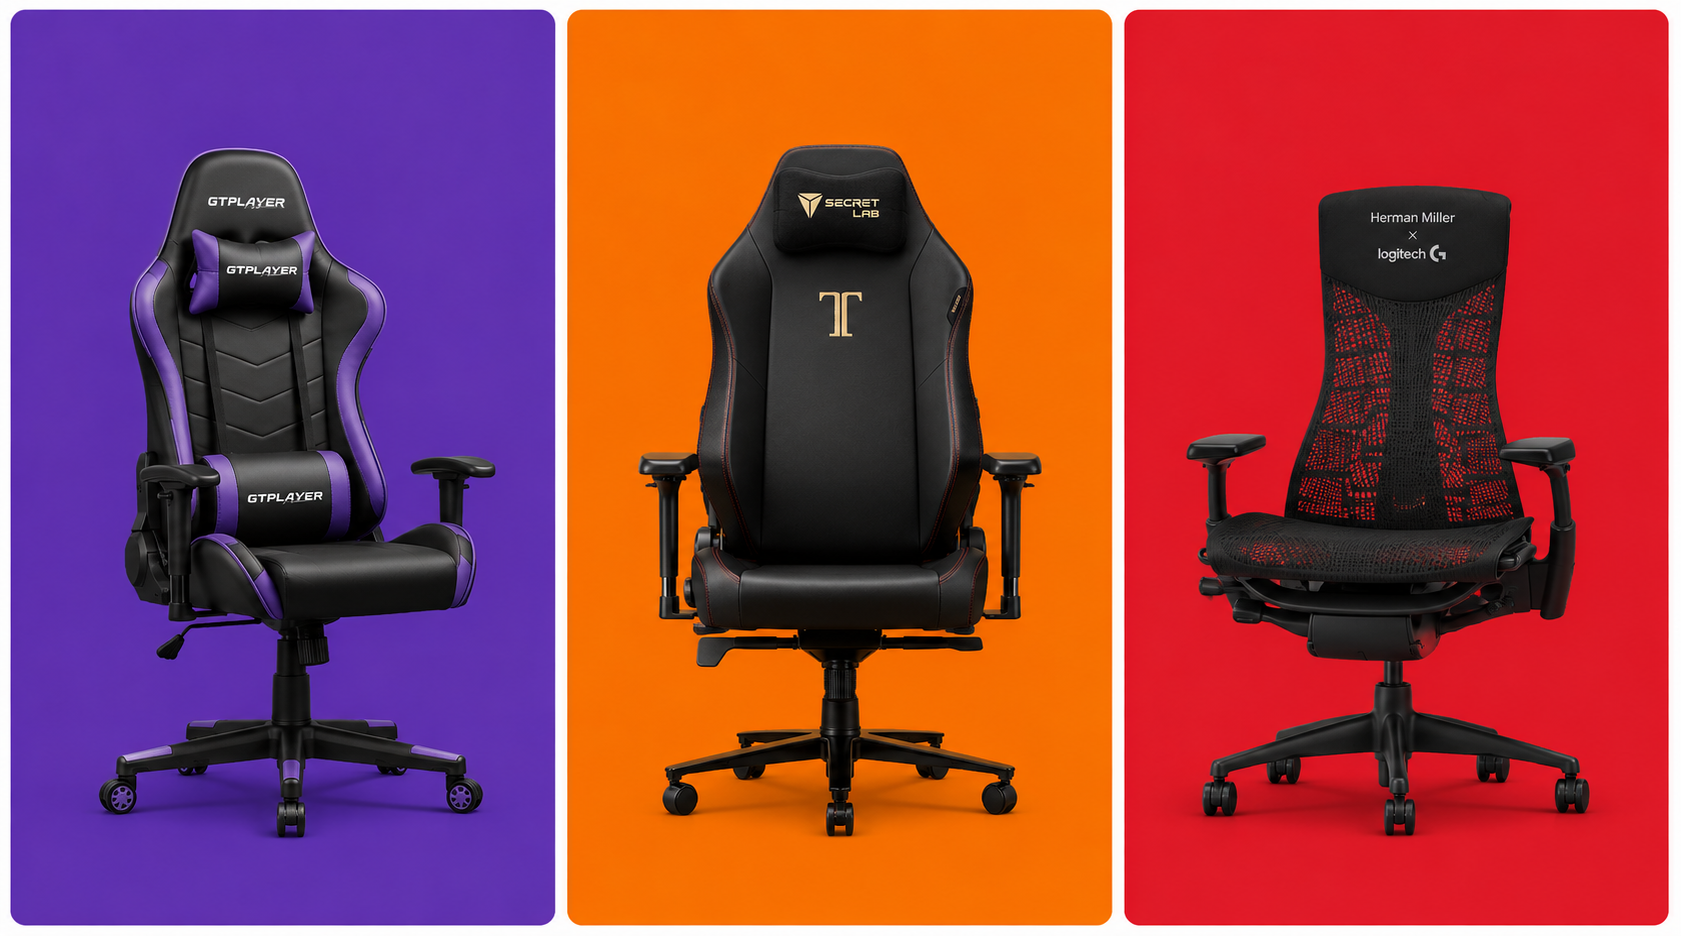
    For the past decade, the industry standard “gaming chair” has been modeled after race car seats. These seats were originally designed to keep drivers securely strapped in during high-speed crashes and sharp turns. They feature aggressive side bolsters that force your shoulders forward and flat seating pans with zero natural lumbar support.

    For sitting still at a desk, this design is actively harmful. It encourages slouching and compresses the lower spine. True ergonomic chairs focus on adjustable lumbar support, breathable materials, and dynamic movement that supports your spine’s natural S-curve.

    The Material Debate: Mesh vs PU Leather

    When shopping, you will encounter two primary materials:

    Mesh

    Mesh is a synthetic fabric stretched tightly across the chair’s frame.

    • Benefits: Incredible breathability. It allows body heat and sweat to dissipate instantly, making it perfect for hot climates or intense gaming sessions. It also conforms dynamically to your body shape.
    • Drawbacks: Can be abrasive on bare skin; cheaper mesh sags over time.

    PU Leather (Synthetic Leather)

    • Benefits: Looks premium, is highly stain-resistant, and is extremely easy to wipe clean after spills.
    • Drawbacks: Traps heat. If you play in a room without air conditioning, you will sweat. It can also peel and crack after a few years of heavy use.

    Top Contender 1: Secretlab Titan Evo

    For illustrative purposes only. Model:  Secretlab Titan Evo

    Secretlab is one of the few brands that successfully bridged the gap between “gaming aesthetic” and true ergonomics.

    Features and Relief

    The Titan Evo ditches the cheap lumbar pillow for an internal, fully adjustable lumbar support system integrated directly into the backrest. You can adjust it up, down, in, and out to perfectly cradle your lower back. The seat base is flat (no restrictive bolsters), allowing you to sit cross-legged. Their SoftWeave fabric option is highly recommended over the leatherette for better breathability.

    Top Contender 2: Sihoo Doro C300

    For illustrative purposes only. Model: Sihoo Doro C300

    If you want Herman Miller-style ergonomics on a budget, Sihoo has been making waves in the ergonomic community.

    Features and Relief

    The Doro C300 is a full-mesh chair that features a dynamic lumbar tracking system. The lower support pad is physically separated from the upper backrest and rests on a suspension mechanism. As you lean forward or backward, the pad moves with you, ensuring constant pressure and support on your lower spine. It is an exceptional tool for posture correction.

    Top Contender 3: Ticova Ergonomic Office Chair

    For illustrative purposes only. Model: Ticova Ergonomic Office Chair

    If you are on a tight budget but desperately need immediate relief from lower back pain, the Ticova Ergonomic Chair is widely considered the undisputed king of entry-level ergonomic seating on Amazon US.

    Features and Relief

    While most chairs under $150 compromise heavily on adjustability and build quality, Ticova packs an incredible amount of custom ergonomic support into an affordable package. Instead of a full-mesh seat pan—which can feel too firm on budget models—it pairs a highly breathable mesh backrest with a 3-inch thick, high-density shaping foam seat cushion. This cushion is contoured to distribute your weight evenly and relieve pressure on your hips during extended gaming sessions.

    Feature Comparison

    Chair ModelMaterial StyleLumbar SupportArmrestsPrice Bracket
    Secretlab Titan EvoSoftWeave / PUInternal 4-Way4D MagneticPremium
    Sihoo Doro C300Full MeshDynamic Tracking3D AdjustableUnder $300
    Ticova ErgonomicMesh / FoamManual Adjustable3D AdjustableUnder $150

    Frequently Asked Questions (FAQ)

    What are 4D Armrests?

    4D armrests can be adjusted in four directions: up/down, forward/backward, left/right (width), and they can pivot inwards or outwards. This ensures your elbows are always supported at a 90-degree angle, reducing strain on your shoulders and neck.

    How do I know what size chair to buy?

    Always check the manufacturer’s height and weight recommendations. A chair that is too large will hit the back of your knees, cutting off circulation. A chair too small will not support your upper shoulders.

    🔗 Related on TechPlayGrid

    Final Verdict

    If you have the budget and want a chair that looks incredible while supporting your back, the Secretlab Titan Evo remains a top-tier choice. However, if you are actively suffering from lower back pain and need maximum breathability and dynamic support, the Sihoo Doro C300 provides unbeatable ergonomic value for the price.

    Tags: Ergonomic Chair, Gaming Chair, Back Pain, Secretlab Titan, Sihoo Doro, Posture

    Meta Description: Find the best new ergonomic chairs for back pain relief. We compare mesh vs PU leather models from Secretlab and Sihoo to complete your ultimate gaming setup.

    Summary: A health-focused buying guide evaluating the best ergonomic seating options for gamers and remote workers. We break down the differences in materials, debunk racing chair myths, and highlight models that provide genuine back pain relief.

  • Wooting vs Razer: Best for New Pros

    Wooting vs Razer: Best for New Pros

    Introduction: The Rapid Trigger Revolution

    If you want to dominate in competitive tactical shooters like Valorant or Counter-Strike 2, relying on a standard mechanical keyboard is no longer enough. The new standard for esports professionals and aspiring ranked grinders is magnetic switches, specifically those equipped with Rapid Trigger technology. But when it comes to finding the absolute best performance for your desk, the conversation almost always boils down to a heavyweight matchup: the Wooting 80HE vs the Razer Huntsman V3 Pro.

    In this comprehensive guide, we will break down everything you need to know about these two titans. We will look at their switch technology, software capabilities, build quality, and how they fit into the ultimate gaming setup in 2026.

    ⚠️ Affiliate Disclosure: TechPlayGrid is reader-supported. When you buy through links on our site, we may earn an affiliate commission at no extra cost to you.

    What is Rapid Trigger Technology?

    Video credit: rtings.com

    Before diving into the comparison, it is crucial to understand what you are paying for. Traditional mechanical switches actuate (register a keypress) at a fixed point and must travel back up past a specific reset point before you can press the key again.

    Rapid Trigger changes the game entirely. Using Hall Effect (magnetic) sensors, the keyboard constantly tracks the exact physical depth of the switch. The moment you start lifting your finger, the key resets. The moment you press down again, it actuates. This allows for near-instantaneous strafing, counter-strafing, and movement adjustments, which are critical in games where stopping perfectly still is required for accurate shooting.

    Deep Dive: Wooting 80HE

    The Wooting 80HE represents the pinnacle of community-driven keyboard design. Following the massive success of the 60HE, Wooting introduced the 80% layout (TKL without the wasted space) to cater to gamers who still need arrow keys and function rows.

    Performance and Switches

    The 80HE utilizes the Lekker magnetic switches. These switches offer an actuation range from 0.1mm to 4.0mm, adjustable per key. The tracking is incredibly smooth, and with an 8000Hz polling rate, the input delay is virtually nonexistent.

    The Software: Wootility

    Wooting’s biggest advantage is its software. Wootility is entirely web-based, meaning you do not need to install bloatware on your PC to configure your keyboard. You can adjust actuation curves, set up advanced macros, and save profiles directly to the keyboard’s onboard memory in seconds.

    👉 You can find the Wooting 80HE in Wooting

    Deep Dive: Razer Huntsman V3 Pro

    Razer has been a staple in the peripheral market for decades, and the Huntsman V3 Pro is their definitive answer to the Hall Effect trend. Available in full-size, TKL, and Mini, it targets the premium gamer who wants high performance straight out of the box.

    Performance and Switches

    Razer uses its Analog Optical Gen-2 switches. While they use light instead of magnets to measure distance, the end result is the same: fully functional Rapid Trigger and adjustable actuation (from 0.1mm to 4.0mm).

    Design and Extras

    Where Razer shines is the physical hardware extras. The Huntsman V3 Pro features a beautiful brushed aluminum top plate, dedicated media controls (including a very satisfying multi-function dial), and a magnetic wrist rest. It looks and feels like a premium product sitting on your desk.

    👉 Razer Huntsman V3 Pro — Amazon US

    Head-to-Head Comparison

    FeatureWooting 80HERazer Huntsman V3 Pro
    Switch TechnologyLekker Magnetic (Hall Effect)Analog Optical Gen-2
    Polling Rate8000Hz1000Hz
    Form Factor80% (Compact TKL)Full, TKL, or 60% Mini
    SoftwareWeb-based (Wootility)Razer Synapse (Installed)
    AestheticsMinimalist, highly customizableGamer-focused, RGB heavy
    Where to Buy[Amazon US Link Placeholder][Amazon US Link Placeholder]

    Pros and Cons

    Wooting 80HE

    • Pros: Industry-leading web software, 8000Hz polling, highly moddable, incredible community support.
    • Cons: Often on backorder, minimalist design might not appeal to everyone.

    Razer Huntsman V3 Pro

    • Pros: Widely available, excellent media controls, premium wrist rest, solid build quality.
    • Cons: Razer Synapse software can be heavy, non-standard bottom row makes custom keycaps tricky.

    Frequently Asked Questions (FAQ)

    Does Rapid Trigger actually make you a better gamer?

    While a keyboard cannot give you better game sense, Rapid Trigger objectively lowers the mechanical latency between your brain deciding to stop moving and your in-game character actually stopping. In tactical shooters, this translates to more accurate first shots.

    Can I use these keyboards for typing and office work?

    Yes! Both keyboards allow you to set different profiles. You can have a “Gaming Profile” with a hyper-sensitive 0.1mm actuation, and a “Typing Profile” with a standard 2.0mm actuation to prevent typos.

    Final Verdict: Which One Should You Buy?

    If you are looking for the absolute highest technical ceiling, love modifying your gear, and want the best software experience, the Wooting 80HE is the undisputed king. However, if you prefer the convenience of buying from Amazon today, want a premium unboxing experience with dedicated media controls, and don’t want to deal with wait times, the Razer Huntsman V3 Pro is an exceptional alternative.

    ⚠️ Affiliate Disclosure: TechPlayGrid is reader-supported. When you buy through links on our site, we may earn an affiliate commission at no extra cost to you.

    Tags: Rapid Trigger, Gaming Keyboard, Wooting 80HE, Razer Huntsman, PC Gaming, Valorant Setup

    Meta Description: Wooting 80HE vs Razer Huntsman V3 Pro: Which rapid trigger keyboard is best for new pros? Compare specs, performance, and features for your 2026 setup.

    Summary: An in-depth comparison of the market’s leading rapid trigger keyboards. We break down the technology behind magnetic and optical switches, analyze software performance, and help competitive gamers choose the ultimate keyboard for their setup.

  • Is the Xbox Series S Worth It in 2026? No Fluff Review

    Is the Xbox Series S Worth It in 2026? No Fluff Review


    The Xbox Series S is the cheapest current-gen console on the market. At $299, it costs $200 less than an Xbox Series X and $200 less than a PS5 Digital. Microsoft calls it the best value in gaming. Critics call it a disc-less, underpowered, storage-starved compromise.

    Both are partially right. Whether the Xbox Series S is worth it in 2026 depends entirely on your situation — and this guide gives you the unfiltered answer based on what the console actually delivers, not what the marketing promises.

    ⚠️ Affiliate Disclosure: TechPlayGrid is reader-supported. When you buy through links on our site, we may earn an affiliate commission at no extra cost to you.


    🎮 What the Xbox Series S Actually Is

    For illustrative purposes only. Model: Xbox Series S

    The Series S is a digital-only, 1440p-targeted console built for performance mode gaming rather than maximum resolution. Microsoft deliberately designed it to prioritize frame rate over visual fidelity — a trade-off that works brilliantly in some scenarios and frustratingly in others.

    Core Specs

    ComponentXbox Series SXbox Series X
    CPUAMD Zen 2 (8 cores, 3.6GHz)AMD Zen 2 (8 cores, 3.8GHz)
    GPU4 TFLOPS RDNA 212 TFLOPS RDNA 2
    RAM10GB GDDR616GB GDDR6
    Target Resolution1440p (upscaled to 4K)4K native
    Frame Rate Target60–120 FPS60–120 FPS
    Storage512GB NVMe SSD1TB NVMe SSD
    Physical Disc❌ None✅ Yes
    Price$299$499

    The Series S has one-third the GPU power of the Series X. That gap matters — but not in the way most people assume.


    ✅ Where the Xbox Series S Genuinely Excels

    Fast Loading and SSD Performance

    Both the Series S and Series X use Microsoft’s custom NVMe SSD, and the loading experience is effectively identical. Games that took 45–90 seconds to load on Xbox One load in 2–5 seconds on the Series S. This is a genuine generational leap and it’s present even on the cheaper console.

    Game Pass Value

    The Xbox Series S is purpose-built for Xbox Game Pass. With Game Pass Ultimate, you get access to hundreds of games — and because the Series S never needs to store games permanently (you can delete and re-download), the smaller SSD matters less than it initially appears. Game Pass + Series S is the most cost-efficient way to play a large volume of console games in 2026.

    👉 Xbox Series S Console — Amazon US 👉 Xbox Game Pass Ultimate — Amazon US (Gift Cards) or maybe the Xbox Series X Console is for you

    120 FPS Gaming

    Like the Series X, the Series S supports 120 FPS output — and in many titles, it hits it at 1080p or 1440p when set to Performance Mode. For fast-paced games like Halo, Fortnite, Rocket League, and Call of Duty, 120 FPS on a 144Hz monitor is genuinely excellent. This is something the previous generation (Xbox One X, PS4 Pro) couldn’t deliver.

    Size and Portability

    At 275mm × 151mm × 64mm and roughly 1.93kg, the Series S is dramatically smaller than any other current-gen console. It fits in a backpack, on any desk, and in any entertainment cabinet. For students, shared housing, or a second gaming room, the form factor is a genuine advantage.


    ⚠️ Where the Xbox Series S Falls Short

    The Storage Problem Is Real

    512GB sounds like enough until you install 3–4 modern games. Call of Duty: Warzone alone exceeds 100GB. Red Dead Redemption 2 is 150GB. You will fill the internal SSD within weeks if you own more than a handful of games.

    The solution: Seagate Storage Expansion Card (official expansion that slots into the back of the console and extends storage at full NVMe speed).

    👉 Seagate 1TB Storage Expansion Card for Xbox Series X/S — Amazon US

    This is not optional for anyone who owns more than 3–4 modern games. Factor the ~$100–$120 cost into your Series S budget.

    Visual Downgrades Are Noticeable in Demanding Games

    The GPU gap between Series S and Series X/PS5 forces developers to make compromises on the S specifically. This shows up as lower texture quality, reduced draw distances, and in some cases, lower or more inconsistent frame rates in demanding titles.

    Games that run noticeably better on Series X or PS5 include: Cyberpunk 2077, Red Dead Redemption 2, Forza Horizon 5 (4K mode), and Alan Wake 2. Games where the difference is minimal or non-existent: Fortnite, Halo Infinite, Game Pass titles optimized for performance, and older generation games running via backward compatibility.

    No Physical Disc Drive — A Growing Limitation

    As digital storefronts dominate and physical games become less common, this matters less over time. However, you can’t buy used physical games, can’t access physical game collections, and can’t use game rentals. If you own a physical collection or value game ownership flexibility, this is a genuine limitation.

    Some Multiplayer Games Have Had Parity Issues

    A small number of games released slower on Series S or with reduced features because of memory constraints. While Microsoft has pushed back on developers who refuse Series S parity, this remains a consideration for players who always want day-one access to the highest-fidelity version.


    🎯 Who Should Buy the Xbox Series S in 2026

    Xbox Series S

    ✅ Buy the Series S if:

    • You’re primarily a Game Pass player and don’t have a large physical game library
    • You want 120 FPS gaming at 1080p–1440p without spending $500
    • You primarily play competitive multiplayer games (Halo, Fortnite, COD, Rocket League) where frame rate matters more than resolution
    • You want a secondary console for a bedroom, dorm, or travel
    • Budget is a hard constraint and the alternative is no new console at all

    ❌ Skip the Series S if:

    • You want 4K native gaming with maximum visual fidelity
    • You own a large physical disc collection
    • You play storage-heavy games (COD, RDR2, Forza) and don’t want to manage an SSD constantly
    • You can save another $100–$200 for a Series X or PS5 — both offer significantly more headroom

    💻 Best Accessories for the Xbox Series S

    Essential: Storage Expansion

    👉 Seagate 1TB Storage Expansion Card for Xbox Series S — Amazon US

    Non-negotiable for anyone owning 5+ games. Doubles your storage at full NVMe speed.

    Recommended: Extra Controller

    👉 Xbox Wireless Controller — Amazon US

    The Series S comes with one controller. For couch co-op gaming, the second controller is the first accessory to add.

    Recommended: Best Monitor for Series S

    The Series S targets 1440p output, making it a natural pair for a 1440p 144Hz monitor — which is also what we recommend for PC gaming. Check our full monitor guide for the best pairings:

    👉 Best 144Hz Monitor Under $300 for PS5 and Xbox (2026)

    Optional: Headset

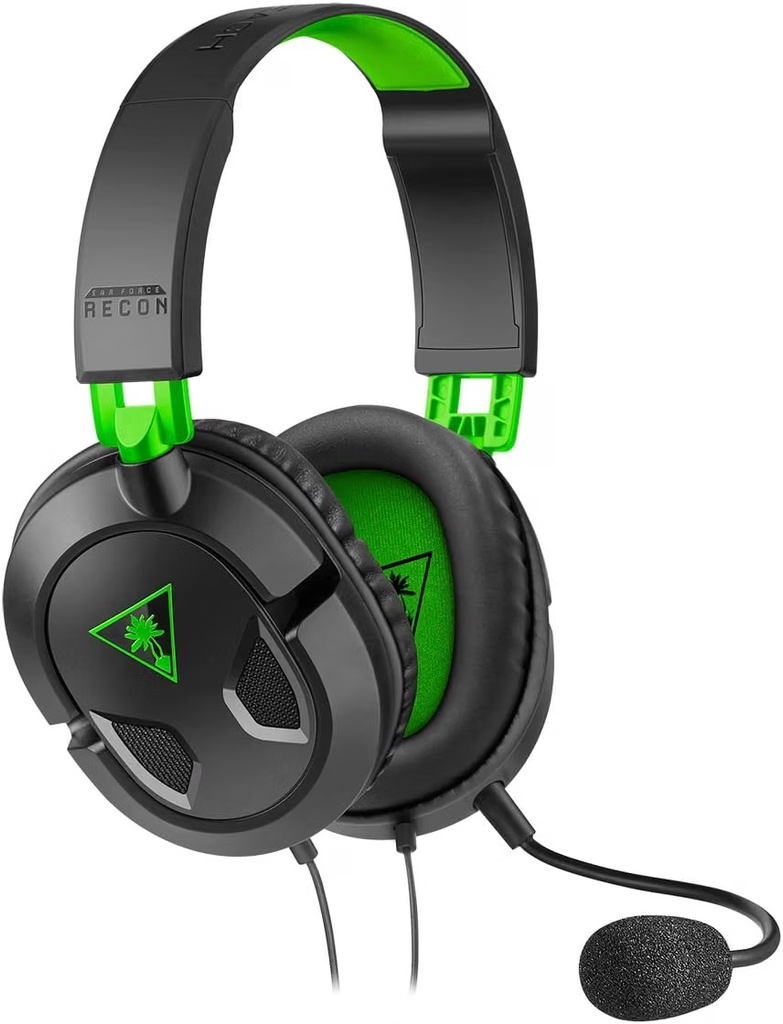
    👉 Best Wireless Headset Under $100 — No Dongle (PS5 and Xbox)


    📊 Xbox Series S vs Alternatives at a Glance

    ConsolePriceDisc DriveTarget ResBest For
    Xbox Series S$2991440pGame Pass, budget, FPS gaming
    Xbox Series X$4994KMaximum Xbox performance
    PS5 Digital$4494KPlayStation exclusives, value
    Nintendo Switch 2$449✅ Cartridge4K dock / 1080p handheldPortability + Nintendo exclusives

    🔗 Related on TechPlayGrid


    ❓ FAQ

    Is the Xbox Series S powerful enough for 2026 games? For most games, yes — especially at 1080p-1440p with Performance Mode enabled. The GPU gap with Series X/PS5 shows in graphically demanding open-world titles but has minimal impact in competitive games, sports titles, and most Game Pass offerings.

    Does Xbox Series S support 4K? It outputs up to 4K via upscaling, but doesn’t render games natively at 4K. Its target resolution is 1440p, with upscaling to 4K on compatible displays. True native 4K requires the Series X.

    Do I need to buy the storage expansion card? For most players, yes. 512GB fills up fast with modern games. Budget an additional $100–$120 for the Seagate 1TB expansion card when calculating total cost.

    Can I play Xbox One discs on the Series S? No. The Series S has no disc drive. However, you can play all digital Xbox One games you own through your Microsoft account.

    Is Xbox Game Pass worth it with the Series S? This combination is one of the best value propositions in gaming right now. Game Pass Ultimate gives access to hundreds of games for a monthly fee, and the Series S’s small SSD matters less when you can freely download and delete from a large library.


    Last updated: August 2026 | Price verified on Amazon US

    ⚠️ Affiliate Disclosure: TechPlayGrid participates in the Amazon Associates Program and other affiliate programs. We earn a commission on qualifying purchases at no extra cost to you.


    🏷️ SEO Metadata

    Title: Is the Xbox Series S Worth It in 2026? No Fluff Review

    Meta Description: Is the Xbox Series S worth buying in 2026? This honest review covers what it does well, where it falls short, and who should (and shouldn’t) buy it. No hype, no fluff.

    Tags: xbox series s worth it 2026, xbox series s review honest, xbox series s vs series x, xbox series s game pass, xbox series s storage problem, is xbox series s good 2026, xbox series s pros cons

    Post Summary: At $299, the Xbox Series S is the cheapest way into current-gen console gaming in 2026 — but it comes with real trade-offs that some buyers discover too late. This honest review covers what the Series S genuinely delivers (Game Pass value, 120 FPS gaming, SSD loading speeds, compact size) and where it falls short (512GB storage, one-third the GPU power of Series X, no disc drive, visual downgrades in demanding games). A clear guide on who should buy it and who should save for a Series X or PS5, with affiliate-linked accessories including the essential Seagate storage expansion card.

  • Melhor Notebook Gamer até R$4.000 em 2026 — Custo-Benefício Real

    Melhor Notebook Gamer até R$4.000 em 2026 — Custo-Benefício Real


    R$4.000 ($500 se você está lendo em inglês) é o ponto de inflexão mais importante do mercado de notebooks gamer em 2026. Abaixo dessa faixa, as concessões são pesadas: placas de vídeo fracas, telas de 60Hz, armazenamento mínimo. Acima dela, você começa a pagar caro por ganhos marginais.

    Com R$4.000 ($500), você consegue RTX 4050 ou até RTX 4060 dependendo da promoção, 16GB de RAM DDR5, tela de 144Hz Full HD e SSD NVMe. A pergunta certa não é “dá pra comprar um bom notebook gamer com R$4.000 ($500)?” — é “qual deles comprar?”

    Este guia responde isso com produtos verificados na Amazon.com.br e na KaBuM em agosto de 2026.

    ⚠️ Aviso de Afiliados: O TechPlayGrid é financiado pelos leitores. Quando você compra através dos nossos links, podemos ganhar uma comissão sem custo extra para você.

    Lembre-se, os produtos sugeridos aqui estão sujeitos aos estoques das lojas e os preços podem sofrer variações após a publicação dessa postagem.


    🔬 O que Realmente Importa nas Especificações

    Antes de ver qualquer modelo, entenda o que diferencia um bom notebook gamer de um com ficha técnica inflada.

    GPU — o componente mais importante

    PlacaDesempenho em 1080pPara quem é
    RTX 4050 (6GB GDDR6)60+ FPS em jogos AAA no médio-altoMelhor custo-benefício até R$4.000
    RTX 4060 (8GB GDDR6)60+ FPS no ultra, fôlego para 1440pTopo da faixa R$3.800–R$4.500
    RTX 3050 / GTX 165060 FPS apenas em configurações médiasEvite — já está ficando obsoleto

    TGP — o detalhe que a ficha técnica esconde

    Dois notebooks com a mesma RTX 4060 podem ter desempenhos completamente diferentes. O TGP (Total Graphics Power) define quanto de energia a GPU pode consumir — um RTX 4060 com TGP de 80W performa muito abaixo de um com 115W. Sempre pesquise o TGP do modelo específico antes de comprar.

    RAM — dual-channel ou nada

    Notebooks que saem de fábrica com 16GB em um único pente (single-channel) perdem até 20% de performance em jogos comparado ao dual-channel. Prefira modelos com 2×8GB ou considere adicionar um segundo pente após a compra.

    Tela — 144Hz é o mínimo

    Em 2026, tela de 60Hz em notebook gamer é inaceitável. O mínimo é 144Hz Full HD. Telas IPS têm ângulos de visão superiores a painéis TN — priorize IPS ou Fast IPS.


    🏆 Melhores Notebooks Gamer até R$4.000 (Amazon.com.br e KaBuM, Agosto 2026)


    🥇 Melhor Custo-Benefício Geral — Lenovo LOQ 15 (RTX 4050, Ryzen 5)

    Imagem meramente ilustrativa: Modelo: LeNovo LOQ 15

    O Lenovo LOQ é a recomendação mais consistente do mercado brasileiro para a faixa de entrada-intermediária em 2026. Combina RTX 4050 com 16GB DDR5, tela de 144Hz e o AI Engine+ da Lenovo para otimização automática de performance. A build quality é notavelmente robusta para o preço — o chassi é de metal reforçado, diferente de plástico flexível comum nos concorrentes diretos.

    SpecDetalhe
    ProcessadorAMD Ryzen 5 7235HS (8 núcleos, até 4.5GHz)
    Placa de VídeoNVIDIA GeForce RTX 4050 6GB GDDR6
    RAM16GB DDR5
    Armazenamento512GB SSD NVMe PCIe 4.0
    Tela15.6″ Full HD 144Hz
    PortasUSB-C (PD + DisplayPort), HDMI 2.1, RJ-45, 2× USB-A
    Peso~2.4kg
    Faixa de preçoR$3.300–R$3.800

    Performance estimada em jogos (1080p):

    • Fortnite (Modo Performance): 120+ FPS
    • Valorant (Configurações baixas): 200+ FPS
    • Cyberpunk 2077 (Médio, DLSS): 55–65 FPS
    • Elden Ring (Médio): 55–60 FPS

    👉 Lenovo LOQ 15 RTX 4050 — KaBuM 👉 Lenovo LOQ 15 RTX 4050 — Amazon.com.br

    Prós: Qualidade de construção superior ao HP e Acer na mesma faixa, carregamento USB-C, AI Engine+ funciona, bom sistema de resfriamento Contras: 512GB de armazenamento é apertado, ventilador ruidoso no modo performance máximo

    Melhor para: Quem quer a melhor relação de build quality e performance até R$3.800.


    🥈 Melhor Tela e Armazenamento — Acer Nitro V (RTX 4050, Intel Core i7)

    Imagem meramente ilustrativa. Modelo: Acer Nitro V

    O Nitro V é o favorito de quem prioriza tela e armazenamento. A principal diferença frente ao Lenovo LOQ: tela de 165Hz (melhor que o padrão de 144Hz) e 1TB de SSD de fábrica — o dobro do Lenovo. O sistema de resfriamento usa metal líquido no processador, o que mantém temperaturas mais baixas e consistentes em sessões longas.

    SpecDetalhe
    ProcessadorIntel Core i7-13620H (10 núcleos, até 4.9GHz)
    Placa de VídeoNVIDIA GeForce RTX 4050 6GB GDDR6
    RAM16GB DDR5
    Armazenamento1TB SSD Gen 4 NVMe
    Tela15.6″ Full HD 165Hz IPS
    Peso~2.3kg
    Faixa de preçoR$3.600–R$4.000

    👉 Acer Nitro V RTX 4050 — KaBuM 👉 Acer Nitro V RTX 4050 — Amazon.com.br

    Prós: Tela de 165Hz a mais que o padrão, 1TB de armazenamento, resfriamento com metal líquido, Intel i7 com bom desempenho em multitarefa Contras: Intel Core i7-13620H esquenta mais que o Ryzen equivalente, ventiladores mais barulhentos sob carga total

    Melhor para: Quem armazena muitos jogos e quer a tela mais fluida disponível nessa faixa de preço.


    🥉 Melhor se Encontrar em Promoção — Lenovo LOQ 15 com RTX 4060

    Imagem meramente ilustrativa. Modelo: LeNovo LOQ RTX 4060

    Quando o Lenovo LOQ com RTX 4060 entra em promoção na KaBuM ou Amazon.com.br (acontece com frequência durante o Julho Gamer e Black Friday), fica na faixa de R$3.800–R$4.200 — dentro ou muito próximo do teto de R$4.000. A RTX 4060 com 8GB GDDR6 é um salto significativo sobre a RTX 4050: melhor para jogos exigentes no ultra, DLSS 3 com Frame Generation, e maior fôlego para os próximos anos.

    SpecDetalhe
    ProcessadorAMD Ryzen 7 7435HS (8 núcleos, até 4.5GHz)
    Placa de VídeoNVIDIA GeForce RTX 4060 8GB GDDR6
    RAM16GB DDR5
    Armazenamento512GB SSD NVMe PCIe 4.0
    Tela15.6″ Full HD 144Hz
    PortasHDMI 2.1, USB-C, RJ-45
    Faixa de preçoR$3.800–R$4.500 (em promoção, próximo de R$4.000)

    👉 Lenovo LOQ 15 RTX 4060 — KaBuM 👉 Lenovo LOQ 15 RTX 4060 — Amazon.com.br

    💡 Dica Pro: Configure um alerta de preço na KaBuM para esse modelo. Quando cai para R$3.800–R$3.900, é uma das melhores compras disponíveis no mercado brasileiro de notebooks gamer.


    📊 Tabela Comparativa

    NotebookGPURAMTelaArmazenamentoFaixa de Preço
    Lenovo LOQ 15 (RTX 4050)RTX 4050 6GB16GB DDR5144Hz FHD512GBR$3.300–R$3.800
    Acer Nitro V (RTX 4050)RTX 4050 6GB16GB DDR5165Hz FHD1TBR$3.600–R$4.000
    Lenovo LOQ 15 (RTX 4060)RTX 4060 8GB16GB DDR5144Hz FHD512GBR$3.800–R$4.500

    🔧 O Upgrade que Vale a Pena Fazer Depois da Compra

    Todos os modelos acima saem de fábrica com um único pente de RAM (single-channel). Isso reduz o desempenho em jogos em até 20% comparado ao dual-channel. Por aproximadamente R$150–R$200, você adiciona um segundo pente de 16GB DDR5 na segunda entrada — 32GB dual-channel, performance notavelmente melhor, especialmente em jogos que usam bastante memória como GTA VI e Cyberpunk 2077.

    👉 Memória RAM 16GB DDR5 SO-DIMM — Amazon.com.br 👉 Memória RAM 16GB DDR5 — KaBuM


    🎒 Acessórios Recomendados para o Notebook Gamer

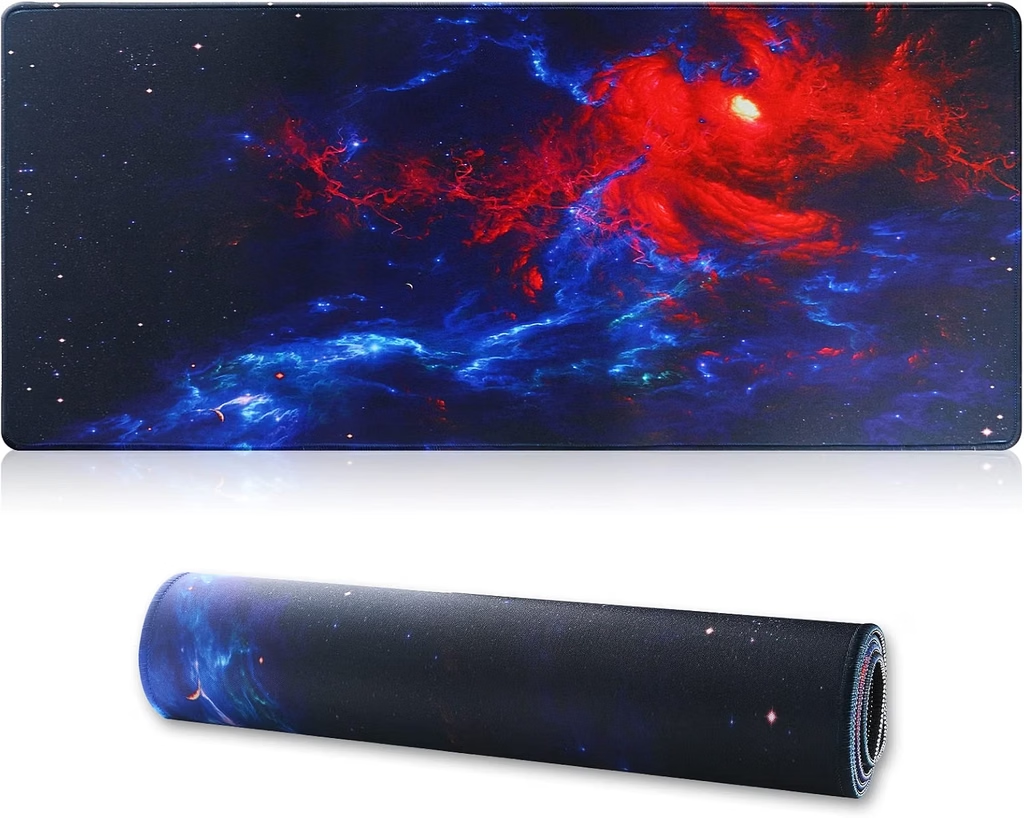
    Mousepad Extended (essencial para gaming de precisão)

    👉 Mousepad Extended Gamer — Amazon.com.br 👉 Mousepad Extended — KaBuM

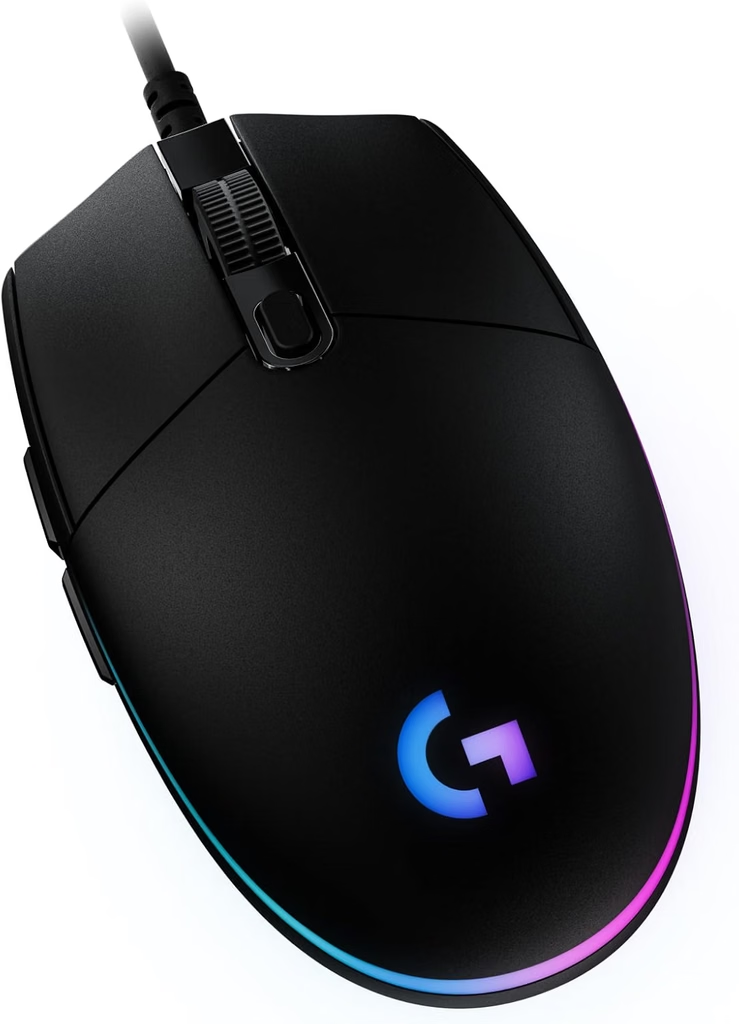
    Mouse Gamer sem Fio (Logitech G305)

    Já recomendado no nosso guia de setup gamer até R$2.000, o G305 é o mouse sem fio de melhor custo-benefício do Brasil.

    👉 Logitech G305 LIGHTSPEED — KaBuM

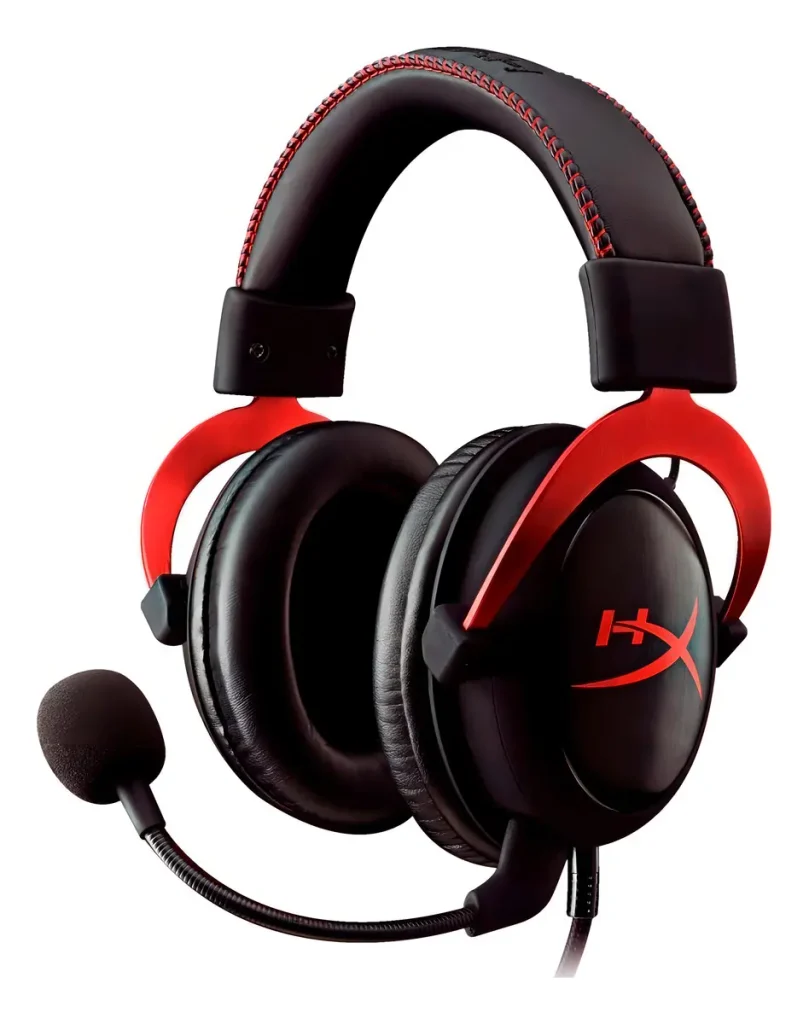
    Headset Gamer (HyperX Cloud Stinger 2)

    Para gaming competitivo com boa qualidade de áudio sem estourar o orçamento.

    👉 HyperX Cloud Stinger 2 — KaBuM 👉 HyperX Cloud Stinger 2 — Amazon.com.br


    🔗 Relacionados no TechPlayGrid


    ❓ FAQ

    RTX 4050 ainda vale a pena comprar em 2026? Sim, para 1080p em configurações médias a altas com DLSS ativado, a RTX 4050 entrega 60+ FPS em praticamente todos os jogos atuais. Para jogos competitivos como Valorant e CS2, alcança facilmente 200+ FPS nas configurações certas.

    Devo preferir Intel ou AMD nos notebooks gamer até R$4.000? Ambos são competitivos nessa faixa. Os AMD Ryzen (7235HS, 7435HS) tendem a ser mais eficientes termicamente e oferecem melhor autonomia de bateria. Os Intel Core i7 recentes têm desempenho ligeiramente superior em tarefas single-core. Para gaming, a diferença é mínima — priorize GPU, RAM e tela.

    512GB é suficiente para um notebook gamer em 2026? Depende de quantos jogos você tem instalados simultaneamente. Com 3–4 jogos modernos (cada um com 50–100GB) + sistema operacional, 512GB fica apertado. Ou compre o Nitro V com 1TB, ou adicione um SSD externo/segundo slot após a compra.

    Posso usar esses notebooks para trabalho e estudo além de gaming? Sim — todos os modelos com RTX 4050+ lidam bem com edição de vídeo no DaVinci Resolve, design no Photoshop e tarefas de programação. A RTX 4060 é visivelmente mais rápida para exportações e renderização.

    Vale mais a pena comprar na KaBuM ou Amazon.com.br? Compare sempre antes de finalizar. A KaBuM costuma ter melhores preços em hardware de PC e notebooks gamer, especialmente com cupons e desconto no Pix. A Amazon.com.br às vezes tem promoções relâmpago competitivas. Verifique os dois antes de fechar a compra.


    Última atualização: agosto de 2026 | Produtos verificados na Amazon.com.br e KaBuM

    ⚠️ Aviso de Afiliados: O TechPlayGrid participa dos programas de afiliados da Amazon.com.br e do KaBuM. Ganhamos comissão em compras qualificadas sem custo extra para você.


    🏷️ Metadados SEO

    Título: Melhor Notebook Gamer até R$4.000 em 2026 — Custo-Benefício Real

    Meta Descrição: Qual o melhor notebook gamer até R$4.000 em 2026? Testamos e comparamos os melhores modelos com RTX 4050 e 4060 disponíveis no KaBuM e Amazon.com.br agora.

    Tags: melhor notebook gamer até 4000 reais, notebook gamer rtx 4050 brasil, lenovo loq rtx 4050 kabum, acer nitro v rtx 4050 amazon brasil, notebook gamer 2026 custo beneficio, melhor notebook gamer 2026, notebook gamer até 4000 reais 2026

    Parágrafo de Resumo: R$4.000 é a faixa certa para entrar de verdade no gaming portátil em 2026 no Brasil. Este guia apresenta os três melhores notebooks gamer nessa faixa com produtos verificados no KaBuM e na Amazon.com.br: Lenovo LOQ 15 com RTX 4050 (melhor custo-benefício geral, R$3.300–R$3.800), Acer Nitro V com RTX 4050 (tela de 165Hz e 1TB de armazenamento, R$3.600–R$4.000) e Lenovo LOQ 15 com RTX 4060 (melhor desempenho quando em promoção próximo de R$4.000). Inclui explicação sobre TGP, o upgrade de dual-channel RAM que melhora a performance em até 20%, e recomendações de acessórios complementares.

  • Best Fix for Fortnite Ping (No New Router Under $50)

    Best Fix for Fortnite Ping (No New Router Under $50)

    Nothing is more frustrating than dropping into a match, gathering your favorite loot, and suddenly teleporting straight into an enemy’s crosshairs because of a lag spike. High ping can ruin your competitive experience, but you do not always need to spend money to solve it.

    Before you rush to buy expensive gear, try these software and system tweaks to stabilize your connection.

    ⚠️ Affiliate Disclosure: TechPlayGrid is reader-supported. When you buy through links on our site, we may earn an affiliate commission at no extra cost to you.

    Quick Fortnite Settings to Lower Ping

    Photo credit: Fortnite website. For illustrative purposes only.

    Your first stop should always be the in-game settings. Sometimes, the game itself is routing you inefficiently.

    Choose the Right Matchmaking Region

    Fortnite usually sets your server region to “Auto,” which is supposed to connect you to the closest server. However, during off-peak hours, it might route you to a server further away to find a match faster.

    1. Open the Settings menu in Fortnite.
    2. Go to the Game tab (the gear icon).
    3. Under Language & Region, manually select the server with the lowest “ms” number.

    Close Bandwidth-Heavy Background Apps

    Your game might be competing for bandwidth with other applications on your PC. Web browsers with dozens of tabs, game launchers downloading updates in the background, and voice chat software can cause major lag.

    Pro Tip: If you use Discord to communicate with your squad and notice performance drops, make sure to read our complete guide on how to fix Discord lag while gaming to keep your system running smoothly.

    Optimize Your Current Connection

    You can make your existing internet setup more efficient without touching a single cable.

    Flush Your DNS

    Clearing your PC’s network cache can force a fresh, faster route to the Epic Games servers.

    1. Type cmd in your Windows search bar, right-click, and select Run as administrator.
    2. Type ipconfig /flushdns and press Enter.

    Switch to a Public DNS

    Sometimes, your internet provider’s default DNS is slow. Switching to Google’s public DNS can reduce your ping slightly. Go to your Windows Network Settings, find your adapter properties, and change the IPv4 DNS servers to 8.8.8.8 and 8.8.4.4.

    When You Actually Need Hardware Upgrades

    If you have tried the steps above and your ping is still holding you back, your local hardware might be the bottleneck. Here is what to look for on Amazon US if you decide to upgrade.

    Get the Best Ethernet Cable Under $15

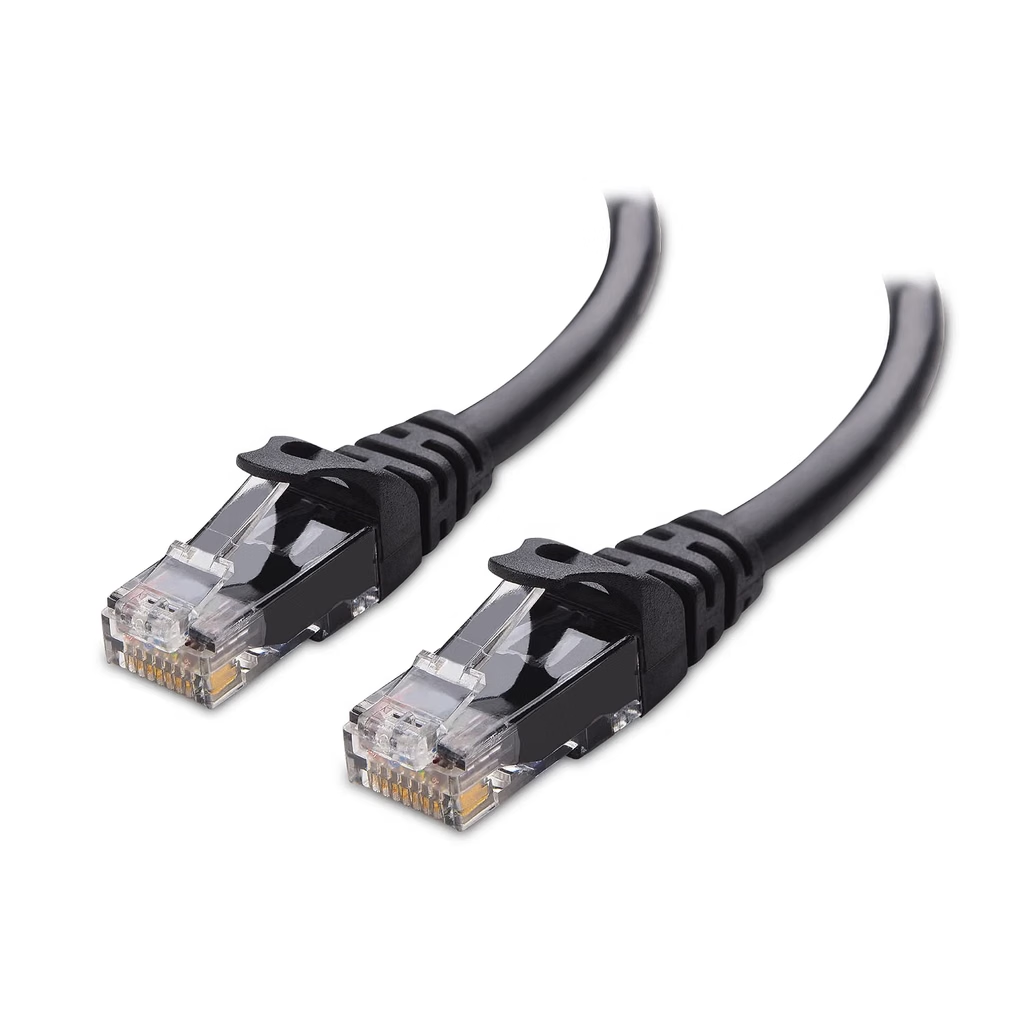
    The absolute best fix for high ping is getting off Wi-Fi. A wired connection is immune to wireless interference. You do not need anything expensive. The Amazon Basics RJ45 Cat-6 Ethernet Cable or the UGREEN Cat 6 Ethernet Cable are both highly rated, consistently in stock on Amazon US, and will deliver zero packet loss for under $15.

    Consider a Budget Gaming Router

    Photo credit: Fortnite website. For illustrative purposes only.

    If you absolutely must use Wi-Fi (for example, if your console or PC is too far from the modem), and your router is more than 5 years old, an upgrade might be necessary. Look for routers with Wi-Fi 6 technology. The TP-Link Archer AX21 (AX1800) is a proven best-seller on Amazon US that offers excellent traffic prioritization for gaming without breaking the bank.

    While a stable connection fixes your network delay, having a smooth visual experience is just as important. Check out our recommendations for the best 144Hz monitors under budget to ensure you see every frame clearly.

  • Best Budget PC Controller Under $50 — No Drift (2026)

    Best Budget PC Controller Under $50 — No Drift (2026)


    For years, buying a budget PC controller meant accepting one unavoidable tradeoff: stick drift. The potentiometer-based joysticks used in most controllers — including the official Xbox and PlayStation pads — wear out over time and start registering phantom inputs. It’s annoying in single-player games. It’s game-breaking in competitive ones.

    In 2026, that tradeoff is gone. Hall effect technology, once locked behind enterprise-grade and high-end gaming peripherals, has finally trickled down to the sub-$50 market. You can now grab drift-resistant, wireless, programmable gamepads for less than a new AAA game, with performance that matches controllers costing twice as much.

    This guide covers the best budget PC controllers under $50 with Hall effect sticks — all verified on Amazon US as of July 2026, all drift-proof by design.

    ⚠️ Affiliate Disclosure: TechPlayGrid is reader-supported. When you buy through links on our site, we may earn an affiliate commission at no extra cost to you.


    🤔 Why Hall Effect Sticks Are the Only Thing That Matters in 2026

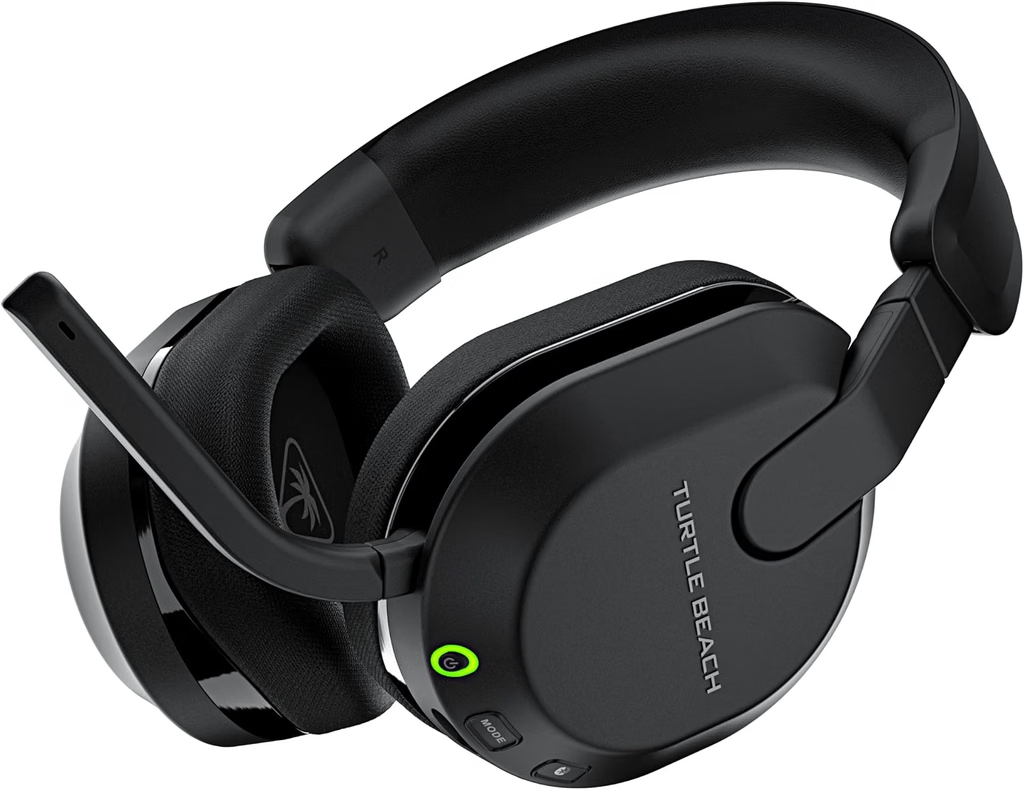
    Photo credit: https://www.turtlebeach.com/blog. For illustrative purposes only.

    Before jumping into picks, here’s the one spec you need to understand.

    Traditional Potentiometer Sticks (Most Controllers)

    Standard joysticks use a resistive contact between a wiper and a carbon track. Every movement wears down that contact. Nearly all $70+ controllers still use potentiometer sticks that eventually drift. Several sub-$50 controllers have already switched to Hall Effect technology — and that makes them better long-term investments than official gamepads at twice the price.

    Hall Effect Sticks (The New Standard)

    Hall effect joysticks use magnets and a sensor instead of physical contacts. There is no surface-to-surface wear. The stick reads position from the magnetic field without touching anything.

    FeaturePotentiometer SticksHall Effect Sticks
    How it worksResistive contact (wears down)Magnetic field (no contact)
    Drift riskHigh after 6–18 months of heavy useVirtually zero
    Used inXbox Core, DualSense, most budget padsGameSir, GuliKit, 8BitDo (2026)
    Lifespan2–4 years (heavy use)5–10+ years
    Price premiumNear-zero in 2026 sub-$50 market

    💡 Pro Tip: If you’ve ever had a PS5 DualSense drift, you experienced potentiometer failure firsthand. Our PS5 Controller Drift guide covers the fixes — but with Hall effect controllers, that guide becomes irrelevant. The drift never happens.


    🏆 Best Budget PC Controllers Under $50 — No Drift (Amazon US, July 2026)


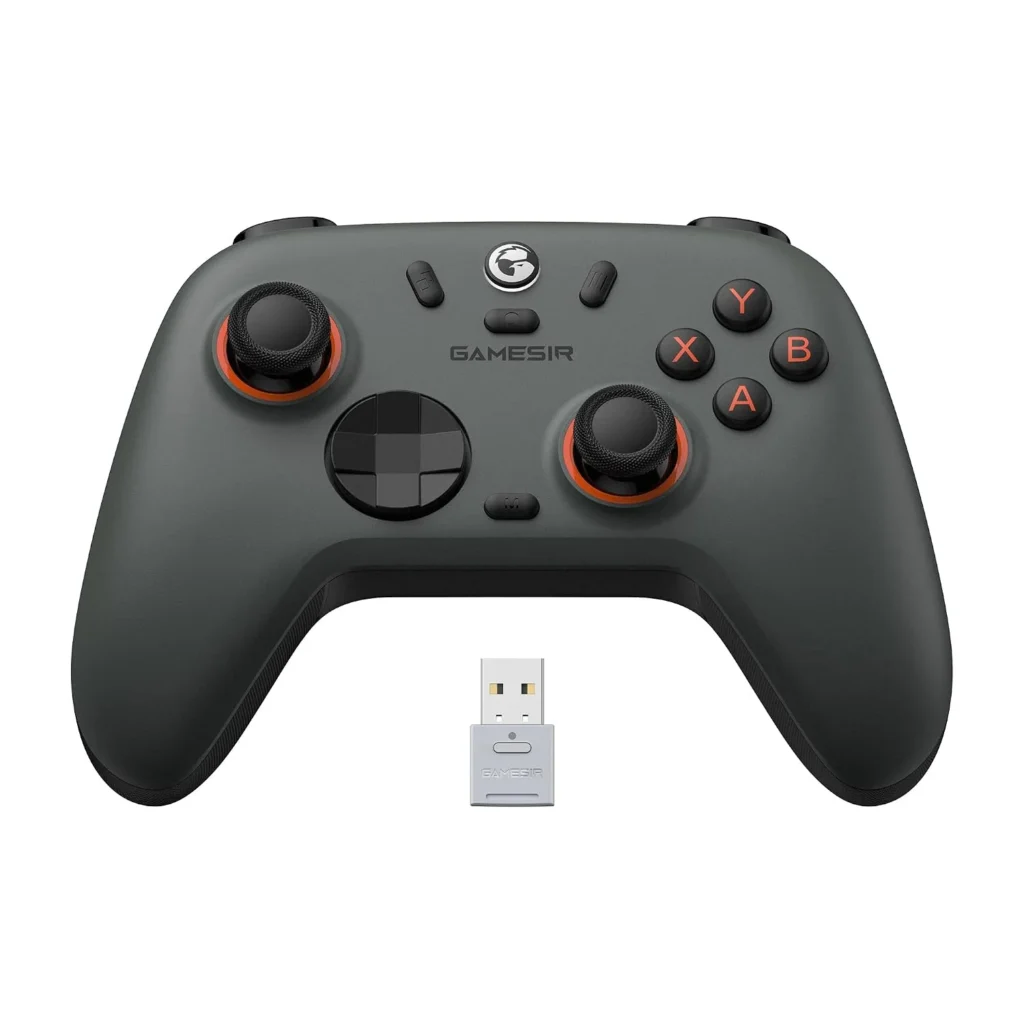
    🥇 Best Overall — GameSir Nova Lite 2

    For illustrative purposes only. Model: GameSir Nova Lite 2

    👉 GameSir Nova Lite 2 — Amazon US

    Why it’s #1: The GameSir Nova Lite is the best budget controller for PC gaming, and that’s not just because it’s cheap. There are plenty of options in the sub-$30 price range, but few have as good a feature set. You get proper Hall effect thumbsticks, so stick drift will never be an issue. Plus, it comes with a low-latency 2.4GHz dongle, which is far more suitable for faster gaming than Bluetooth — which it also supports. The Nova Lite 2 builds on this with Hall effect triggers in addition to sticks, and a 1000Hz polling rate that matches premium controllers.

    SpecDetail
    Hall EffectSticks ✅ + Triggers ✅
    Connection2.4GHz dongle + Wired USB-C
    Polling Rate1000Hz (wired and wireless)
    Remappable Buttons✅ Yes
    PlatformPC / Switch / Steam Deck / Android
    Weight~205g
    Price Range~$27–$35

    Pros:

    • Hall effect on both sticks AND triggers — rare at this price
    • 1000Hz polling matches flagship controllers at 3–4x the cost
    • Triple connectivity: 2.4GHz dongle, USB-C wired, Bluetooth
    • Plug-and-play on Windows — no driver installation required
    • Remappable buttons via GameSir app

    Cons:

    • No gyroscope
    • Primarily a PC/Switch controller — not Xbox-native for console

    Best for: PC gamers who want the best performance per dollar and plan to use the controller for years without drift.


    🥈 Best Feature Set — GuliKit KK3 Max

    For illustrative purposes only. Model: GuliKit KK3 Max

    👉 GuliKit KK3 Max — Amazon US

    Why it’s here: The GuliKit KK3 Max is a “budget” PC and Nintendo Switch controller with magnetic thumbsticks, trigger locks, a comfortable layout, and a turbo button. At around $45–$50, it’s the most feature-rich controller under $50 on the market — and everything that makes it remarkable comes from GuliKit’s proprietary Hall effect technology.

    GuliKit KK3 Max is equipped with new-gen Hall magnetic joysticks with anti-stick drift and smooth control, with high precision at level 2200 for more delicate micro-control. The patented SmartTrigger technology lets you instantly switch between digital triggers for ultra-fast firing in FPS games, and analog triggers for pressure-sensitive control in racing games.

    SpecDetail
    Hall EffectSticks ✅ + Triggers ✅ (SmartTrigger)
    Connection2.4GHz HyperLink + Bluetooth + Wired
    Polling Rate1000Hz (wired and wireless)
    Back Paddles4 detachable metal paddles
    Gyroscope6-axis ✅
    PlatformSwitch / Switch 2 / PC / Android / iOS / Steam Deck
    Price Range~$45–$55

    Pros:

    • Best Hall effect implementation at this price (Level 2200 precision)
    • 4 detachable metal back paddles — feature usually found in $150+ elite controllers
    • SmartTrigger switchable between digital (FPS) and analog (racing) — no other controller under $100 does this
    • 6-axis gyroscope for motion aiming
    • Switch 2 Wake-Up function

    Cons:

    • Slightly above $50 at standard pricing (watch for sales)
    • More complex than casual gamers need

    Best for: Gamers who want elite features at a fraction of the cost — especially Switch 2 and PC hybrid setups.


    🥉 Best Wireless Value — 8BitDo Ultimate 2C

    For illustrative purposes only. Model: 8BitDo Ultimate 2C

    👉 8BitDo Ultimate 2C — Amazon US

    Why it’s here: The 8BitDo Ultimate 2C is the most impressive budget controller of 2026. It packs Hall Effect sticks and triggers, 2.4GHz wireless via dongle, USB-C charging, and compatibility with PC, Switch, and Android. Build quality feels closer to $70 than $40 — the face buttons have crisp tactile feedback and the grips are textured well. Input lag via USB averages 4.8ms. Via 2.4GHz dongle it’s 7.2ms. Both figures match or beat the Nintendo Switch Pro Controller at less than half the price.

    SpecDetail
    Hall EffectSticks ✅ + Triggers ✅
    Connection2.4GHz dongle + USB-C wired
    Polling Rate1000Hz
    Remappable BumpersL4/R4 extra bumpers ✅
    PlatformPC (Windows) / Android
    BatteryUSB-C rechargeable
    Price Range~$30–$40

    Pros:

    • Hall effect sticks and triggers — virtually zero drift risk
    • 1000Hz polling rate beats most $60–$80 controllers
    • Extra L4/R4 remappable bumpers
    • 8BitDo’s software (Ultimate Software) is best-in-class for button remapping
    • Extremely competitive pricing — frequently under $30 on sale

    Cons:

    • No Bluetooth (dongle only for wireless)
    • PC and Android only — no Nintendo Switch support on this specific model
    • No rumble in the 2C variant

    Best for: PC-only gamers who want the best wireless latency at the lowest possible price.


    🎯 Best Wired Budget Pick — GameSir G7 SE

    For illustrative purposes only. Model: GameSir G7 SE

    👉 GameSir G7 SE — Amazon US

    Why it’s here: The G7 SE solves the most critical pain point for budget buyers: stick drift. During our testing marathon, it showed zero signs of drift after 35 hours of simulated gameplay — something most sub-$40 controllers can’t claim. Customers praise the controller’s value for money as a budget-friendly Hall effect device. One customer notes it feels like an Xbox controller in their hands.

    If you don’t need wireless and want zero-latency wired performance, the G7 SE is the pick. It uses a standard Xbox layout, meaning Windows recognizes it instantly without any driver setup — the same plug-and-play experience as an official Xbox controller.

    SpecDetail
    Hall EffectSticks ✅
    ConnectionWired USB-A
    LayoutXbox-style (Windows native)
    Customizable Face Plates✅ Yes
    PlatformPC / Xbox
    Price Range~$35–$45

    Pros:

    • Wired means zero latency and no battery management
    • Xbox layout = instant Windows compatibility
    • Hall effect sticks eliminate drift entirely
    • Interchangeable face plates for personalization
    • Solid build quality for the price

    Cons:

    • Wired only — no wireless option
    • Triggers are standard potentiometer (not Hall effect on this model)

    Best for: Desk PC gamers who prefer a cable and want an Xbox-compatible controller without the Xbox price.


    💡 Honorable Mention — Xbox Core Controller

    For illustrative purposes only. Model: Xbox Core Controller

    👉 Xbox Core Wireless Controller — Amazon US

    A word on the “official” option: Our #1 pick for overall PC gaming in 2026 is the Xbox Core. It’s the best-supported controller on Windows, recognized by virtually every game, and the gold standard for layout comfort. However, at $60 and with standard potentiometer sticks, it costs more than every pick above while being more prone to drift. We include it here as a reference: if budget isn’t your concern and you want maximum game compatibility, it’s the safe choice. But for pure value and longevity, the Hall effect options above are objectively better investments.


    📊 Full Comparison Table

    ControllerHall EffectWirelessPolling RateBack PaddlesPlatformPrice
    GameSir Nova Lite 2Sticks + Triggers2.4GHz + BT1000HzPC/Switch/Android~$30
    GuliKit KK3 MaxSticks + Triggers2.4GHz + BT1000Hz✅ 4 paddlesPC/Switch 2/Android/iOS~$50
    8BitDo Ultimate 2CSticks + Triggers2.4GHz1000Hz✅ L4/R4PC/Android~$35
    GameSir G7 SESticks only❌ WiredNative USBPC/Xbox~$40
    Xbox Core❌ Standard✅ WirelessStandardPC/Xbox/PS5~$60

    🤔 Which Controller Should You Buy?

    • Best all-around under $35: → GameSir Nova Lite 2 — Hall effect sticks and triggers, 1000Hz, three connection modes
    • Best feature set under $50: → GuliKit KK3 Max — back paddles, SmartTrigger, gyro, Switch 2 compatible
    • Best pure wireless for PC: → 8BitDo Ultimate 2C — lowest latency at this price, 1000Hz dongle wireless
    • Best wired option: → GameSir G7 SE — Xbox layout, instant Windows compatibility, zero drift
    • Best if game compatibility is paramount: → Xbox Core Controller (accepts the drift risk for plug-and-play ubiquity)

    🎮 Which Games Need a Controller vs. Mouse and Keyboard?

    Not every game benefits from a controller. Here’s the quick guide:

    GenreController Better?Notes
    Platformers✅ YesAnalog movement is essential
    Fighting games✅ YesD-pad precision matters
    Racing games✅ YesAnalog triggers for throttle control
    Action-adventure / RPG✅ YesMore comfortable for long sessions
    FPS / TPS (competitive)❌ Mouse/KB winsAim assist helps on console, less so on PC
    Strategy / RTS❌ Mouse/KB winsClicking precision is fundamental
    Indie / casual✅ UsuallyDepends on the game

    🔗 Related on TechPlayGrid


    ❓ FAQ

    What is Hall effect and why does it prevent drift?

    Hall effect joysticks use magnets instead of physical resistive contacts. Nearly all $70+ controllers still use potentiometer sticks that eventually drift. Several sub-$50 controllers have switched to Hall Effect technology — making them better long-term investments than official gamepads at twice the price. Since there’s no surface wear, the sensor never degrades and drift never develops.

    Do Hall effect controllers work on all PC games?

    Yes — these controllers present themselves to Windows as standard XInput or DirectInput devices. Any game that supports a controller works with them. Some (like the GameSir G7 SE) use native Xbox layout for the broadest compatibility.

    Is 1000Hz polling rate actually noticeable in gaming?

    For competitive games, yes. Standard controllers poll at 125Hz (8ms delay). 1000Hz polling means 1ms delay — a significant reduction in input lag that’s perceptible in fast-paced games like Fortnite, Rocket League, or fighting games where frame-perfect inputs matter.

    Are budget controllers good for fighting games?

    Fighting game communities are embracing Hall effect controllers for tournaments because they eliminate stick drift accusations. The GameSir Nova Lite 2 and GuliKit KK3 Max are both used by competitive players specifically because of their reliable, accurate inputs.

    Can I use these controllers on Steam Deck?

    Yes — the GameSir Nova Lite 2, GuliKit KK3 Max, and 8BitDo Ultimate 2C all support Steam Deck either via 2.4GHz dongle or USB-C wired connection.

    Do these work with Nintendo Switch 2?

    The GuliKit KK3 Max specifically includes Switch 2 Wake-Up function and full Switch 2 compatibility. The GameSir Nova Lite 2 works with Switch via Bluetooth and its 2.4GHz dongle. The 8BitDo Ultimate 2C is PC/Android only.


    Last updated: July 2026 | Products verified on Amazon US

    ⚠️ Affiliate Disclosure: TechPlayGrid participates in the Amazon Associates Program and other affiliate programs. We earn a commission on qualifying purchases at no extra cost to you.


    🏷️ SEO Metadata

    Title : Best Budget PC Controller Under $50 — No Drift (2026)

    Meta Description: Best budget PC controllers under $50 with no drift in 2026 — Hall effect sticks, 1000Hz polling, wireless. All picks verified on Amazon US. No more stick drift ever.

    Tags: best budget pc controller 2026, gaming controller under 50, no drift pc controller, hall effect controller budget, gamesir nova lite 2, gulikit kk3 max, 8bitdo ultimate 2c, best cheap pc gamepad 2026

    Post Summary: In 2026, you no longer have to spend $60–$80 on an official Xbox or PlayStation controller to get a reliable, drift-free gaming experience on PC. Hall effect joystick technology has reached the sub-$50 market, and the options are genuinely impressive. This guide covers four verified picks on Amazon US — the GameSir Nova Lite 2 (best overall under $35), GuliKit KK3 Max (best feature set with back paddles and SmartTrigger under $50), 8BitDo Ultimate 2C (best wireless latency for PC-only gamers), and GameSir G7 SE (best wired Xbox-layout option) — all with Hall effect sticks that eliminate stick drift permanently by design.

  • Is a New 1440p Monitor Best for Nintendo Switch 2 Dock?

    Is a New 1440p Monitor Best for Nintendo Switch 2 Dock?


    The Nintendo Switch 2 is out, you have it docked, and now you’re staring at monitor options. The console outputs up to 4K@60fps in docked mode. So does buying a 1440p monitor make sense — or are you leaving resolution on the table?

    The honest answer is nuanced, and it depends on something most reviews don’t explain: how the Switch 2’s DLSS upscaling actually works on a 1440p panel. This guide breaks that down clearly, so you can make an informed decision before spending $200–$400 on a monitor.

    👉 Don’t have a Nintendo Switch 2 yet? Check it out on Amazon US right now!

    ⚠️ Affiliate Disclosure: TechPlayGrid is reader-supported. When you buy through links on our site, we may earn an affiliate commission at no extra cost to you.


    🎮 What the Nintendo Switch 2 Actually Outputs in Docked Mode

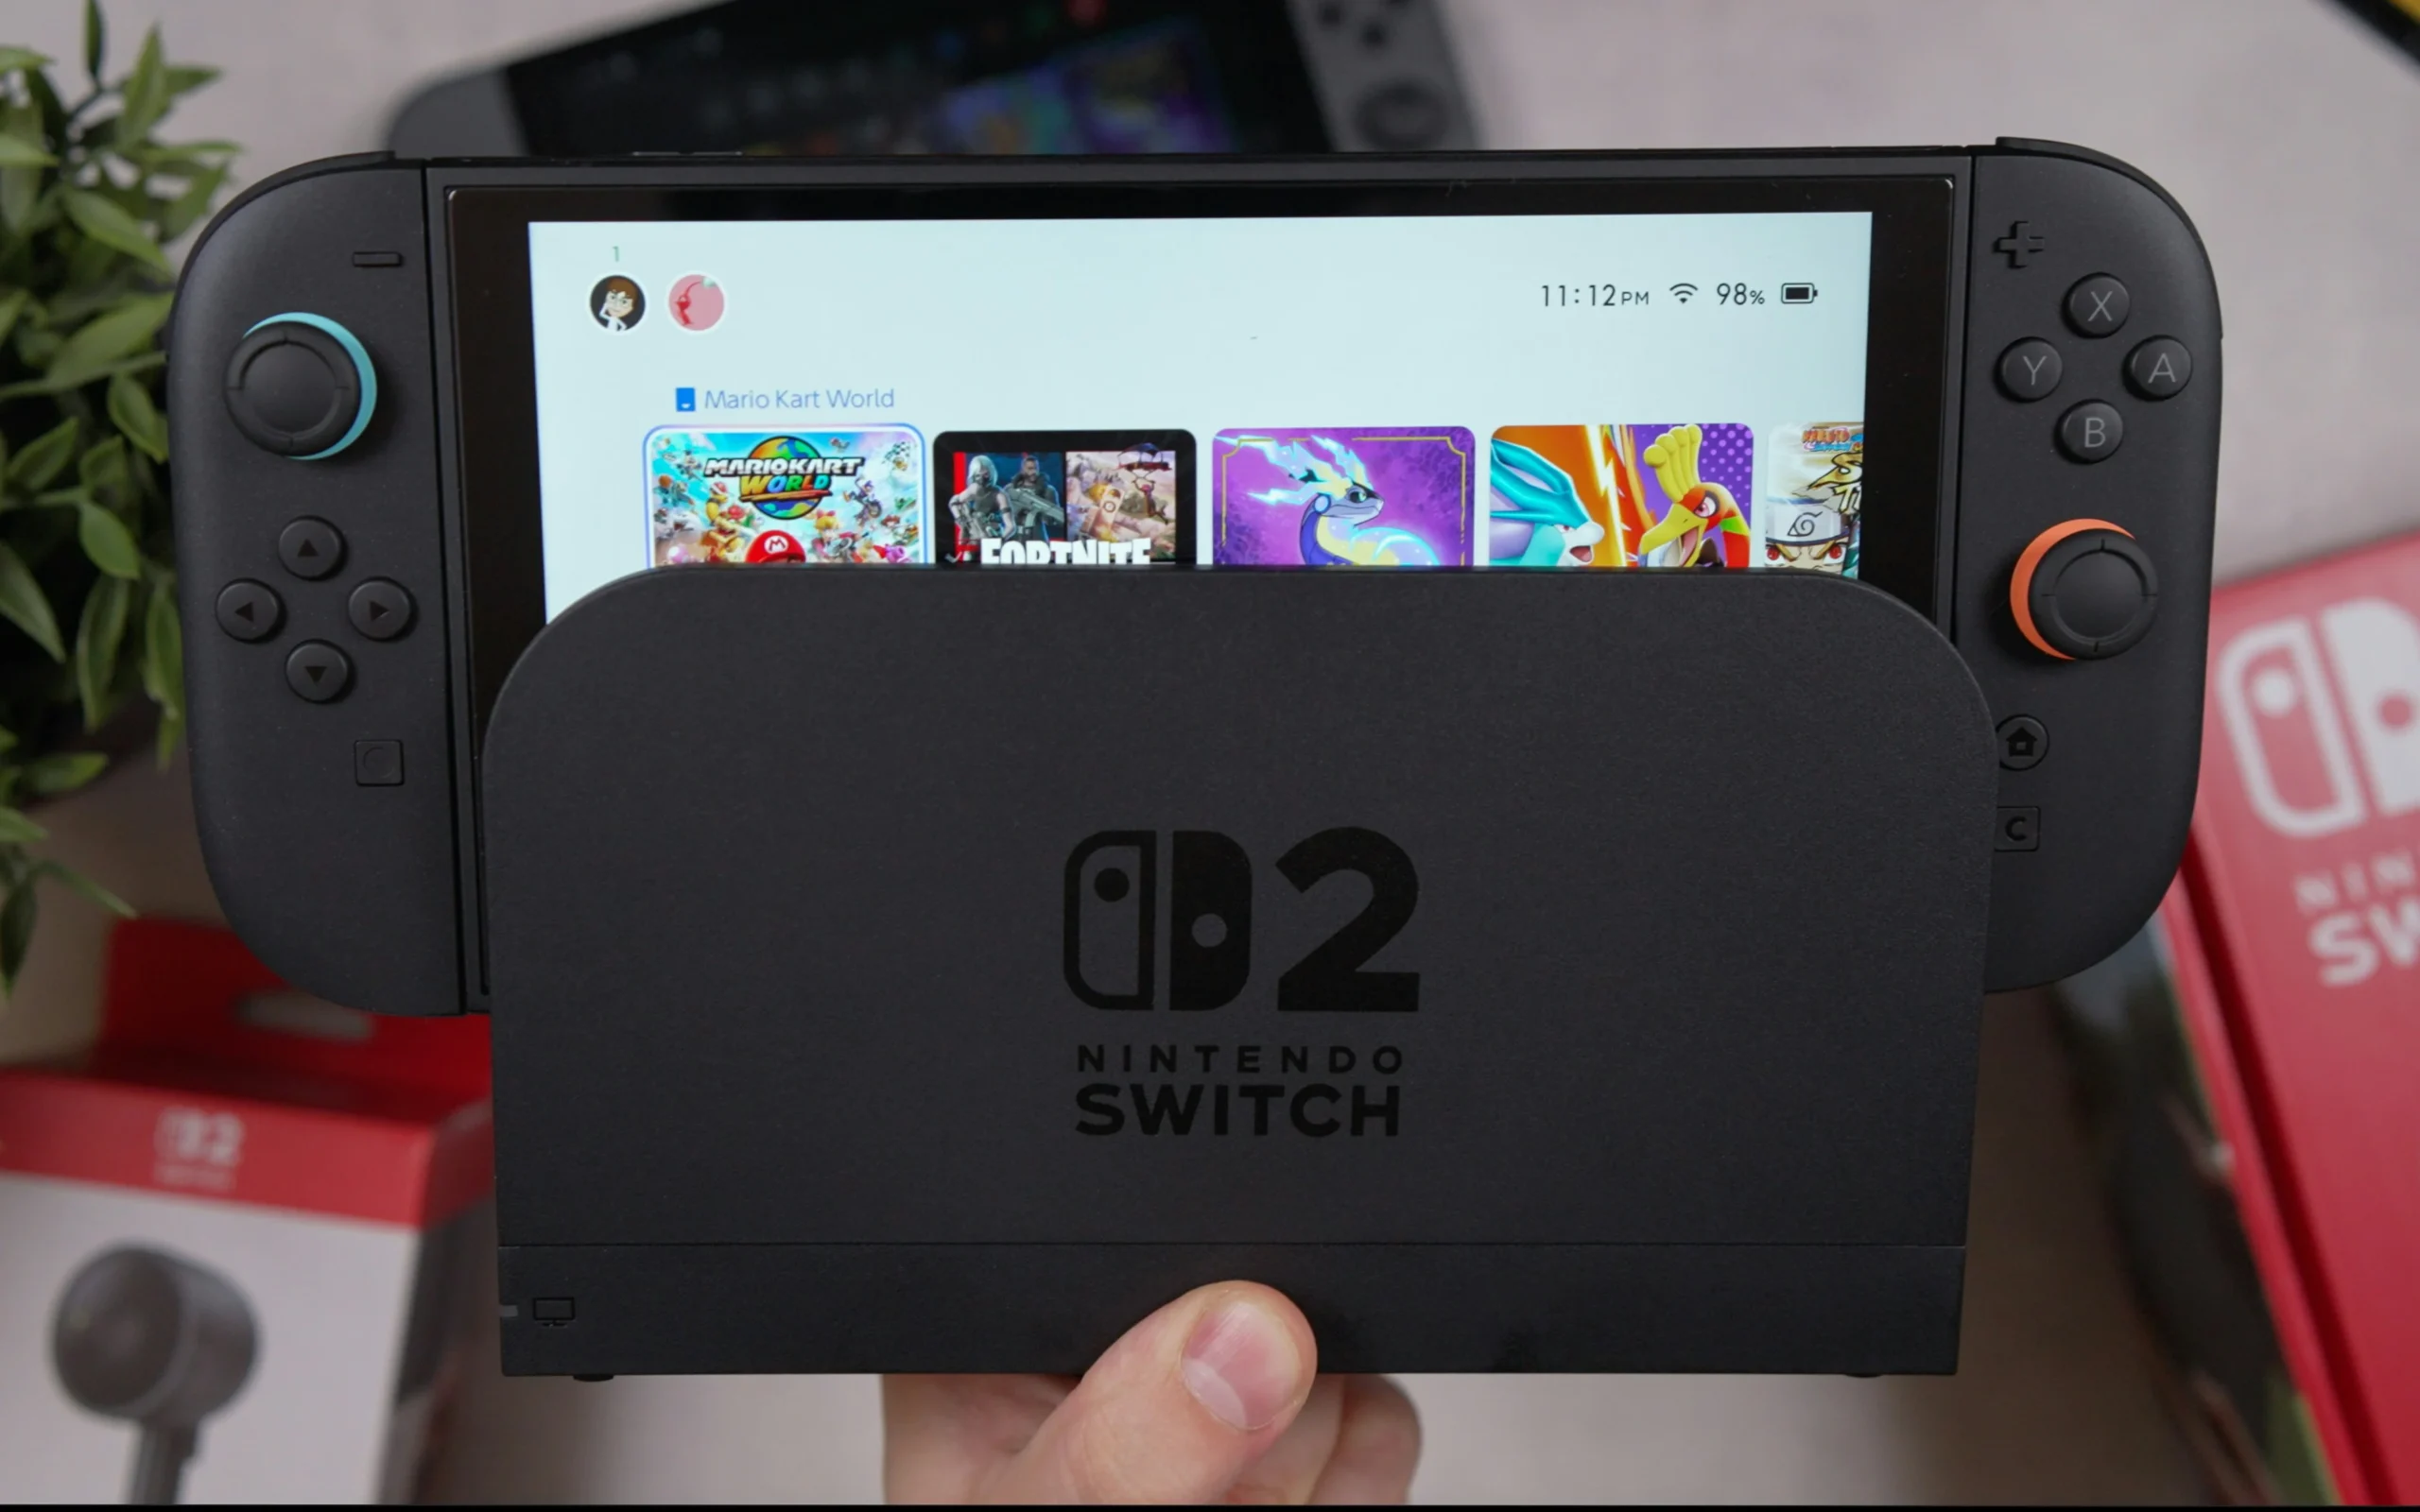
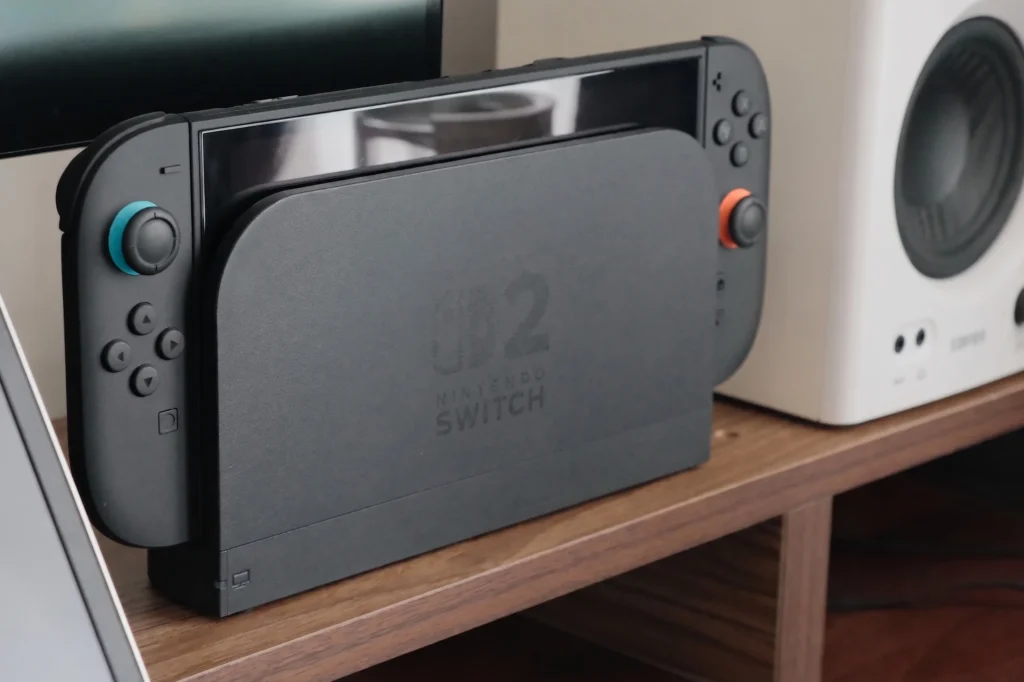
    switch 2 com dock
    For illustrative purposes only. Nintendo Switch 2

    Before comparing resolutions, you need to know exactly what signal the Switch 2 sends through the dock:

    In docked mode, Switch 2 can output up to 120fps at 1080p or 1440p over HDMI to a TV or monitor. Nintendo has also confirmed that Switch 2 supports 4K resolution at 60fps over HDMI 2.0. In handheld mode, it supports up to 1080p at 120fps on the built-in 7.9-inch LCD panel. Switch 2 also supports VRR for smoother gameplay and HDR10 for an expanded range of color and luminance.

    Output ModeResolutionFrame RateNotes
    Docked — Performance1080pUp to 120fpsNative or DLSS upscaled
    Docked — Quality1440pUp to 60fpsDLSS upscaled from 720p+
    Docked — 4K4K (2160p)Up to 60fpsDLSS Light upscaled
    Handheld1080pUp to 120fpsBuilt-in 7.9″ LCD

    💡 Important: Not all Switch 2 games support every mode. Each game’s developer chooses which output modes to implement. Some games run at 1080p@120fps only; others offer a Quality mode at 1440p or 4K@60fps. Check each game’s supported modes before optimizing for them.


    🧠 How Switch 2 Upscaling Actually Works — DLSS Light Explained

    This is the part that matters most for the 1440p question. The Switch 2 doesn’t render games natively at 4K — it uses NVIDIA DLSS to upscale from a lower resolution.

    Nintendo Switch 2 supports two DLSS versions: a PC-like CNN model upscaling to 1080p with high image quality, and a custom lightweight ‘DLSS Light’ for 1440p and 4K docked mode. The CNN model offers the best balance of performance and visual fidelity. Although static shots using DLSS Light look 1440p or 4K on the Switch 2, it’s a different story when there are objects in motion.

    Here’s how the rendering pipeline works per mode:

    Performance Mode (1080p@120fps)

    Performance mode renders at 1080p and upscales to 4K, freeing GPU budget for higher frame rates or more visual effects. On a 1440p monitor, this signal gets displayed natively at 1080p — no scaling needed, perfectly sharp.

    Quality Mode (1440p@60fps)

    Quality mode renders at 1440p and upscales to 4K, preserving more detail. On a 1440p monitor, this is displayed pixel-for-pixel — the ideal scenario. No upscaling, no downscaling. A 1440p monitor displays the Switch 2’s 1440p signal pixel for pixel, preserving the original sharpness without artificial upscaling. This direct match eliminates the scaling guesswork that degrades the image on 4K TVs.

    4K Mode (2160p@60fps)

    On a 1440p monitor, the Switch 2’s 4K output is downscaled to fit the 1440p panel. The monitor’s scaler handles this, and the result is typically sharper than native 1080p — but you lose the benefit of true 4K pixels.


    🖥️ The Core Question: Does 1440p Make Sense for Switch 2?

    Nintendo Switch com monitor e jogo ao fundo
    For illustrative purposes only. Nintendo Switch

    ✅ YES — 1440p Is the Sweet Spot If:

    You want the best image for Quality Mode games. When a Switch 2 game offers 1440p Quality Mode, a 1440p monitor receives and displays that signal perfectly — pixel-for-pixel accuracy, no scaling artifacts, no processing overhead. This direct match eliminates the scaling guesswork that degrades the image on 4K TVs.

    You play at a desk. At 27 inches viewed from 60–80cm, 1440p sits at ~109 PPI — right at the threshold where pixels become invisible to the naked eye. A 27-inch 1440p monitor viewed at 60–80cm offers a pixel density of 109 PPI, perfectly suited to human vision. This configuration allows for the perception of all details without eye strain.

    You care about competitive gaming. 1440p monitors at 144Hz–180Hz are significantly cheaper than 4K monitors at equivalent refresh rates. For games that run at 1080p@120fps, a fast 1440p monitor handles that perfectly while giving you a sharper display for everything else.

    You game on PC or other consoles too. A 1440p monitor is the most versatile purchase for a mixed gaming setup. It works excellently with PC, PS5 (which also natively supports 1440p), Xbox Series X, and the Switch 2.


    ⚠️ CONSIDER 4K Instead If:

    You primarily game on a large screen from the couch. At distances over 1.5 meters, 4K becomes more relevant — especially for cinematic games like Zelda or Metroid Prime 4 that support 4K Quality Mode.

    You have a 4K-compatible TV already. If you’re using the Switch 2 on a 4K OLED TV, the 4K DLSS output genuinely shines. The TV handles the downscale from DLSS output gracefully and the result is visually impressive.

    You want future-proof for games that get 4K patches. More Switch 2 games are receiving 4K mode updates, and that number will grow.


    ❌ AVOID 1080p Monitors For Switch 2 Docked:

    On a 1080p screen, the extra detail from 1440p and 4K output will be lost entirely. The Switch 2’s DLSS Quality Mode outputs 1440p — a 1080p monitor has to downscale that, which eliminates the resolution advantage entirely. For a console that natively supports 1440p and 4K output, a 1080p monitor is the wrong pairing.


    📐 1080p vs 1440p vs 4K on Switch 2 — The Full Comparison

    Monitor Resolution1080p Output1440p Output4K OutputVerdict
    1080p monitorNative ✅Downscaled ⚠️Heavily downscaled ❌Not recommended
    1440p monitorPillarboxed/upscaled ⚠️Native ✅Downscaled (looks good) ✅Best value
    4K monitorUpscaled 4x ⚠️Upscaled ⚠️Native ✅Best quality, higher cost

    🏆 Best 1440p Monitors for Nintendo Switch 2 Dock (Amazon US, July 2026)

    All picks verified on Amazon US. All support HDMI 2.0 (which is all the Switch 2 dock requires for 1440p@60fps).


    🥇 Best Overall — LG 27GP850-B Ultragear (27″ 1440p 165Hz Nano IPS)

    For illustrative purposes only. Model: LG 27GP850-B

    👉 LG 27GP850-B — Amazon US

    Why it’s #1 for Switch 2: The 27GP850-B is consistently the top recommended 1440p monitor for console gaming. Its Nano IPS panel delivers exceptional color accuracy — critical for Switch 2’s vibrant Nintendo titles — with 1ms response time and 165Hz for Performance Mode games at 120fps.

    SpecDetail
    PanelNano IPS
    Resolution2560×1440 (1440p)
    Refresh Rate165Hz
    Response Time1ms GtG
    HDRHDR400
    Ports2× HDMI 2.0, 1× DisplayPort 1.4
    VRRAMD FreeSync Premium, G-Sync Compatible
    Price Range~$250–$280

    Why it works perfectly with Switch 2:

    • 1440p native → Switch 2 Quality Mode displayed pixel-for-pixel
    • 165Hz → Switch 2 Performance Mode at 120fps displayed with headroom
    • HDR10 support → Switch 2’s HDR output properly displayed
    • Excellent color reproduction for Mario Kart World, Zelda, and Metroid

    Pros: Best-in-class IPS colors, industry-leading response time for the price, great stand with full adjustment Cons: HDMI 2.0 only (fine for Switch 2’s actual bandwidth needs), HDR400 is entry-level HDR


    🥈 Best Budget — ASUS TUF Gaming VG27AQ3A (27″ 1440p 180Hz Fast IPS)

    For illustrative purposes only. Model: ASUS VG7AQ3A

    👉 ASUS TUF VG27AQ3A — Amazon US

    Why it’s here: This 27-inch IPS panel with ELMB Sync technology makes moving objects appear sharper — perfect for Switch 2’s fast-paced titles. For gamers who prioritize a smooth, tear-free experience over maximum resolution, this monitor offers a high-end feel at a price that leaves plenty of room in your budget for the actual console and launch games.

    SpecDetail
    PanelFast IPS
    Resolution2560×1440 (1440p)
    Refresh Rate180Hz
    Response Time1ms (ELMB)
    HDRDisplayHDR 400, 130% sRGB
    Ports2× HDMI 2.0, 1× DisplayPort 1.4
    VRRFreeSync Premium, G-Sync Compatible
    Price Range~$200–$240

    Why it works perfectly with Switch 2: Native 1440p for Quality Mode games, 180Hz handles Performance Mode 120fps gaming with room to spare, built-in speakers (useful for Switch 2’s casual gaming sessions).

    Pros: More affordable than LG, 180Hz refresh, built-in speakers, excellent ELMB motion clarity Cons: Slightly less accurate color than Nano IPS, no USB-C


    🥉 Best Premium — AOC Q27G3XMN (27″ 1440p 180Hz Mini LED)

    For illustrative purposes only. Model: AOC Q27G3XMN

    👉 AOC Q27G3XMN — Amazon US

    Why it’s here: Mini LED backlighting dramatically improves HDR performance — making it the best choice for Switch 2 owners who want to experience HDR10 content properly. The AOC Q27G3XMN’s combination of Mini LED technology, high refresh rate, and excellent contrast makes it a standout choice in its price range.
    SpecDetail
    PanelMini LED VA
    Resolution2560×1440 (1440p)
    Refresh Rate180Hz
    Response Time1ms
    HDRMini LED HDR (significantly better than HDR400)
    Ports1× HDMI 2.0, 1× DisplayPort 1.4
    VRRAdaptive Sync
    Price Range~$260–$300

    Why it works perfectly with Switch 2: Native 1440p, best HDR performance of any 1440p monitor under $300, stunning contrast for atmospheric games like Metroid Prime 4.

    Pros: Best HDR in the 1440p category at this price, Mini LED contrast rivals OLED for dark scenes Cons: VA panel has narrower viewing angles than IPS, single HDMI port


    📊 Full Comparison Table

    MonitorResolutionHzPanelHDRHDMIPrice
    LG 27GP850-B1440p165HzNano IPSHDR4002× HDMI 2.0~$260
    ASUS TUF VG27AQ3A1440p180HzFast IPSHDR4002× HDMI 2.0~$220
    AOC Q27G3XMN1440p180HzMini LED VAMini LED HDR1× HDMI 2.0~$280

    🤔 The Verdict

    Is a 1440p monitor worth it for the Nintendo Switch 2 dock?

    Yes — 1440p is the best value monitor choice for Switch 2 docked gaming in 2026.

    Here’s why:

    • Switch 2 natively outputs 1440p in Quality Mode — a 1440p monitor handles this pixel-for-pixel, better than any other display
    • 1440p monitors with 144Hz–180Hz are significantly cheaper than 4K equivalents, leaving budget for games
    • The downscale from 4K DLSS output to 1440p still looks better than 1080p native
    • 1440p at 27″ looks sharp, even up close

    The only reason to choose 4K over 1440p is if you primarily game from couch distance on a large screen — in which case a 4K OLED TV is the better tool entirely.


    🔗 Related on TechPlayGrid


    ❓ FAQ

    Does the Nintendo Switch 2 need HDMI 2.1 for 1440p?

    No. Switch 2 supports 4K resolution at 60fps over HDMI 2.0. For 1440p gaming, HDMI 2.0 is more than sufficient — all three monitor picks on this list use HDMI 2.0 and are fully compatible.

    Does 1440p look better than 1080p on a Switch 2?

    Yes — significantly, especially at 27 inches. Switch 2’s Quality Mode outputs a native 1440p DLSS-upscaled signal, which a 1440p monitor displays pixel-for-pixel. A 1080p monitor would downscale that signal, losing sharpness.

    Will 4K games look bad on a 1440p monitor?

    No. A 1440p monitor displays the Switch 2’s signal pixel for pixel for 1440p content, and handles 4K-to-1440p downscaling cleanly. The result is sharper than native 1080p — you’re not losing much by not having a 4K panel for Switch 2 gaming.

    Does Switch 2’s DLSS upscaling actually work well?

    Static shots using DLSS Light look impressively sharp at 1440p or 4K, though motion clarity is a limitation compared to DLSS on PC. For most Nintendo titles — which tend to have deliberate art direction rather than ultra-fine detail — DLSS Light performs well enough that most players won’t notice the difference.

    Can I use the Switch 2 dock with a 1440p monitor via USB-C?

    The official Nintendo Switch 2 dock outputs via HDMI. For the cleanest results, use HDMI from dock to monitor and skip USB-C video for the console. Third-party USB-C docks exist but vary in quality — the official dock with a standard HDMI cable to your 1440p monitor is the recommended setup.


    Last updated: July 2026 | Switch 2 firmware version 24.x | Monitors verified on Amazon US

    ⚠️ Affiliate Disclosure: TechPlayGrid participates in the Amazon Associates Program and other affiliate programs. We earn a commission on qualifying purchases at no extra cost to you.


    🏷️ SEO Metadata

    Title : Is a New 1440p Monitor Best for Nintendo Switch 2 Dock?

    Meta Description : Is a 1440p monitor worth it for Nintendo Switch 2 docked gaming? We explain how DLSS upscaling works on non-4K screens — and which monitors to buy in 2026.

    Tags: 1440p monitor nintendo switch 2, switch 2 monitor docked, nintendo switch 2 1440p worth it, best monitor for switch 2 dock, switch 2 dlss 1440p, switch 2 docked resolution guide, nintendo switch 2 monitor 2026

    Post Summary: The Nintendo Switch 2 outputs up to 4K@60fps when docked using NVIDIA DLSS upscaling — but that doesn’t mean you need a 4K monitor. This guide explains exactly how the Switch 2’s DLSS Light technology handles 1440p and 4K signals, why a native 1440p monitor receives the Switch 2’s Quality Mode output pixel-for-pixel (better than any other panel size), and which 1440p monitors offer the best value for Switch 2 docked gaming in 2026. Three picks verified on Amazon US: LG 27GP850-B, ASUS TUF VG27AQ3A, and AOC Q27G3XMN.

  • Fix Discord Input Lag for No Lag While Screen Sharing

    Fix Discord Input Lag for No Lag While Screen Sharing


    You launch Discord screen share to watch a game with friends. Instantly: your keyboard feels sluggish, your audio cuts out mid-sentence, or your friends see a stuttering, frozen image of your screen while you’re playing fine on your end.

    This is Discord screen share input lag — and it’s a different beast from the regular Discord lag you might have fixed before. If you already followed our Discord lag fix for Valorant, you know the drill: free fixes first, hardware only if nothing else works. This guide follows the same structure but targets the specific causes that only appear when screen sharing is active.

    ⚠️ Affiliate Disclosure: TechPlayGrid is reader-supported. When you buy through links on our site, we may earn an affiliate commission at no extra cost to you.


    🔍 Why Screen Sharing Causes Its Own Input Lag

    Regular Discord voice chat is lightweight. Screen sharing is not. When you share your screen, Discord must encode or decode video, capture your screen, render an overlay, and use GPU acceleration in the background — all simultaneously. On a system already close to full load, that extra workload is enough to cause stutter, input delay, or sudden frame dips.

    The result is a problem with three distinct symptoms, each with different causes:

    SymptomWhat It Looks LikeRoot Cause
    Keyboard input lagKeys register late in-game while sharingCPU/GPU bottleneck from dual encoding
    Audio delay/cutoutVoice lags or cuts when sharing startsDiscord audio subsystem conflict
    Friends see frozen/choppy streamYour screen looks fine, theirs doesn’tEncoder settings or bandwidth issue

    💡 Pro Tip: The most important diagnostic step: does the lag start the moment you enable screen share, or does it appear gradually? If it’s immediate, it’s a settings conflict. If it builds over time, it’s a thermal or memory issue.


    ✅ Fix 1 — Toggle Hardware Acceleration (The #1 Cause)

    Time: 2 minutes | Difficulty: Easy | Impact: ⭐⭐⭐⭐⭐

    Hardware acceleration shifts demanding tasks like encoding for video calls and high-resolution image scaling to your GPU. When your GPU is already hitting maximum utilization during gaming, Discord may struggle to find the cycles it needs to render its own interface — causing input lag, audio drops, and choppy streams.

    The confusing part: for some systems, turning it off fixes the problem. For others, turning it on fixes it. You have to test both.

    If Hardware Acceleration is currently ON → Turn it OFF:

    1. Open Discord → Settings (gear icon) → Advanced
    2. Toggle Hardware Acceleration → OFF
    3. Click “Okay” when Discord asks to restart
    4. Relaunch Discord and test screen share

    If it’s currently OFF → Turn it ON and test.

    💡 Pro Tip: This single setting causes more confusion than any other in Discord because the best choice depends entirely on your specific hardware and what you’re doing. There’s no universal answer — test both and keep whichever works.


    ✅ Fix 2 — Disable Hardware-Accelerated GPU Scheduling (HAGS) in Windows

    Time: 3 minutes | Difficulty: Easy | Impact: ⭐⭐⭐⭐⭐

    This is the fix most guides miss — and it’s been the most impactful for screen share input lag since 2024. Microsoft has acknowledged that Windows 11 version 24H2 introduced compatibility issues with Hardware-Accelerated GPU Scheduling (HAGS), causing conflicts with streaming applications like Discord. Additionally, some users may experience NVENC encoder failures after updates, which directly impacts screen sharing capabilities.

    How to disable HAGS:

    1. Press Windows + ISystem → Display
    2. Scroll down to Graphics → Click Change default graphics settings
    3. Toggle Hardware-accelerated GPU scheduling → OFF
    4. Restart your PC completely

    Test screen sharing again after the reboot. This fix resolves keyboard input lag during screen share for a significant portion of affected users.


    ✅ Fix 3 — Switch the Screen Share Encoder (H.264 vs. H.265 vs. Software)

    Time: 3 minutes | Difficulty: Easy | Impact: ⭐⭐⭐⭐

    Disabling hardware-accelerated encoding can prevent overlay lag that frequently disrupts gameplay. To implement a permanent screen share lag fix, navigate to Voice & Video settings and adjust the H.264 Video Codec options.

    Steps:

    1. Discord → Settings → Voice & Video
    2. Scroll to Video Codec
    3. Try toggling H.264 Hardware Acceleration — if ON, turn OFF (or vice versa)
    4. Also try switching between H.264 and H.265 if available

    Why this matters specifically for screen share:

    When screen sharing a game, Discord uses your GPU’s video encoder (NVENC for NVIDIA, AMF for AMD). If the driver has bugs, poor support for a newer game, or issues with hardware video encoding, you may see stuttering, sudden frame drops, black screens, or desync between audio and video. Switching to software encoding removes the GPU from the equation — more CPU usage, but more stability.


    ✅ Fix 4 — Lower Screen Share Resolution and Frame Rate

    Time: 2 minutes | Difficulty: Easy | Impact: ⭐⭐⭐⭐

    Lowering your broadcast to 720p at 30 FPS reduces the demand on your video encoder, providing a smoother experience for both you and your viewers.

    Streaming your screen at 1080p 60fps to friends requires significant encoding overhead. Unless you have a dedicated streaming PC, this competes directly with your game for CPU and GPU resources.

    How to set resolution before sharing:

    1. Click the Screen Share button in Discord (monitor icon)
    2. Before confirming, click Stream Quality settings
    3. Set Resolution → 720p
    4. Set Frame Rate → 30 FPS (or 15 FPS for very low-end systems)

    💡 Pro Tip: For watching together with friends, 720p 30fps is completely watchable. The difference between 1080p 60fps and 720p 30fps is only noticeable in fast-moving action — and the input lag elimination is immediately perceptible.


    ✅ Fix 5 — Disable the Discord In-Game Overlay

    Time: 2 minutes | Difficulty: Easy | Impact: ⭐⭐⭐⭐

    The overlay draws a transparent layer over your game, hooks into the game’s rendering pipeline, and can cause input lag. Multiple overlays running simultaneously multiply the GPU and CPU overhead — Discord’s overlay conflicting with other overlays is a common hidden cause of input delay.

    Disable Discord overlay completely:

    1. Discord → Settings → Game Overlay
    2. Toggle Enable in-game overlay → OFF
    3. Also disable it per-game: under Games tab → find your game → toggle overlay off

    Also disable competing overlays:

    • GeForce Experience: Settings → General → Toggle “In-Game Overlay” → OFF
    • Xbox Game Bar: Windows Settings → Gaming → Xbox Game Bar → OFF
    • Steam Overlay: Steam → Settings → In-Game → Uncheck “Enable Steam Overlay”

    Running three overlays simultaneously creates triple the rendering overhead. Disabling them all removes that entirely.


    ✅ Fix 6 — Change the Audio Subsystem to Legacy

    Time: 1 minute | Difficulty: Easy | Impact: ⭐⭐⭐⭐

    Audio dropping or stuttering specifically when screen share starts is caused by Discord’s audio subsystem conflicting with the capture pipeline.

    1. Discord → Settings → Voice & Video
    2. Scroll to Audio Subsystem
    3. Change from Standard to Legacy
    4. Restart Discord

    This routes Discord’s audio processing through an older but more stable pipeline — particularly effective for audio delay when screen sharing starts.

    Watch here how to do: https://www.youtube.com/watch?v=IWgyS9DsehI


    ✅ Fix 7 — Run Discord as Administrator

    Time: 1 minute | Difficulty: Easy | Impact: ⭐⭐⭐

    Games running fullscreen can block Discord from capturing them properly. Running Discord as administrator gives it the permissions needed to capture fullscreen applications correctly. Without admin rights, Discord’s capture can fail silently — causing black screens, extra encoding attempts, and associated lag.

    1. Close Discord completely (right-click taskbar icon → Quit Discord)
    2. Find the Discord shortcut (Desktop or Start Menu)
    3. Right-click → Properties → Compatibility tab
    4. Check Run this program as an administrator
    5. Click Apply → OK → Relaunch Discord

    ✅ Fix 8 — Clear Discord Cache

    Time: 3 minutes | Difficulty: Easy | Impact: ⭐⭐⭐

    Corrupted cache files can cause erratic performance during screen share, especially after Discord updates.

    1. Close Discord completely
    2. Press Windows + R → type %appdata%\discord
    3. Delete the Cache and Code Cache folders
    4. Relaunch Discord

    ✅ Fix 9 — Update GPU Drivers (Clean Install)

    Time: 10 minutes | Difficulty: Medium | Impact: ⭐⭐⭐⭐

    Disabling Xbox Game Bar and background recording removes a layer of GPU capture overhead that compounds with Discord’s own screen share or overlay features. When sharing your screen, Discord may rely on your GPU to capture, encode, and render video. If the driver has bugs or has issues with hardware video encoding, you may see stuttering, sudden frame drops, black screens, or desync between audio and video.

    For NVIDIA:

    1. Download latest Game Ready Driver from nvidia.com
    2. Run installer → Custom → Check Perform a clean installation

    For AMD:

    1. Download AMD Adrenalin Edition from amd.com
    2. Run installer → Select Factory Reset option

    📊 Fix Priority Cheat Sheet

    FixSymptom It SolvesTimeImpact
    Toggle Hardware AccelerationAll three symptoms2 min⭐⭐⭐⭐⭐
    Disable HAGS in WindowsKeyboard lag, encoder failures3 min⭐⭐⭐⭐⭐
    Switch encoder (H.264 toggle)Choppy stream, desync3 min⭐⭐⭐⭐
    Lower resolution to 720p 30fpsAll three symptoms2 min⭐⭐⭐⭐
    Disable all overlaysKeyboard lag, FPS drops2 min⭐⭐⭐⭐
    Audio subsystem → LegacyAudio lag/cutout only1 min⭐⭐⭐⭐
    Run Discord as AdministratorBlack screen, capture lag1 min⭐⭐⭐
    Clear Discord cacheErratic behavior after updates3 min⭐⭐⭐
    Clean GPU driver installAll three symptoms10 min⭐⭐⭐⭐

    💻 Still Lagging? Hardware Upgrades That Actually Help

    If you’ve applied all fixes above and screen sharing still causes input lag, your hardware is the ceiling.

    Option A — Add More RAM

    Screen share + game + Discord’s Electron framework together can push 16GB RAM to its limit. If Task Manager shows RAM usage above 85% during screen sharing, an upgrade will help.

    👉 Corsair Vengeance 16GB DDR4 3200MHz — Amazon US 👉 Kingston Fury Beast 32GB DDR4 3200MHz — Amazon US

    Option B — Switch to Wired Ethernet

    If your friends see lag but you don’t, the issue is your upload bandwidth stability. <cite index=”38-1″>RTC Connecting issues and stream lag for viewers are often caused by Wi-Fi instability rather than hardware — a wired connection eliminates packet loss entirely.</cite>

    👉 Cat 8 Ethernet Cable 25ft — Amazon US

    Option C — Upgrade Your Headset (for Audio Lag Specifically)

    If audio-only lag persists after all fixes, a USB headset with its own onboard DAC bypasses Windows audio routing entirely — eliminating software-layer audio delay.

    👉 HyperX Cloud III Wireless — Amazon US 👉 SteelSeries Arctis Nova 3 — Amazon US


    🔗 Related on TechPlayGrid


    ❓ FAQ

    Does screen sharing on Discord affect my FPS?

    Yes — directly. <cite index=”26-1″>Discord streaming adds extra CPU, GPU, memory, and disk activity on top of the game you are sharing. If your system is already close to full load, the stream can push it over the edge and cause FPS drops, stuttering, delayed audio, or input lag.</cite> Fix 1 (Hardware Acceleration) and Fix 5 (overlay) have the most impact on FPS specifically.

    Why does my keyboard lag only during screen share, not during normal gaming?

    The screen capture and encoding pipeline runs on the same CPU threads that handle input polling. <cite index=”36-1″>The overlay is the most common cause of input delay when gaming with Discord — it draws a transparent layer over your game and hooks into the game’s rendering pipeline.</cite> Disabling the overlay (Fix 5) and HAGS (Fix 2) typically resolves keyboard-specific lag.

    Why do my friends see lag but I don’t feel any?

    This is an upload/encoding issue, not a local performance issue. Your PC is encoding the stream correctly from your perspective but struggling to maintain consistent upload bitrate for your friends. Fix 3 (lower stream resolution) and Fix 9 (GPU driver) address this specifically.

    Is Discord Nitro required for higher-quality screen sharing?

    Yes — Discord Nitro unlocks 1080p 60fps screen share. Free accounts are limited to 720p 30fps. However, for gaming watch parties, 720p 30fps is typically sufficient, and the lower quality actually reduces the encoding load that causes input lag.

    Should I use Discord’s screen share or stream through OBS instead?

    For serious streaming, OBS with the “Share to Discord” integration is significantly more efficient — OBS uses hardware encoding properly, unlike Discord’s capture pipeline. For casual friend groups, fixing Discord settings is simpler and adequate.


    Last updated: July 2026 | Verified for Discord Stable + PTB versions

    ⚠️ Affiliate Disclosure: TechPlayGrid participates in the Amazon Associates Program and other affiliate programs. We earn a commission on qualifying purchases at no extra cost to you.


    🏷️ SEO Metadata

    Title: Fix Discord Input Lag for No Lag While Screen Sharing

    Meta Description: Discord causing keyboard lag or audio delay when screen sharing? These 9 free fixes target the specific causes — no upgrade needed. Step-by-step guide for 2026.

    Tags: discord input lag screen sharing, discord screen share lag fix, discord keyboard lag fix, discord audio delay screen share, discord screen share fix 2026, discord lag while streaming, fix discord overlay lag

    Post Summary: Discord screen share input lag is a distinct problem from regular Discord lag — and it needs its own fixes. This guide covers 9 free solutions in order of impact: toggling Hardware Acceleration, disabling Windows HAGS (the most overlooked fix for 2024–2026), switching the H.264 encoder, lowering stream resolution to 720p, disabling all overlays, switching the audio subsystem to Legacy, running Discord as administrator, clearing cache, and doing a clean GPU driver install. Hardware upgrade options are included for cases where software fixes aren’t enough.

  • Best Valorant Settings for Low-End PC — New FPS Boost Guide

    Best Valorant Settings for Low-End PC — New FPS Boost Guide


    Valorant was built to run on almost anything. Riot’s stated goal was 30 FPS on a machine from 2014 using integrated graphics — and they hit it. But “running” and “competitive” are two completely different things.

    If you’re dropping below 60 FPS on a laptop or older desktop, you’re losing spray control, increasing input lag, and giving up reaction advantage to every opponent on a modern rig. The good news: you don’t need expensive upgrades. These proven tweaks helped players jump from a painful 40 FPS to a buttery-smooth 120 FPS in Valorant in 2026. No gimmicks. Just smart settings that actually work.

    This guide creates a cluster with our Discord lag fix for Valorant — if you followed that guide already, start here for the graphics side of optimization.

    ⚠️ Affiliate Disclosure: TechPlayGrid is reader-supported. When you buy through links on our site, we may earn an affiliate commission at no extra cost to you.


    🔍 What “Low-End PC” Means for This Guide

    This guide is written for:

    Hardware ProfileDescription
    Integrated graphicsIntel HD/UHD, AMD Vega (no dedicated GPU)
    Entry GPUGTX 1050, GTX 1050 Ti, GTX 1060, RX 570, RX 580
    Mid-range aging GPUGTX 1660, RTX 2060 (struggling to hit 144 FPS)
    Low RAM8GB or less
    HDD storageTraditional hard drive (not SSD)

    If you have an RTX 3060 or RX 6600 and newer, follow our Fortnite FPS optimization guide — different game, same Windows tweaks apply.


    🎮 Step 1 — In-Game Video Settings (Biggest Impact, Free)

    Open Valorant → Settings → Video → General

    Resolution — The Single Largest FPS Gain

    Resolution is the priority: reducing pixel count first gives the single biggest gain on integrated graphics. 1280×720 alone takes most integrated setups from under 30 FPS to 45–60 FPS.

    Your SituationRecommended Resolution
    Dedicated GPU, struggling to hit 60 FPS1280 × 720 (16:9)
    Integrated graphics1280 × 720 or 1024 × 768 (4:3)
    Already hitting 60+ FPS, want moreStay at 1920 × 1080, optimize other settings

    Display Mode: Always Fullscreen Windowed and Borderless Window modes use more CPU for compositing. Fullscreen gives Valorant direct GPU access.

    Limit FPS — Set Per-State Caps:

    StateRecommended CapWhy
    In menus60 FPSSaves GPU heat for matches
    Background30 FPSFrees resources when tabbed out
    In matchUncapped or match your HzLet the GPU do its job
    AlwaysLeave uncappedConsistent pressure = consistent frames

    Full Graphics Settings Table

    Go to Settings → Video → Graphics Quality and apply these:

    SettingRecommended ValueFPS Impact
    Multithreaded RenderingON (if 4+ CPU cores)⭐⭐⭐⭐⭐ — Critical
    Material QualityLow⭐⭐⭐
    Texture QualityLow⭐⭐
    Detail QualityLow⭐⭐
    UI QualityLow
    VignetteOff
    V-SyncOFF⭐⭐⭐⭐ — Always off
    Anti-AliasingNone⭐⭐⭐
    Anisotropic Filtering1x⭐⭐
    Improve ClarityOff
    BloomOff⭐⭐
    DistortionOff⭐⭐
    Cast ShadowsOff⭐⭐⭐⭐

    💡 Pro Tip: Turning off Cast Shadows is a massive win. Shadows are among the most GPU-intensive effects in Valorant, and disabling them can boost your FPS by 15–25 frames depending on your system. And turning off Bloom and Distortion? These are purely cosmetic effects. They don’t help you spot enemies, they don’t improve gameplay, and they consume GPU resources. Turn them off without hesitation.


    🖥️ Step 2 — NVIDIA and AMD Specific Settings (Free)

    For NVIDIA GPU Users

    Open NVIDIA Control Panel → Manage 3D Settings → Program Settings → Add Valorant

    SettingValue
    Power Management ModePrefer Maximum Performance
    Low Latency ModeUltra
    Texture Filtering – QualityHigh Performance
    Threaded OptimizationOn
    Vertical SyncOff
    NVIDIA Reflex (in-game)On + Boost

    💡 Pro Tip: If you have an Nvidia card (GTX 900 series or newer), set NVIDIA Reflex to On + Boost. It keeps your GPU clock speeds high even when the game isn’t demanding much load, which significantly lowers input latency.

    For AMD GPU Users

    Open AMD Adrenalin → Gaming → Valorant (or Global Settings)

    SettingValue
    Radeon Anti-LagEnabled
    Radeon Image SharpeningOff (performance mode)
    Wait for Vertical RefreshOff
    Texture Filtering QualityPerformance

    ⚙️ Step 3 — Windows Tweaks (Free, 10 Minutes)

    Set Power Plan to High Performance

    1. Press Windows + R → type powercfg.cpl → Enter
    2. Select High Performance (or Ultimate Performance if available)
    3. If not visible, click “Show additional plans”

    ⚠️ Note: If you’re on a laptop, use High Performance only when plugged in. On battery, it drains charge very fast.

    Disable Windows Game Mode (Counterintuitive But Effective)

    As covered in our Fortnite FPS guide, Windows Game Mode can actually cause stutters by aggressively reallocating resources mid-game.

    1. Settings → Gaming → Game Mode → Off
    2. Also go to Gaming → Xbox Game Bar → Off

    Set Valorant to High Priority

    1. Launch Valorant and get into a match
    2. Press Ctrl + Shift + Esc → Task Manager → Details tab
    3. Right-click VALORANT-Win64-Shipping.exe → Set Priority → High

    Enable Hardware-Accelerated GPU Scheduling (Windows 11)

    1. Settings → System → Display → Graphics
    2. Change default graphics settings
    3. Toggle Hardware-accelerated GPU scheduling → On
    4. Restart PC

    🔧 Step 4 — Update Your GPU Drivers

    Outdated drivers are silent FPS killers. Both NVIDIA and AMD release regular driver updates that include game-specific optimizations for titles like Valorant. NVIDIA users: Download the latest Game Ready drivers from NVIDIA’s official driver page. Use the “Clean Installation” option to remove old driver remnants.
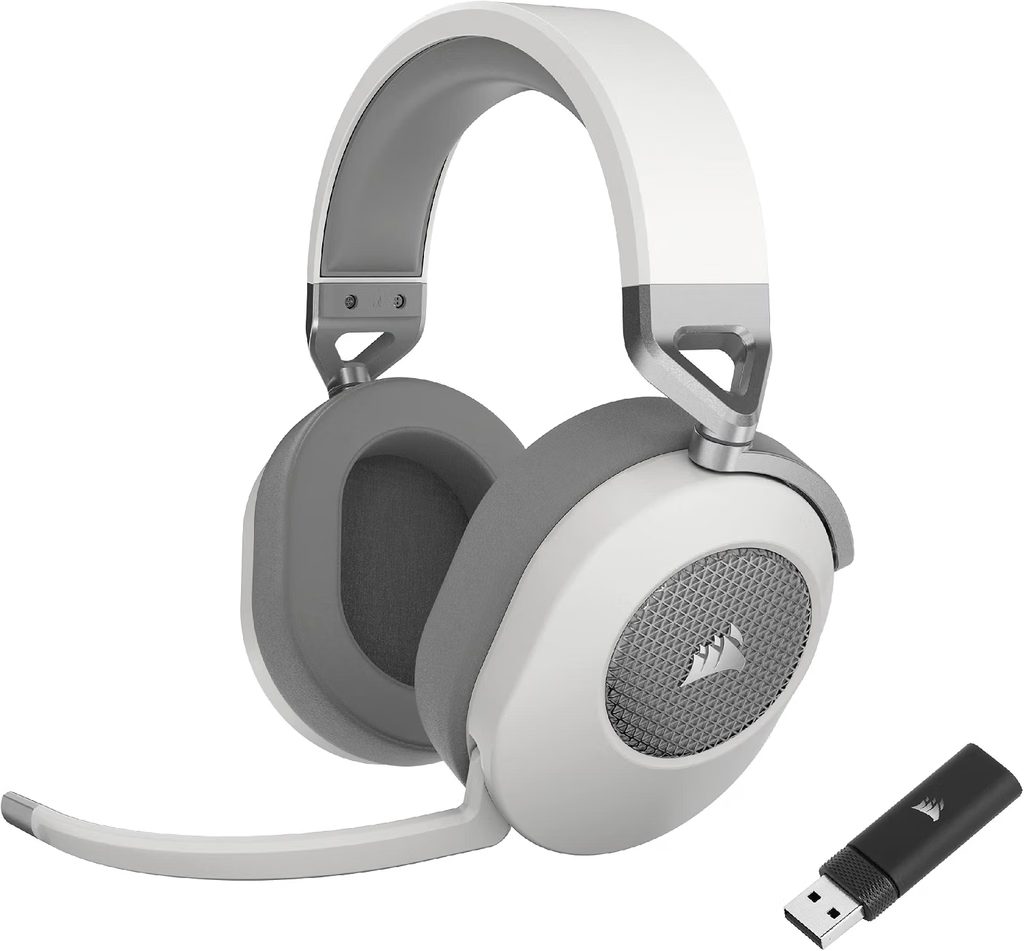
    For AMD: Download the latest Adrenalin Edition from amd.com/en/support.


    📊 Combined Settings Quick Reference

    CategoryKey ActionFPS Gain
    ResolutionDrop to 1280×720+30–60% on integrated/entry GPU
    Multithreaded RenderingON+15–25% on multi-core CPUs
    V-SyncOFFEliminates input lag cap
    Cast ShadowsOFF+15–25 FPS
    NVIDIA ReflexOn + BoostReduces input latency
    Power PlanHigh Performance+5–15% consistency
    GPU driversUpdate + clean install+5–20% depending on update
    Windows Game ModeOFFEliminates stutters

    💻 Still Under 60 FPS? These Upgrades Actually Help

    jogo valorant china sagefire
    For illustrative purposes only.  Valorant

    If you’ve applied every setting above and still can’t reach playable competitive FPS, your hardware is the ceiling.

    Upgrade 1 — Add More RAM (Most Impactful Under $50)

    FPS and Ping are different. FPS is your computer’s speed. If you have high ping, use an Ethernet cable instead of Wi-Fi and close bandwidth-heavy apps. If you’re below 8GB RAM, upgrading is the single most impactful hardware change under $50.

    👉 Corsair Vengeance 16GB DDR4 3200MHz — Amazon US 👉 Crucial 16GB DDR4 3200MHz — Amazon US

    Upgrade 2 — SSD Instead of HDD

    Valorant on an HDD has noticeably longer load times and map streaming hitches. A budget SATA SSD eliminates this entirely.

    👉 WD Green 480GB SATA SSD — Amazon US 👉 Kingston A400 480GB SSD — Amazon US

    Upgrade 3 — Ethernet Cable Instead of Wi-Fi

    Wi-Fi latency spikes are the #1 cause of high ping in Valorant. A direct Ethernet connection eliminates this.

    👉 Cat 8 Ethernet Cable 25ft — Amazon US

    Upgrade 4 — 144Hz Monitor

    If you’re pushing 100+ FPS but gaming on a 60Hz display, you’re not seeing any of those extra frames.

    👉 Best 144Hz Monitor Under $300 — TechPlayGrid


    🔗 Related on TechPlayGrid


    ❓ FAQ

    What is the minimum spec to play Valorant competitively in 2026? Valorant was built from the ground up to run on hardware your parents might have thrown out. Riot’s stated design goal was 30 FPS on a machine from 2014 using integrated graphics. For competitive play, however, you need a stable 60+ FPS — ideally 144+. An Intel Core i5 with 16GB RAM and a GTX 1060 or equivalent can hit 144 FPS with the settings in this guide.

    Does Multithreaded Rendering really make that much difference? Yes — especially on older quad-core CPUs. Multithreaded Rendering: Turn this ON if you have 4+ cores. It’s crucial. It distributes rendering work across all cores instead of hammering a single one.
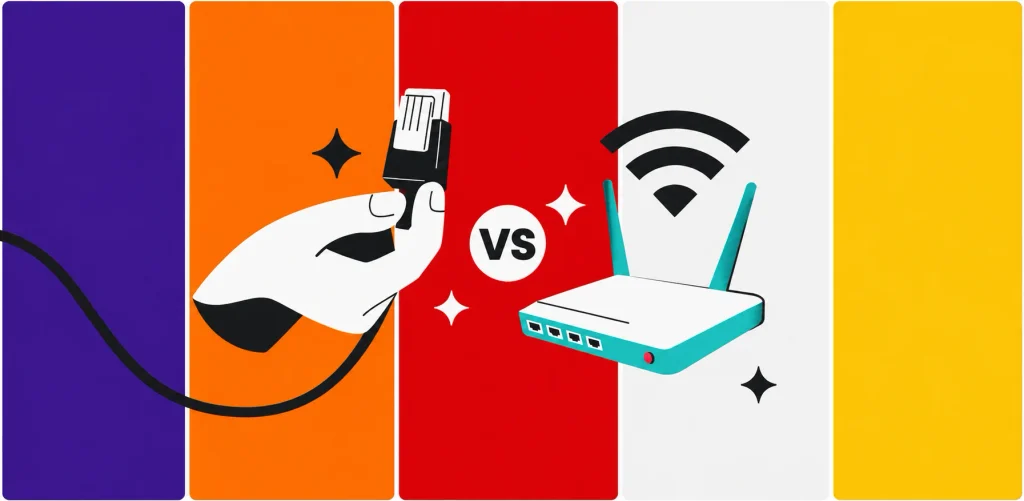
    Will lowering resolution make enemies harder to see? At 720p on a small monitor (24″ or less), enemies are still clearly visible — Valorant’s character design uses high-contrast colors specifically to remain legible at low resolutions. The trade-off in frame rate is almost always worth it for competitive play.

    Is it worth playing Valorant on integrated graphics? Yes, with the settings in this guide. 1280×720 alone takes most integrated setups from under 30 FPS to 45–60 FPS. On Intel UHD 630 or AMD Vega 8, you can realistically hit 60 FPS and play competitively with tweaks.

    Does turning off V-Sync cause screen tearing? Yes, it can cause visible horizontal tearing. If this bothers you, use an FPS cap via the in-game limiter instead (set to your monitor’s refresh rate minus 3 FPS). V-Sync causes massive input lag and caps your frames below your monitor’s potential. The trade-off is almost never worth it in a competitive shooter.


    Last updated: July 2026 | Verified for Valorant Episode 10 / 2026 Act

    ⚠️ Affiliate Disclosure: TechPlayGrid participates in the Amazon Associates Program and other affiliate programs. We earn a commission on qualifying purchases at no extra cost to you.


    🏷️ SEO Metadata

    Title: Best Valorant Settings for Low-End PC — New FPS Boost Guide

    Meta Description : Struggling under 60 FPS in Valorant? These new in-game settings, Windows tweaks, and GPU configs can double your frames on any low-end PC. Free guide for 2026.

    Tags: best valorant settings low end pc 2026, valorant fps boost low end, valorant settings for weak pc, how to get more fps valorant, valorant 60fps low end, valorant settings guide 2026, valorant performance boost no upgrade

    Post Summary: Valorant is designed to run on old hardware — but “running” and “competitive” are two very different things. This guide covers every free setting that matters in 2026: switching to the optimal resolution, enabling Multithreaded Rendering, disabling Cast Shadows and V-Sync, configuring NVIDIA Reflex or AMD Anti-Lag, and applying key Windows tweaks like Power Plan and disabling Game Mode. Hardware upgrade options (RAM, SSD, Ethernet) are included at the end for players who’ve hit their software ceiling.